Hey there friend! Welcome to Groove, your simple yet powerful helpdesk.
If you think Quickstart guides should also be simple yet powerful, we agree. Accordingly, this guide will teach agents everything needed to get rockin’ in minutes, not hours. (we have
Each section has short videos accompanied by written instructions with pictures.
Ready? Let’s go.
STEP 1: FILL OUT PROFILE (30sec video)
First, up top, click Settings → Personal tab, and click through each section to fill out any relevant info and as well as set your notification preferences. If you’re an experienced helpdesker you can click Workflows to change the way Groove works for you. Newbies can take note of the options and use the software for a few weeks before changing any defaults (which you may never change).
STEP 2: GET YOUR GROOVE ON
Next up click Conversations in the top navigation and get familiar with your shared inbox, aka the magic zone.
(click here for a quick video overview)
The main Navigation Bar is on top. You can choose from Conversations, Reports, Knowledge Base, Apps, and Settings.

On the left are your Inboxes and Smart Folders (sometimes called views). We start you with 10 default Smart Folders which you can customize as needed or add/remove if necessary.
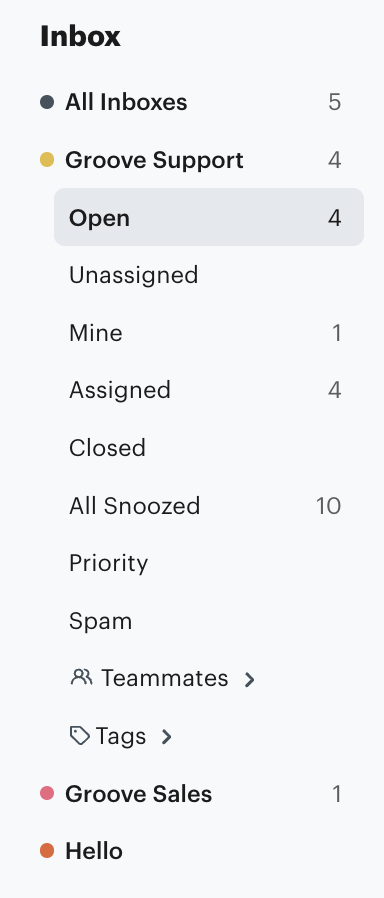
In the middle is your main inbox view which shows all your conversations. Choose what conversations you see by clicking between folders or inboxes. Our collision detection system lets you know when someone else is viewing or working a conversation.

Next click into a conversation and you’ll see your main Action Bar up top.

Here’s a brief explanation of each button:
CLOSE - This marks the conversation as “resolved” and removes it from the inbox view unless it’s reopened. Do not use this for trashing irrelevant convo's or spam as it will skew the reporting data.
STAR - Shows a star in the main inbox so you can keep an eye on it.
TAG - Tags are identifiers that let you track the volume of certain conversations and easily find conversations in the search bar. E-commerce stores might have a tag for every product/service they offer. SaaS companies create Tags for every component of their software (Groove has tags for Inbox, Knowledge Base, Live Chat, Integrations, API, etc). All companies use tags for different customer complaints, returns/refunds, locations (if brink-and-motor), and more. Think of all the different conversations you have and create tags for them. This allows you to learn what’s important to your customers. **More on this below under Automations**
SNOOZE - Temporarily closes a conversation until the day/time you choose in which it pops back into your inbox. Great for lower priority conversations or being used to follow up with customers.
MERGE - If a customer emails twice about the same thing you can merge the conversations into one.
MARK AS SPAM - Adds the email to a blacklist you can manage under settings.
TRASH - Closes and removes from the inbox.
CHANGE INBOX - If you have multiple inboxes, and someone emails the wrong one (maybe sales@yourcompany.com when they should have sent to support@yourcompany.com), you can easily move it to the appropriate one.
FOLLOW - Gives you email notifications when anything happens with the conversation. Great for making sure a conversation or customer is handled properly, keeping an eye on VIPs, service recovery issues, or monitoring the results of a marketing campaign or product launch.
ASSIGN - If people have specialties, or you want to make sure the right person takes ownership of a conversation, this feature is perfect.
Under the Action Bar you’ll see a string of all messages in the thread along with all actions that occurred, letting you know who did what, when.
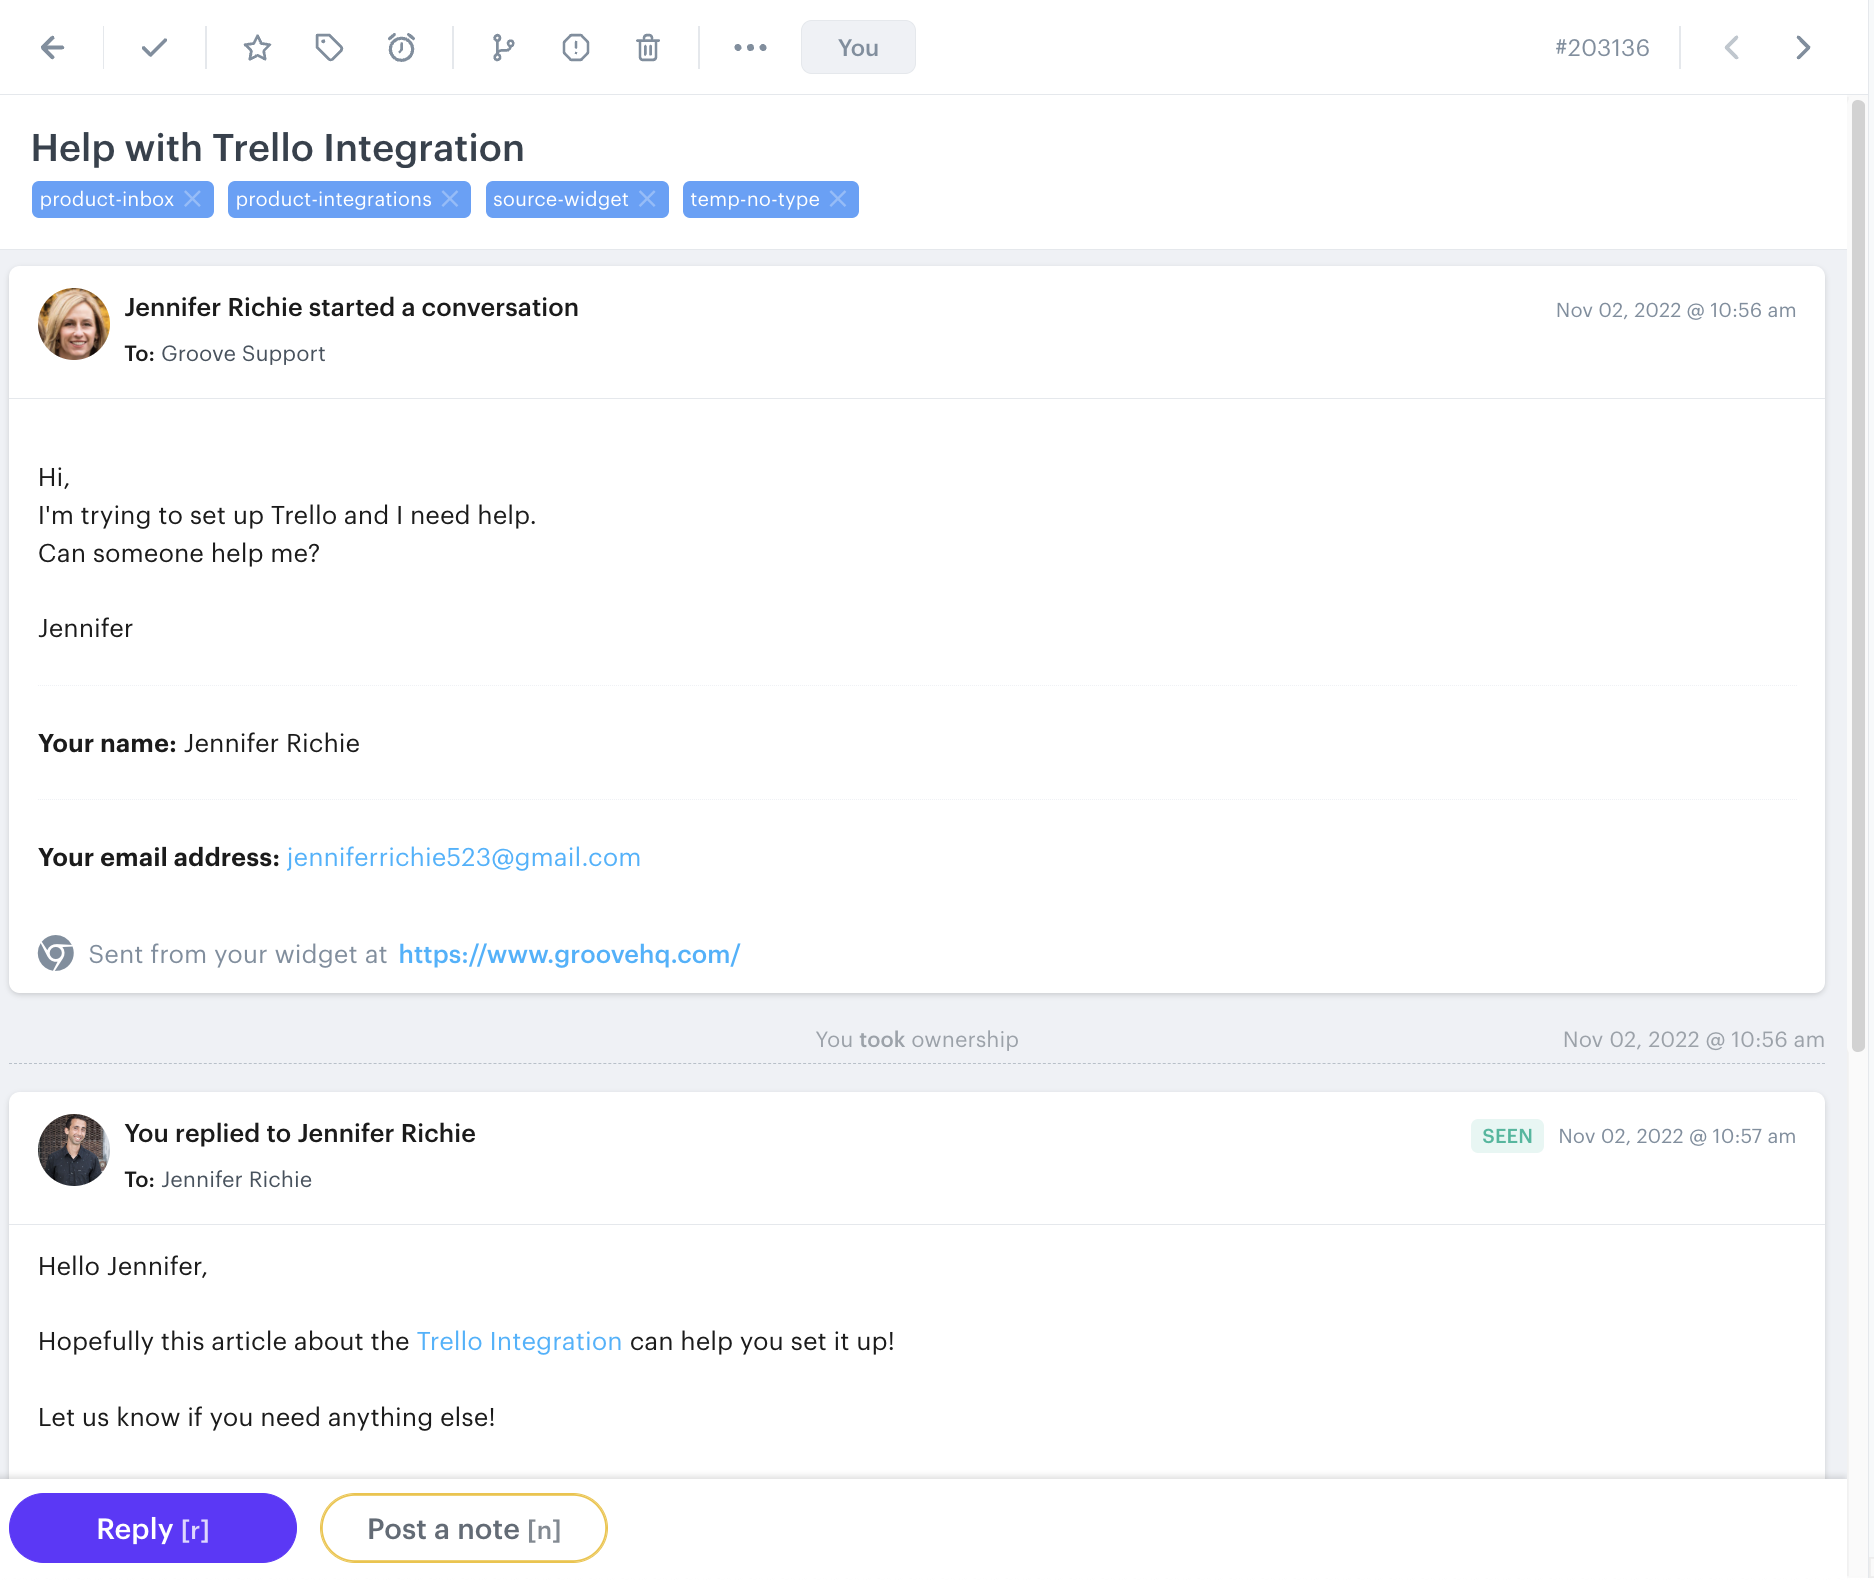
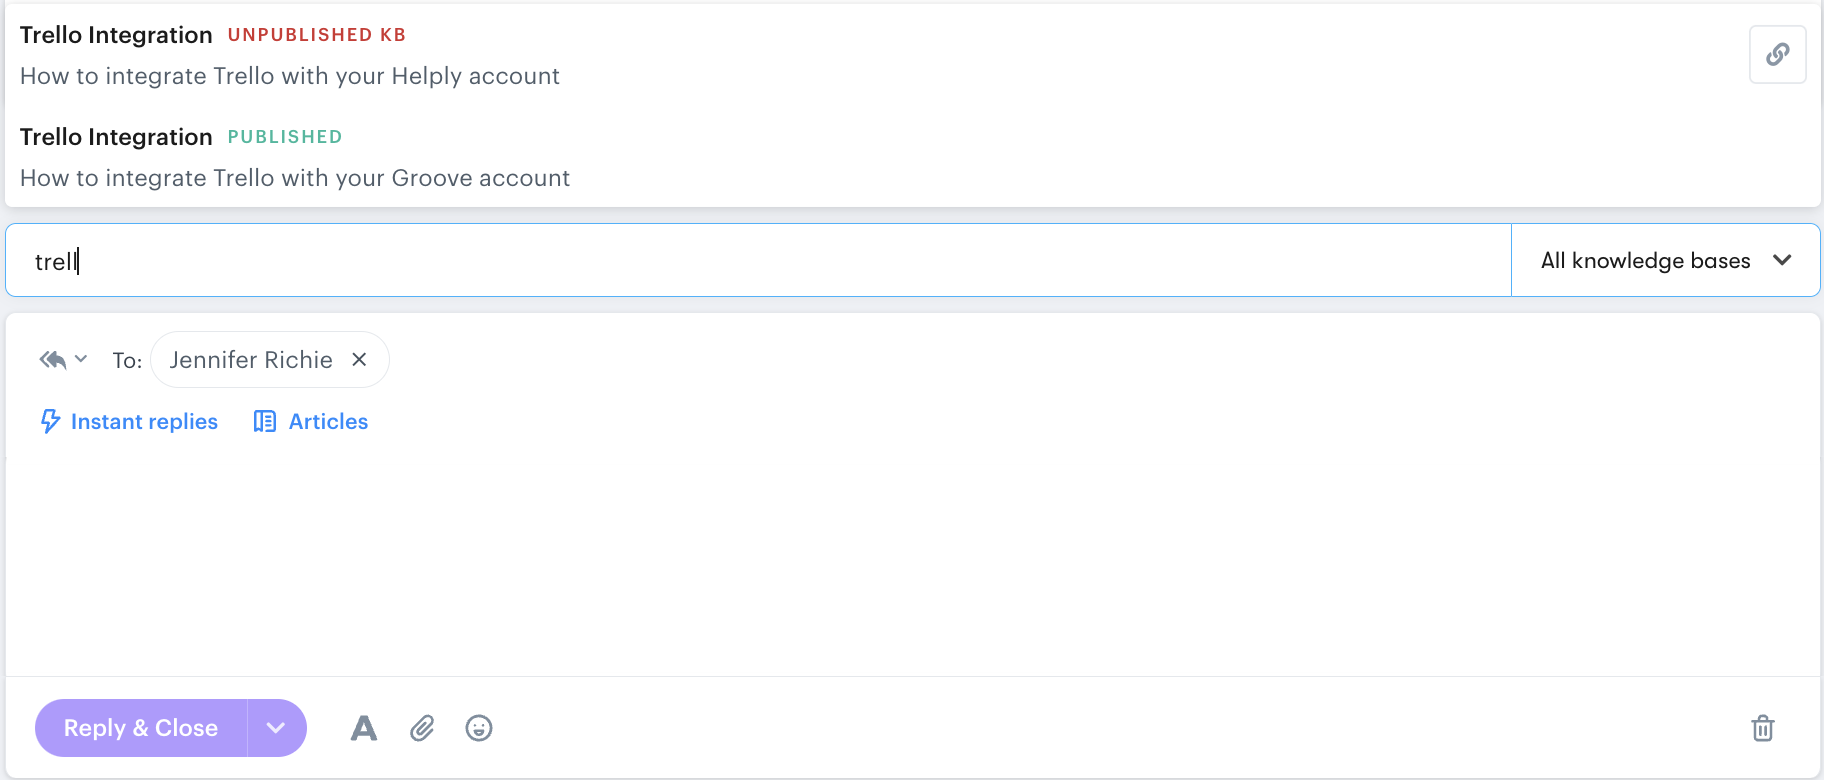
The Reply Box at the bottom works just like email. You can change the subject or CC/BCC, and at the bottom you can change the formatting, add attachments, or use emojis. If you're using our Knowledge Base you'll see a KB search bar that lets you insert article links into replies.
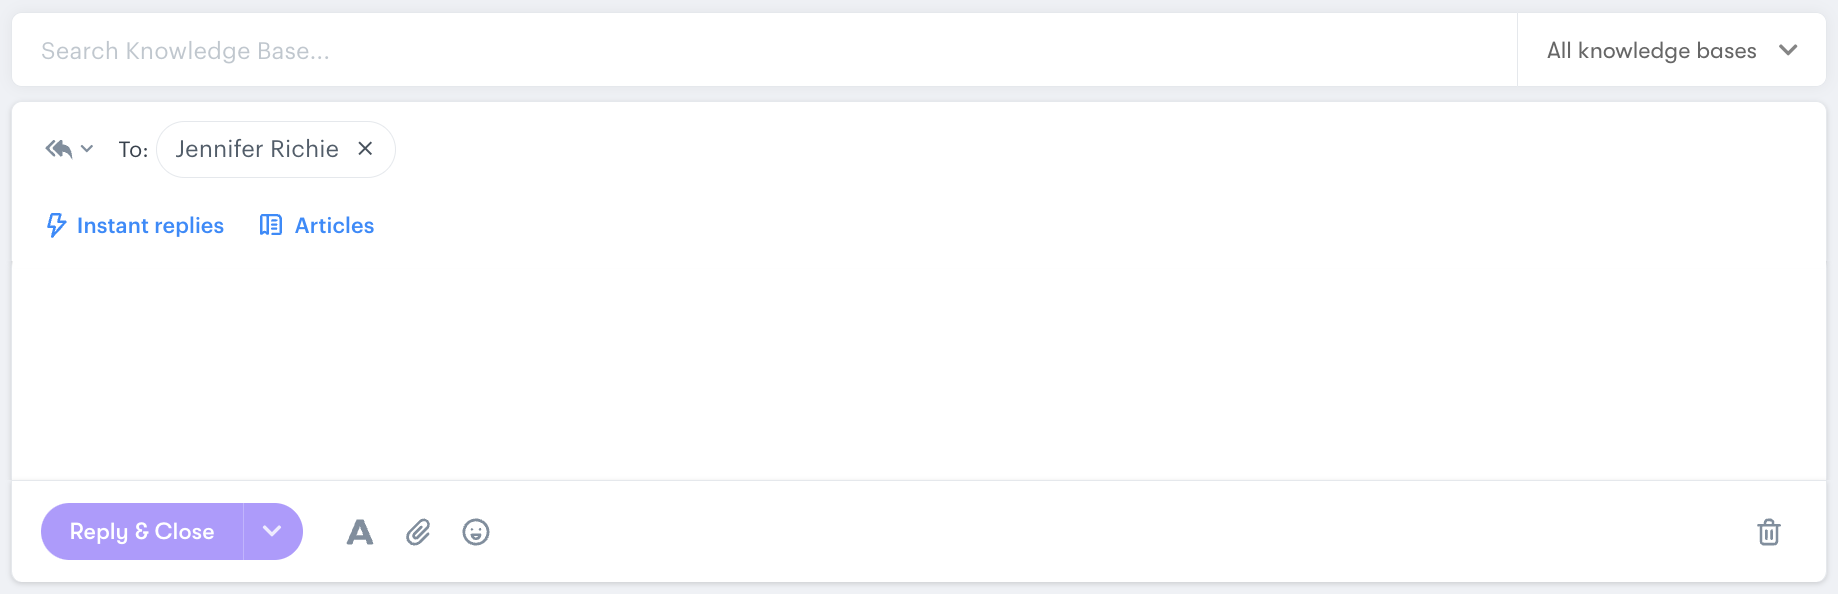
PRO-TIP - Knowledge base articles are designed to thoughtfully answer common questions in article format so you don’t have to. The search bar lets you find relevant articles from your own knowledge base (FAQ page) and insert a link into your reply. More on the KB below.
Click Instant Replies to use a canned reply for common questions. You can create new ones on the fly or manage them under Settings > Instant Replies.
PRO-TIP - we incorporate variables so predetermined info (like customer name, agent name, company info, etc) will be populated when you insert the reply, that way everyone can use them.
Notes let you leave relevant info about the customer/conversation right on the thread and allows you to @mention teammates (which sends them an email notification) so you can collaborate. Notes show up in YELLOW on the conversation thread and are never visible to the customer.

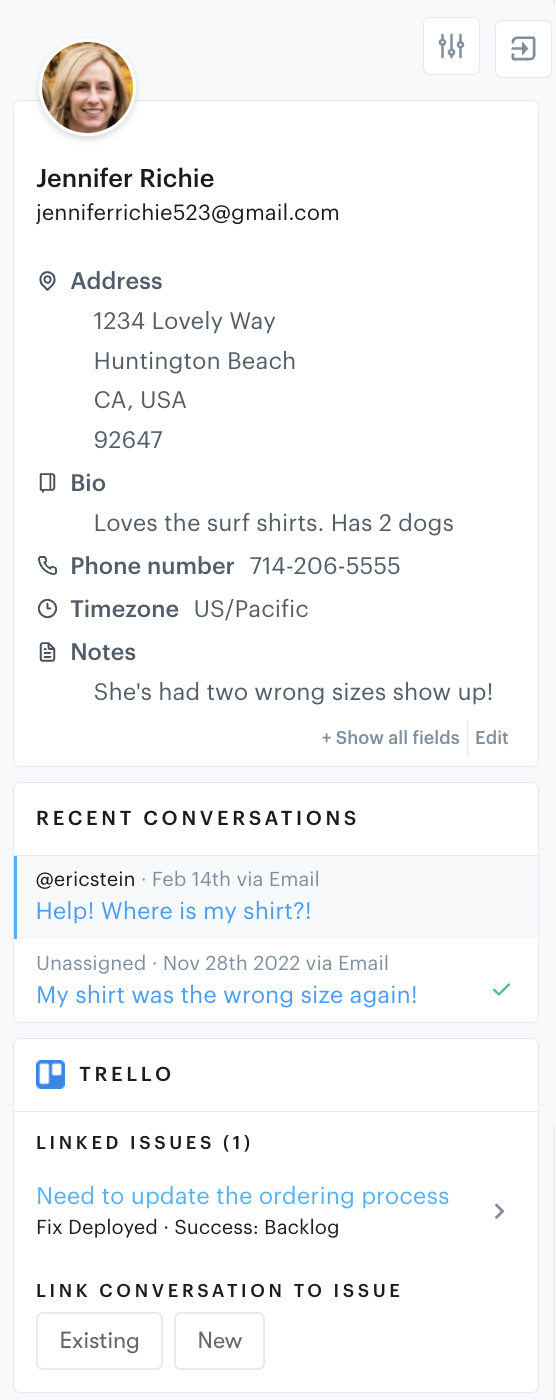
On the right is the Customer Profile. Here you’ll find all the customer’s info along with any past conversations. Integrations for Shopify, Trello, Slack, Jira and others that allow you to display more relevant information about your customer like past orders, subscription status, and more. Click Powerup at the top to see what’s available.
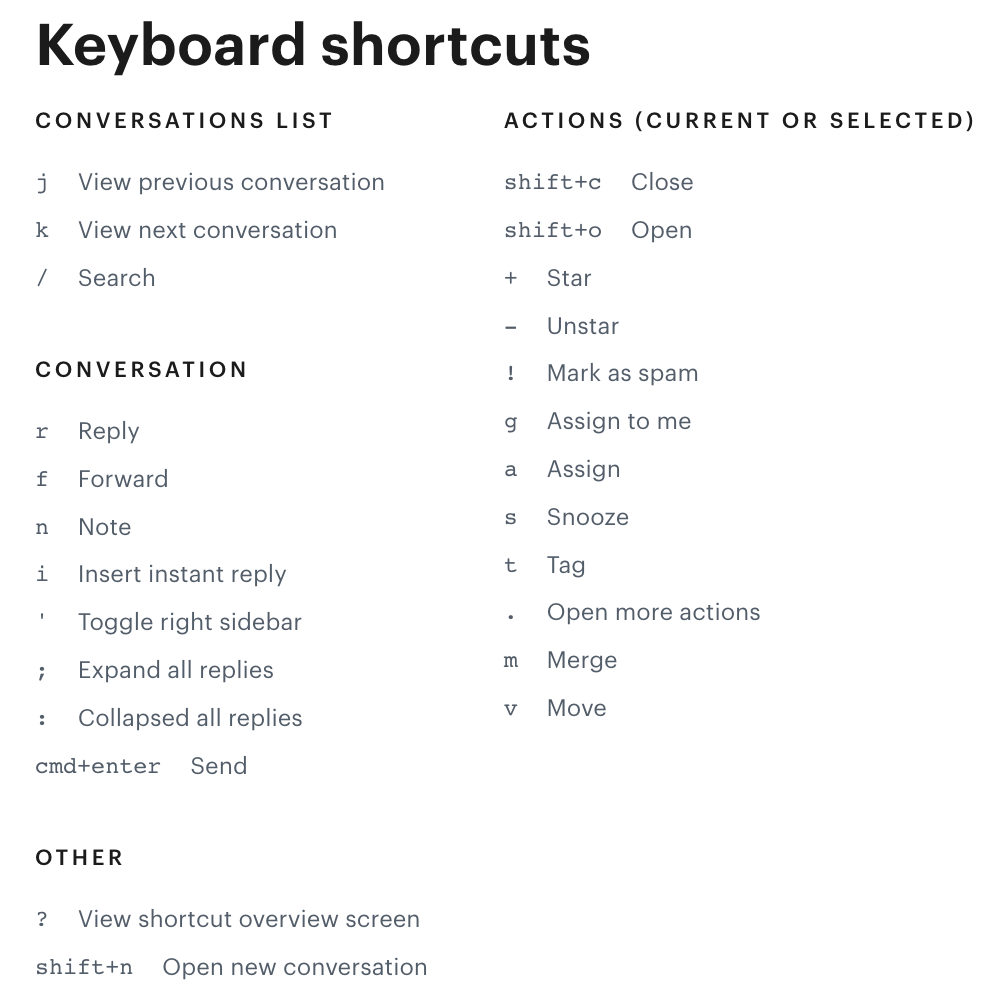
And finally, for people who like to save time, there are numerous shortcuts to master so you can get more done with less effort.
STEP 3: TIME TO CHAT
If your company uses Live Chat, or gets support queries through Facebook or Instagram, the Chats section is up next. You'll find the chat icon on the very left navigation.
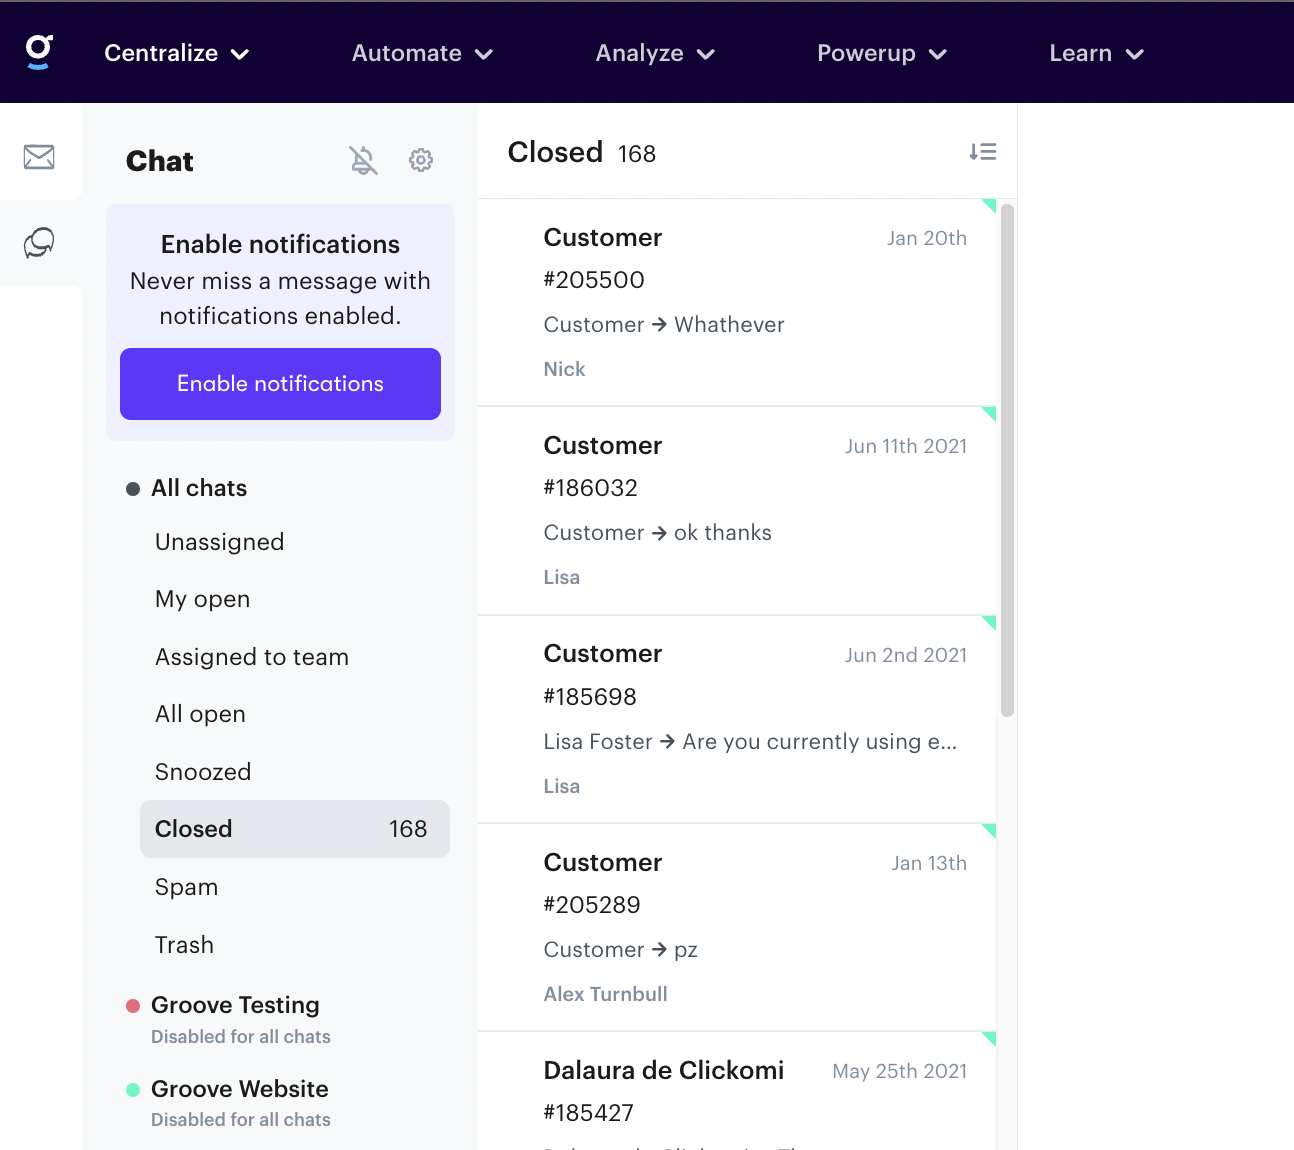
Here you’ll find each channel and all chat messages organized by Smart Folders. When you click into a conversation it looks and feels just like a chat experience, and on the right you’ll find the Customer Profile along with any integrations.
STEP 4: KNOW YOUR KNOWLEDGE BASE
(Click here for a brief overview video)
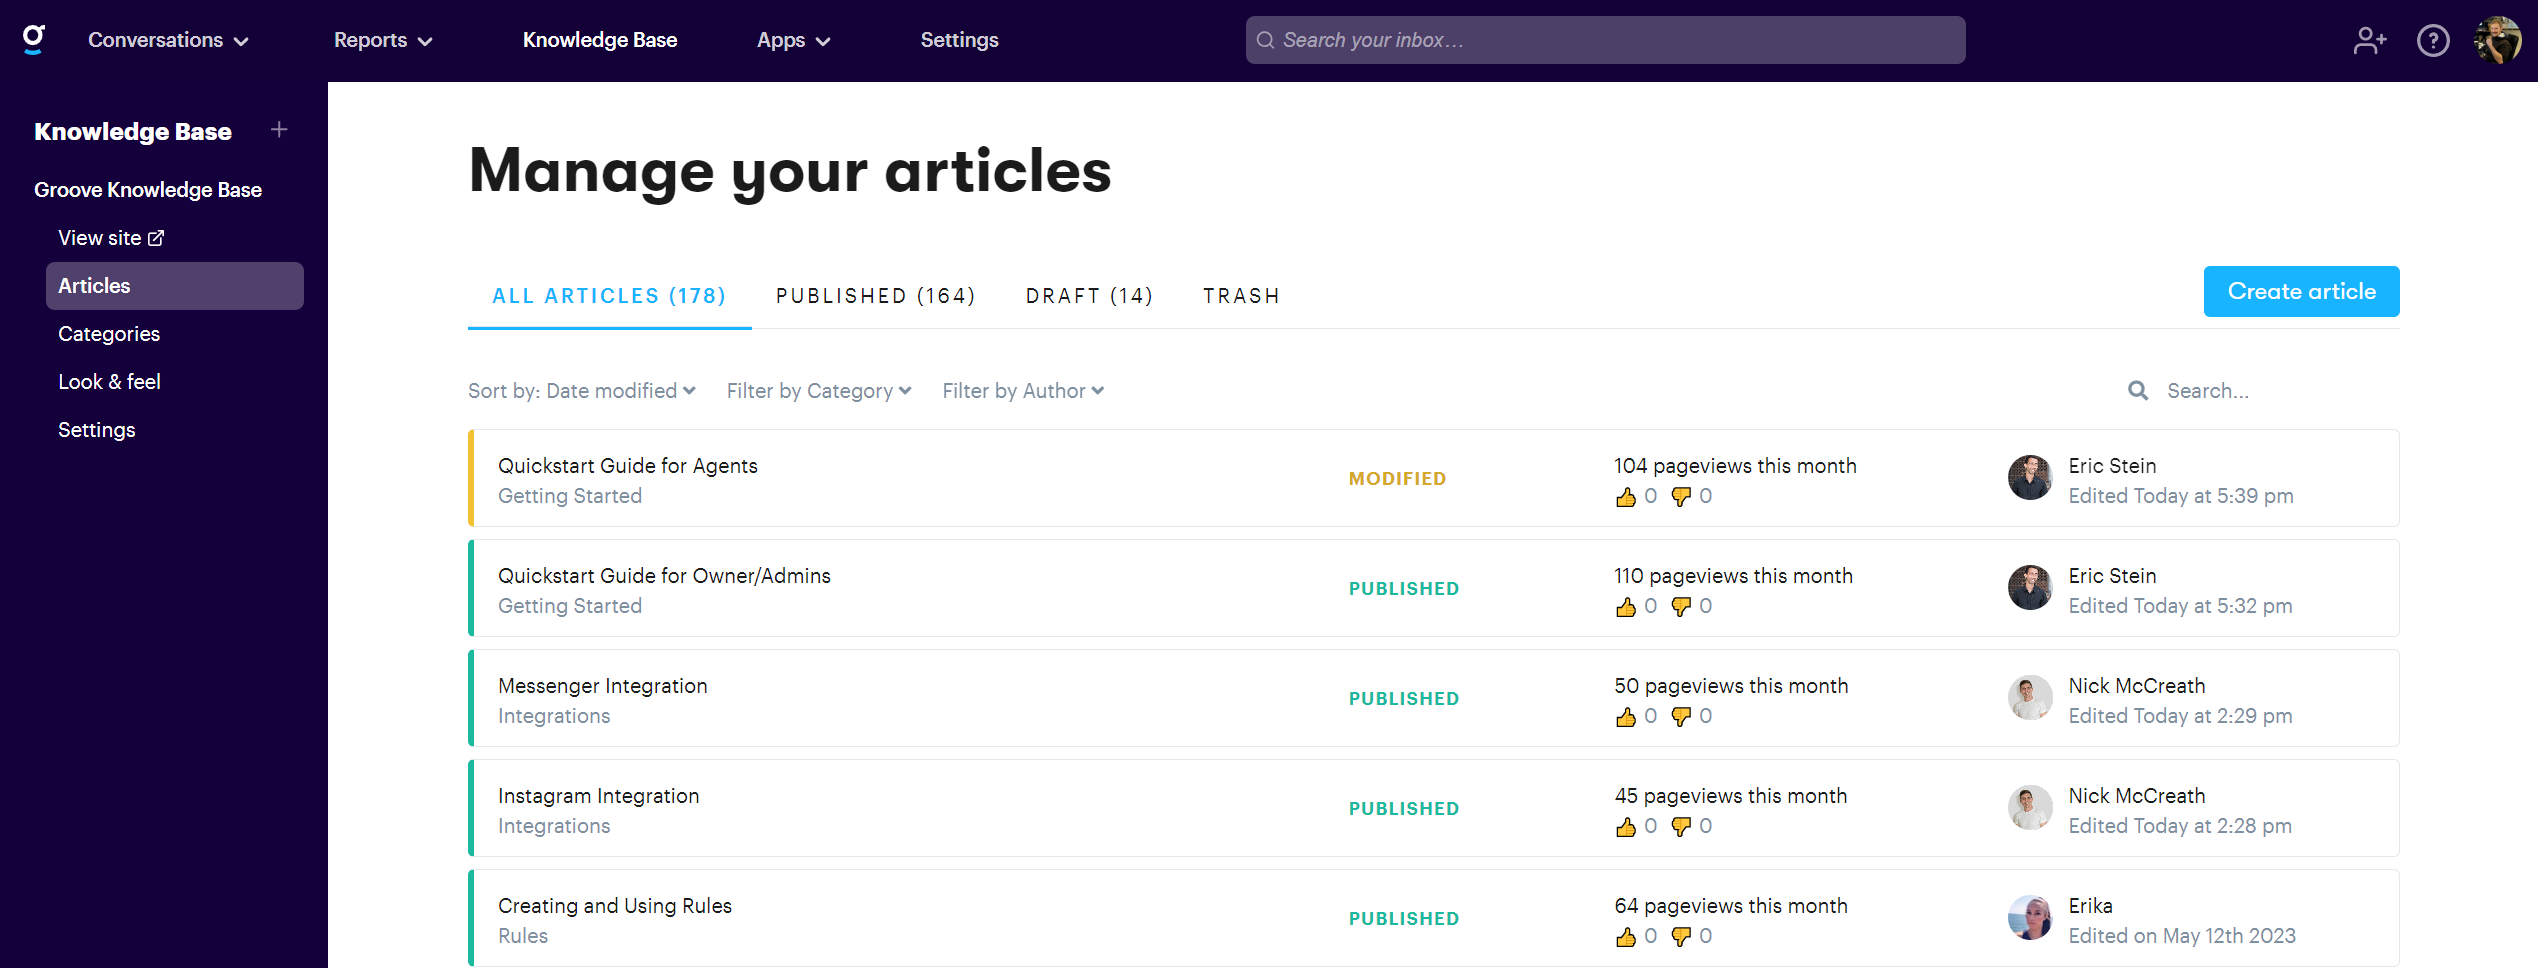
The Knowledge Base, AKA your FAQ page, is a repository of help docs designed to deflect incoming questions. Click Knowledge Base on the top navigation.
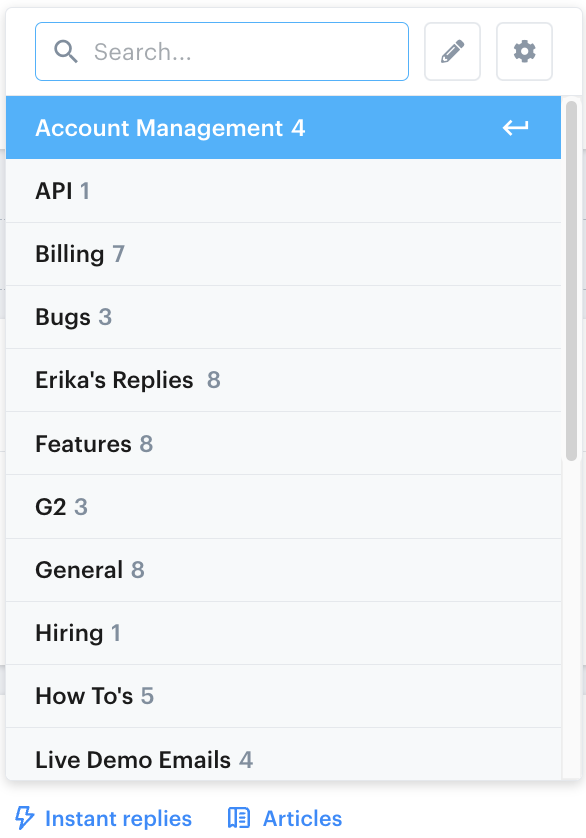
Here you’ll find all your articles along with their views and ratings. You can search by date, category, author or keyword.
If activated you'll find a Knowledge Base Search Bar in the reply section. Use this to browse for relevant articles to send customers. Published articles are available to anyone and unpublished articles can only be viewed internally. Simply click the article to insert a direct link for the customer to follow.
Under Reports → Knowledge Base you’ll see stats of how well they perform and what keywords are most popular.
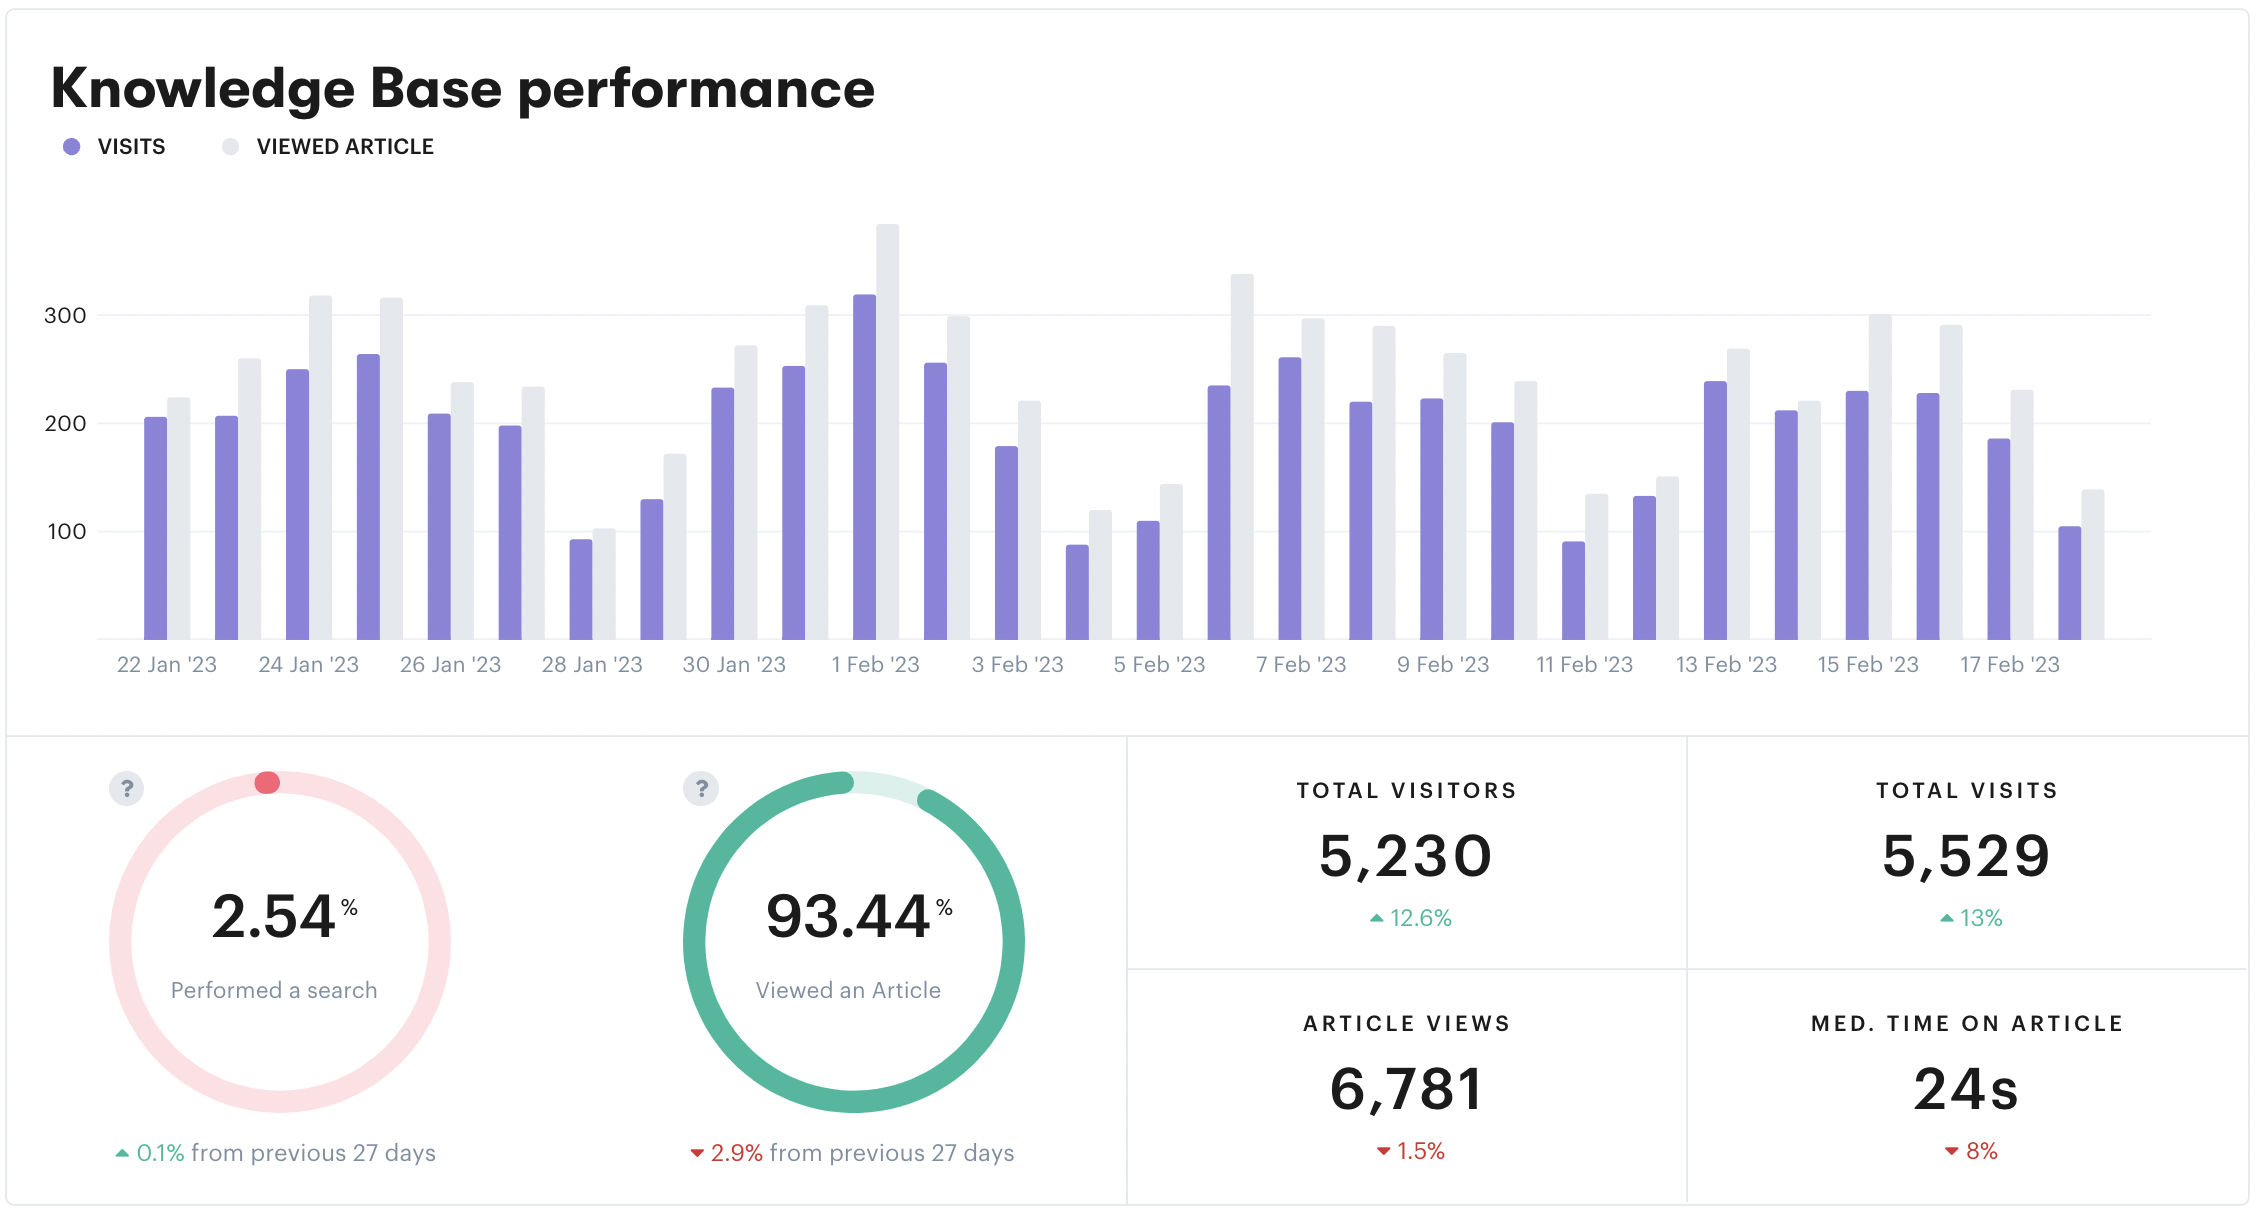
PRO-TIP Some companies see a 30% reduction in support workload just by setting this up!
STEP 5: DATA LOVERS REJOICE
Under Reports you’ll find reports compiled from that sweet, sweet data Groove collects, designed to give you a holistic view of your company.
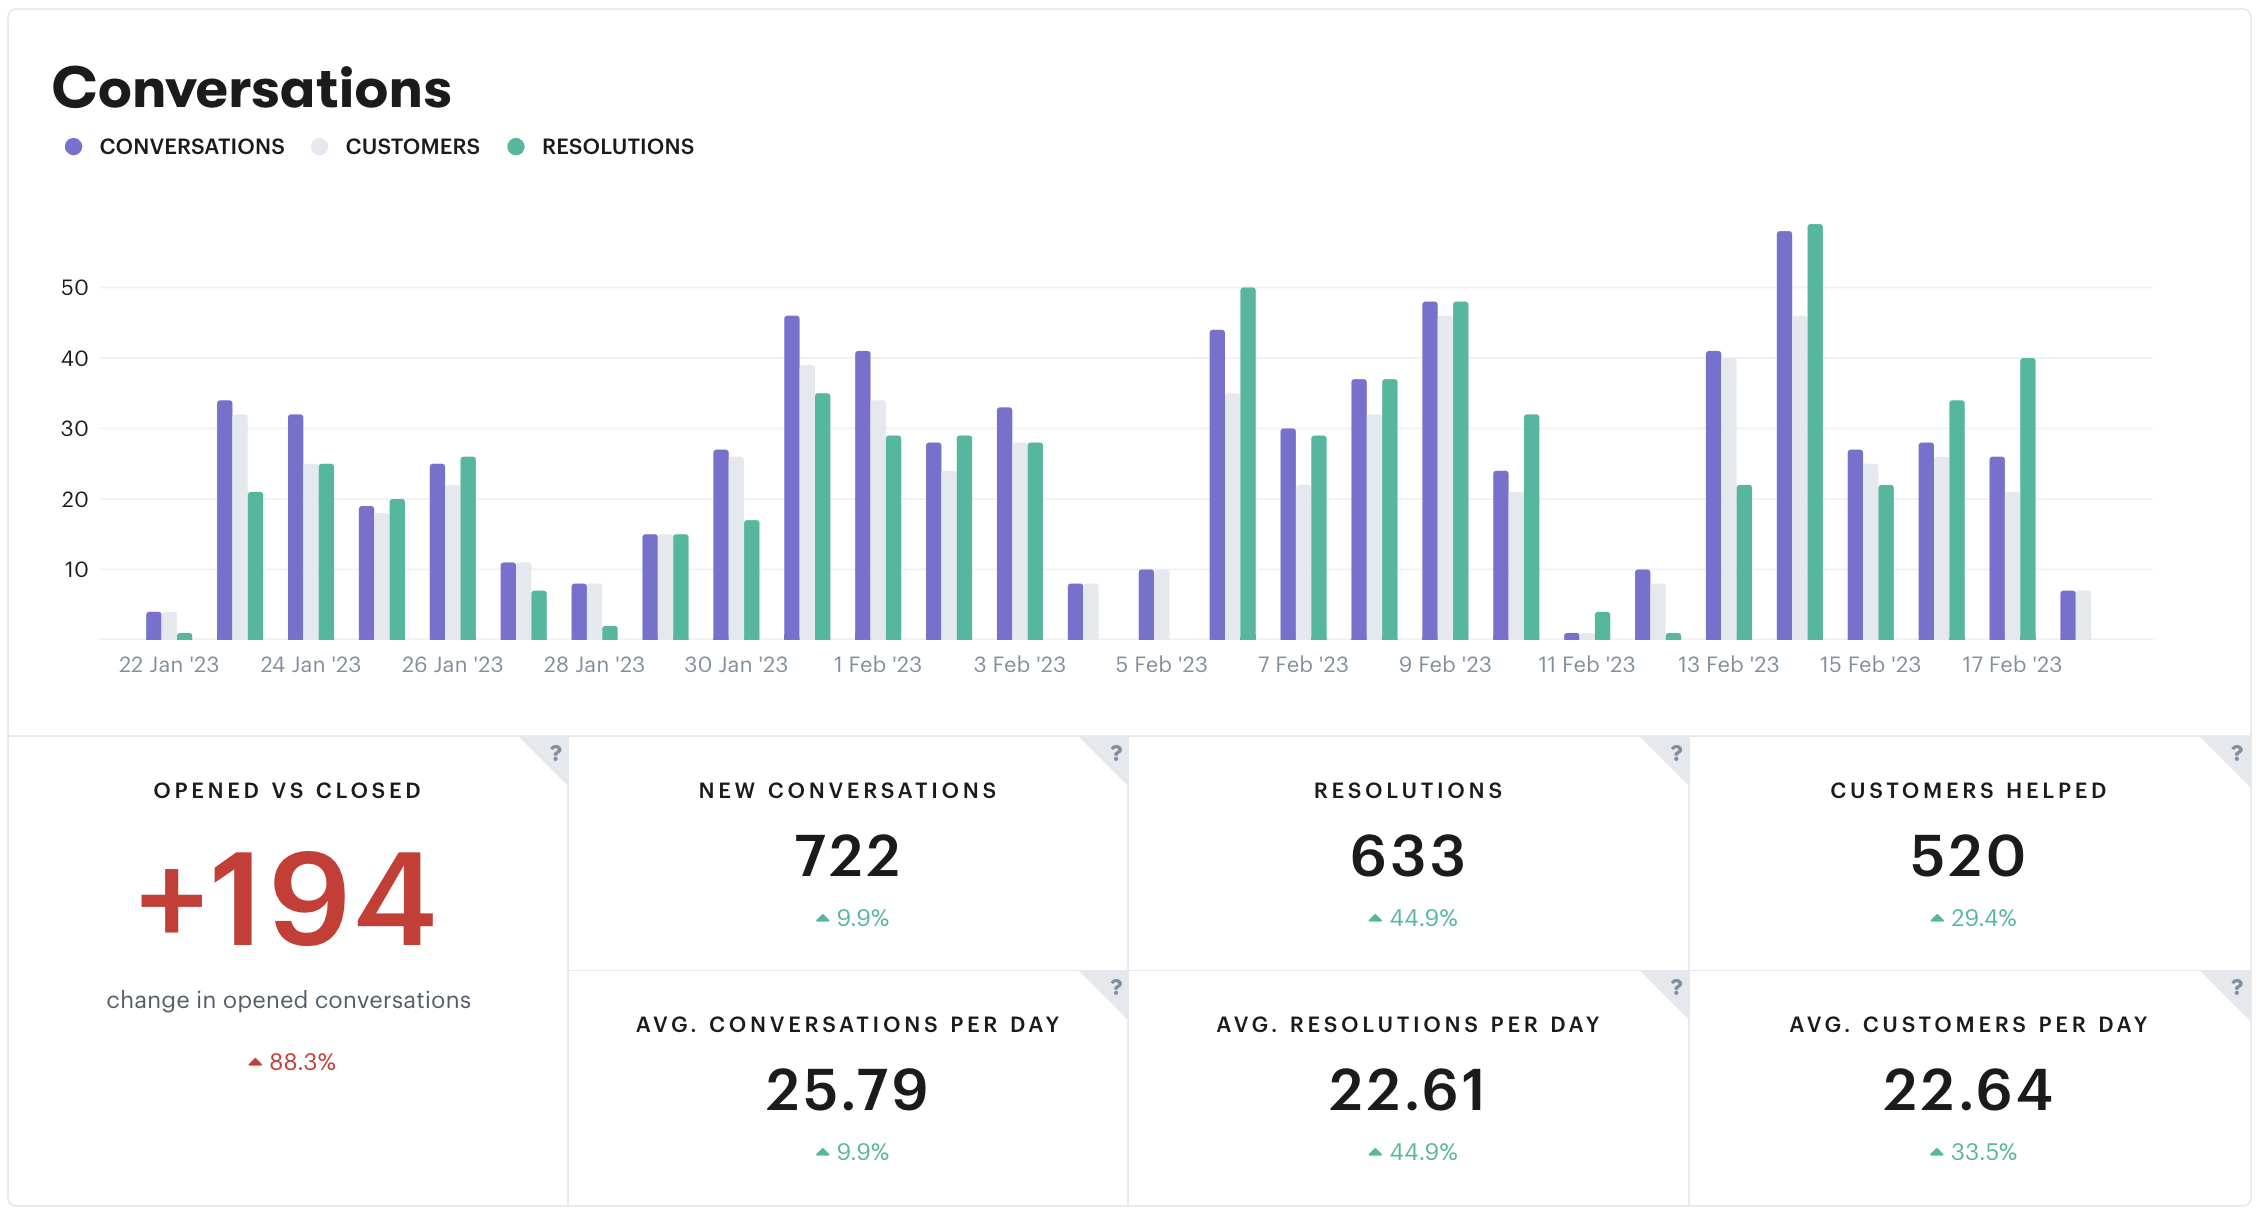
Conversations - shows you the type and volume of conversations coming in and going out.
Busiest Times - gives you an idea of the busiest and slowest times of day.
Tag Insights - show type and source trends
Team Leaderboard - shows you everyone's performance
Productivity - depicts overall support performance through the lens of response time and resolutions.
Happiness - the results of your Customer Satisfaction Ratings (activate CSAT in Settings > Satisfaction Ratings).
Teammate and Teams - lets you explore individual and team performance
STEP 6: BLAST OFF!
How was that for simple yet powerful?
You now have the tools needed to deliver fast, personal support to every customer.
Browse our Knowledge Base if you have any other questions or message us directly!