Before You Start
Completing this task requires some jumping back and forth between two accounts. To help the work go smoothly, open your Zoho account in one browser tab and your Groove account in another.
Configuring Groove Settings
The first step is to create a Groove Inbox.
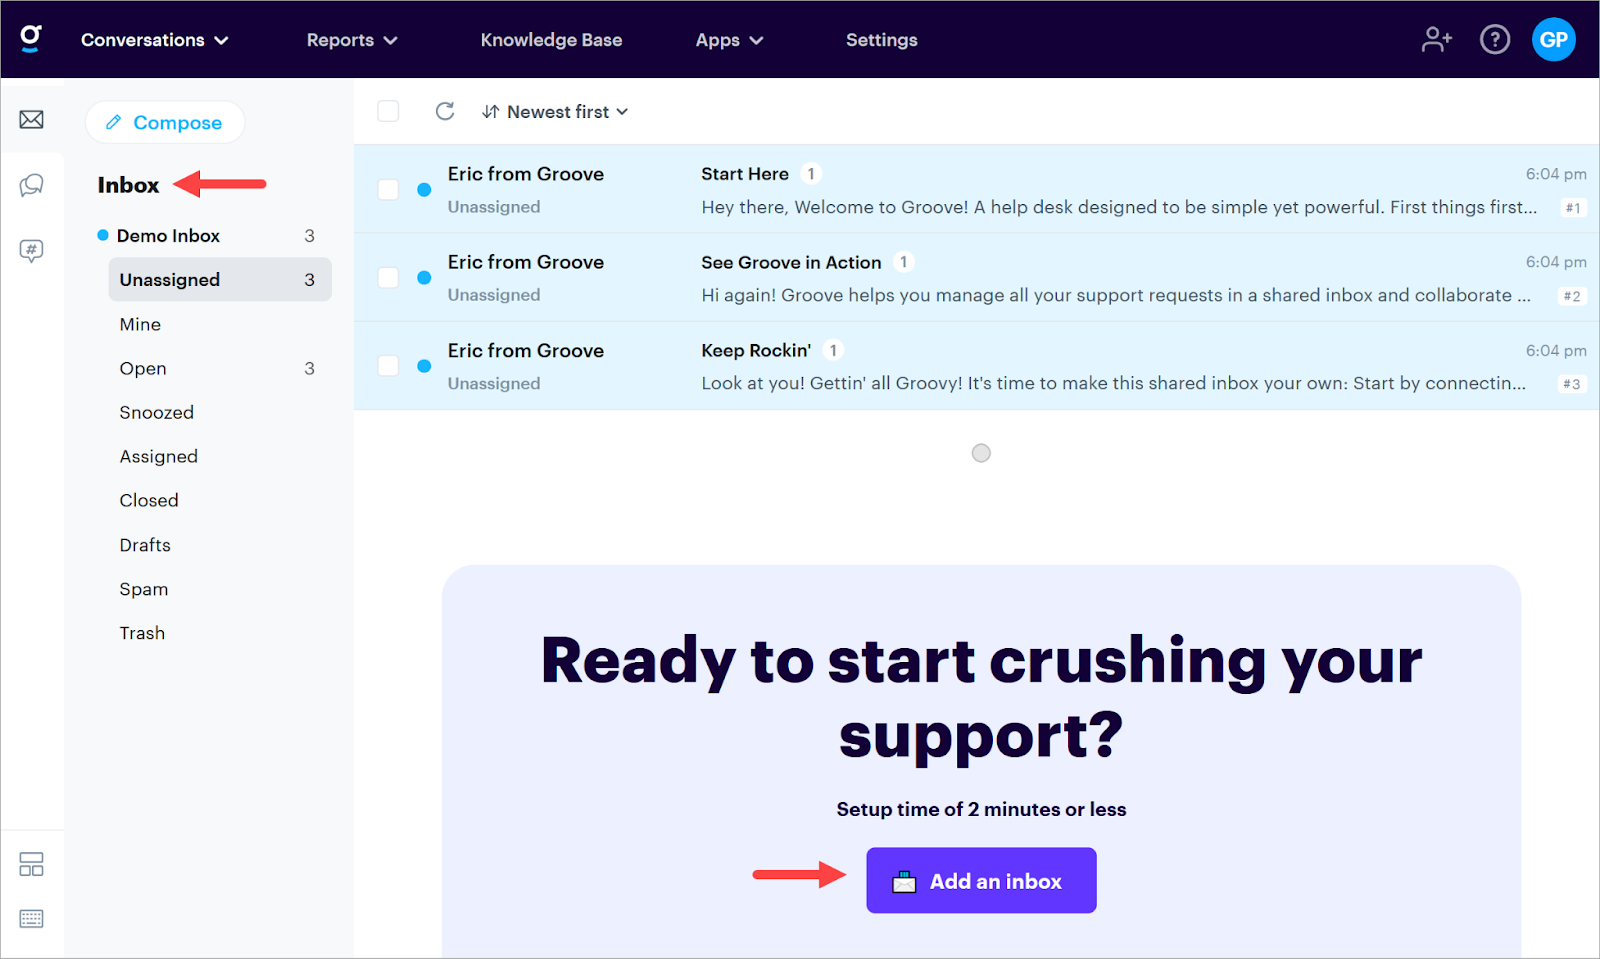
Go to your Groove account and make sure the Inbox page displays. If you happen to open a different page, click the Groove icon in the top left corner and then select Unassigned.
Go to the center of the screen and click the Add an inbox button, or navigate to Settings > Channels > Add a channel
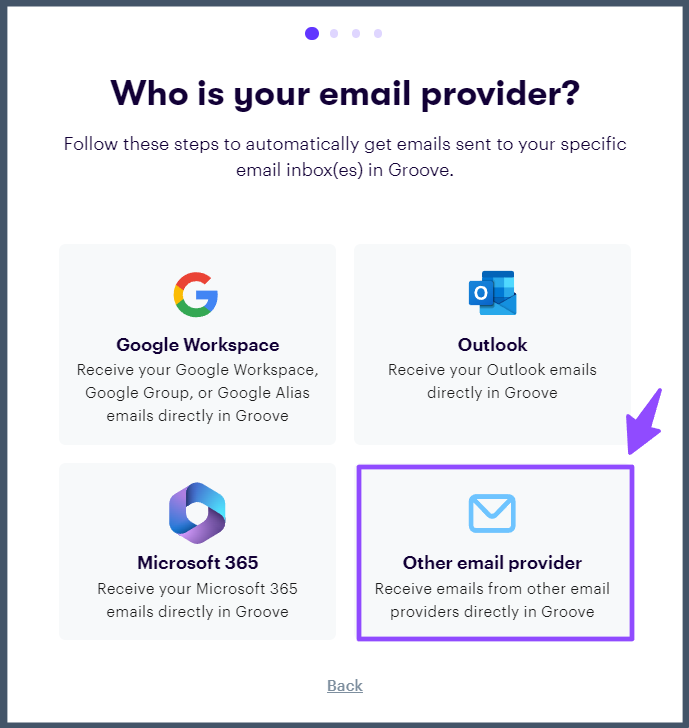
In the popup window, click Other email provider.
In the next window, fill in two fields.
Enter a unique name for the Groove Inbox. This internal reference helps you quickly understand the source of incoming messages.
Paste in the Zoho email address.
Click Next Step.

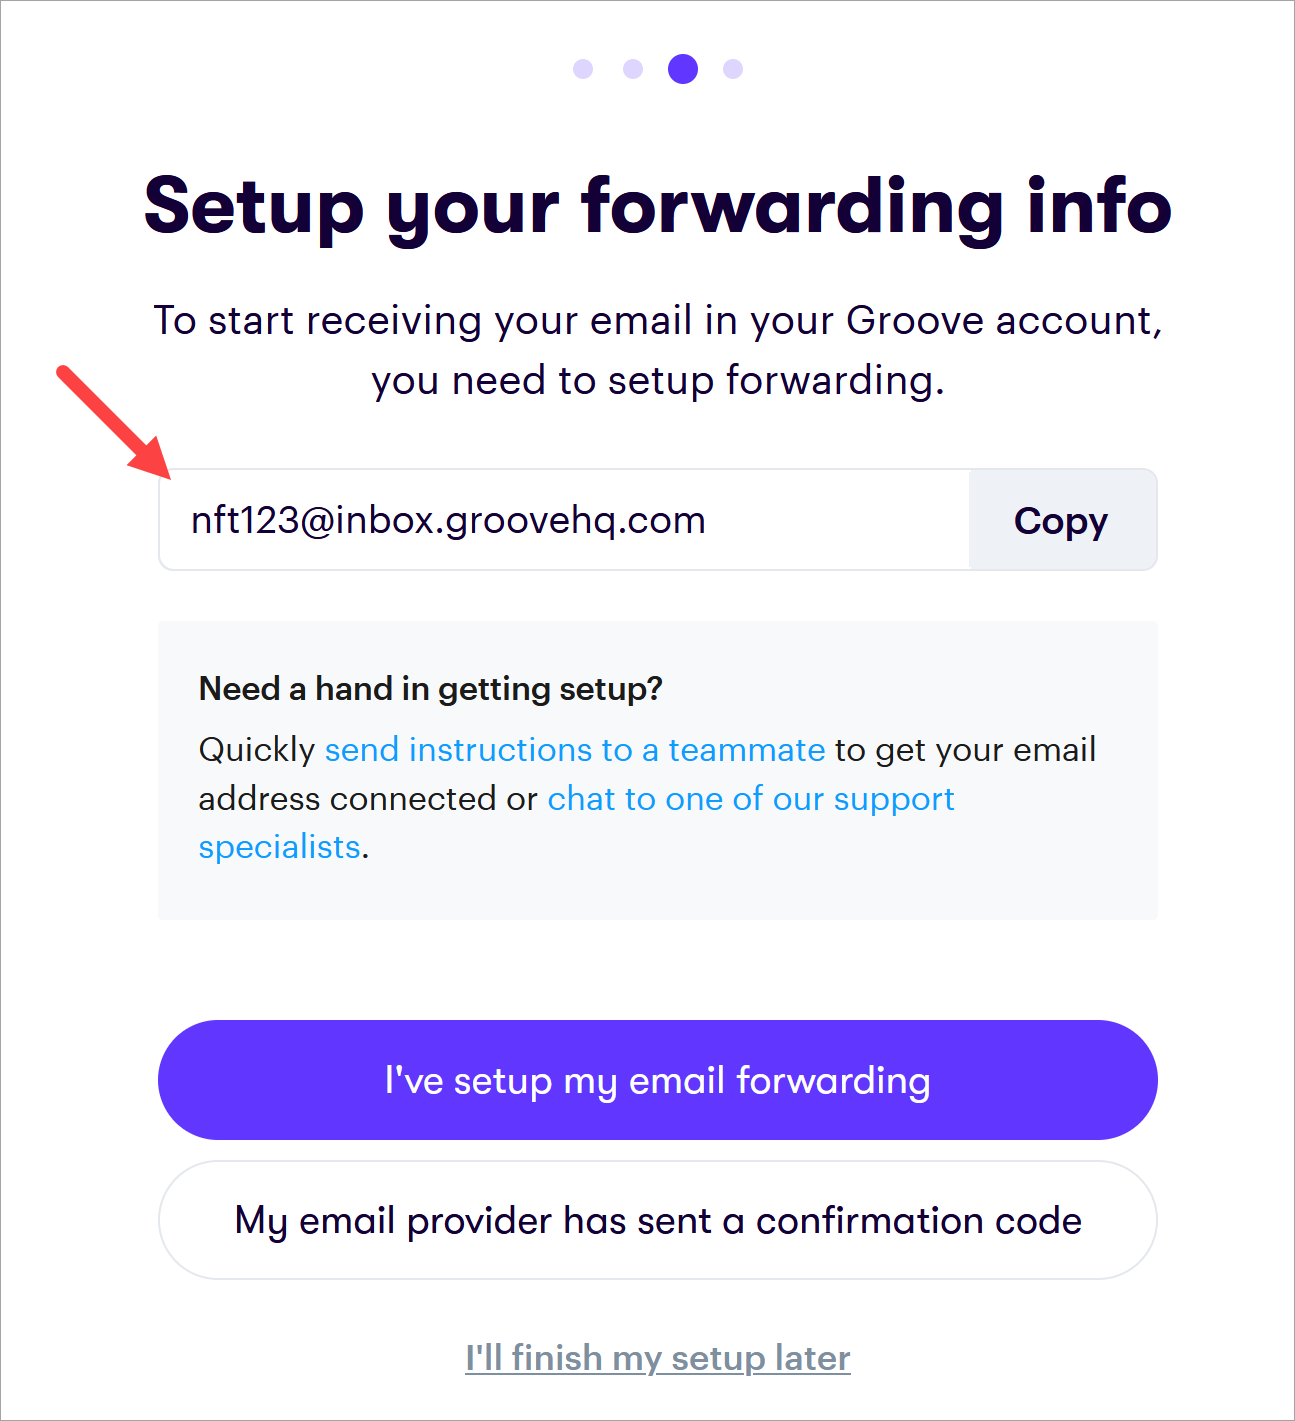
Go to the Groove window (see screenshot below) and copy the unique Inbox address. Now get ready to leave this browser tab - but don’t close it.
Setting Up Zoho Email Forwarding
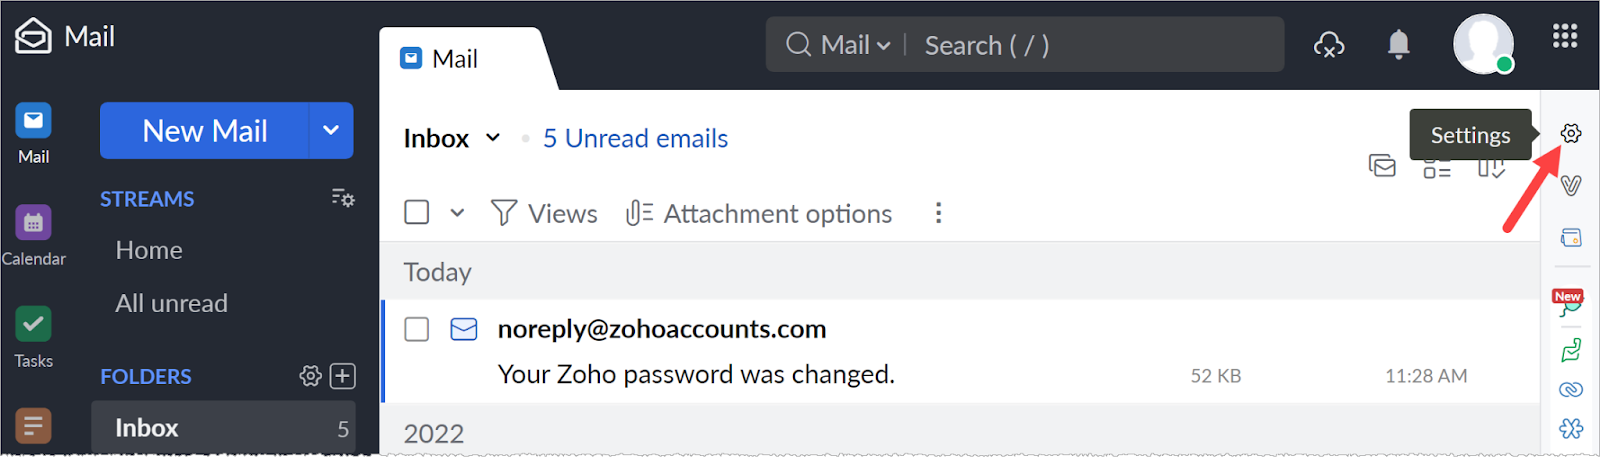
Go to the browser tab with your open Zoho account.
Click the Settings (gear) icon in the top right corner of the page.
In the new window:
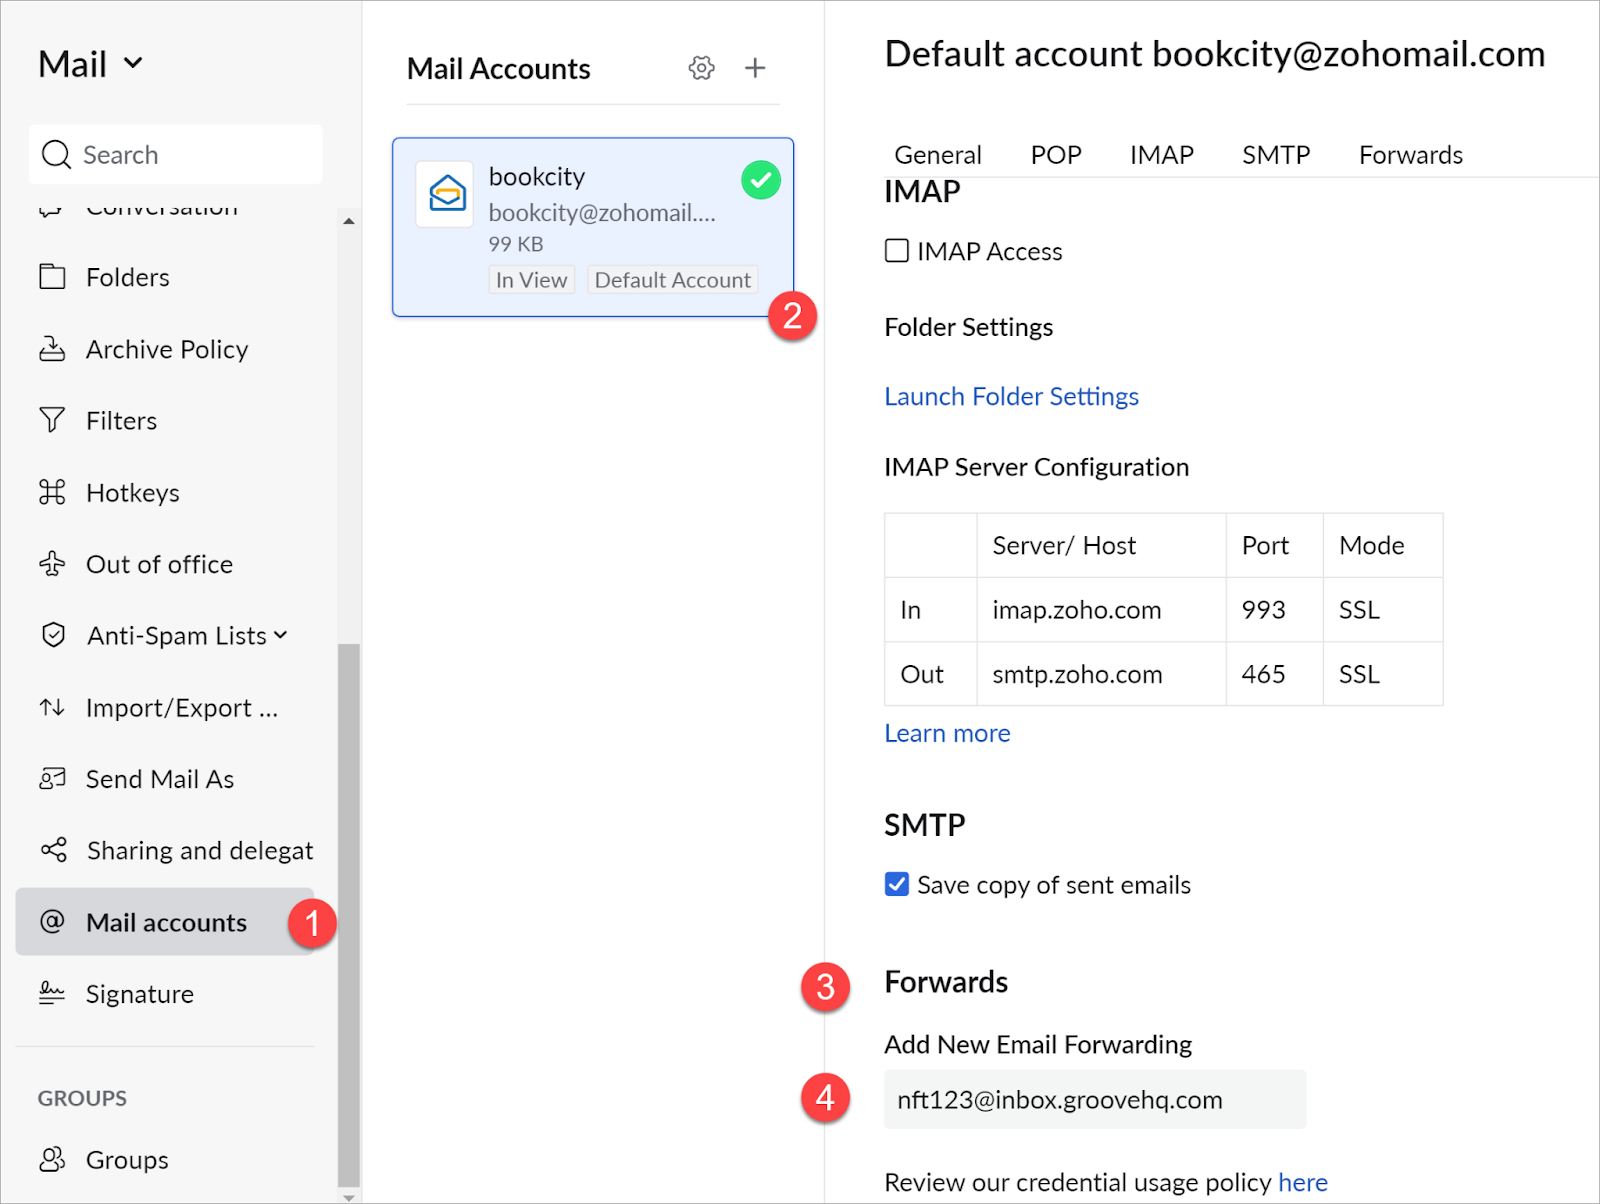
Go to the left panel and scroll down to Mail accounts.
Go to the panel on the right and scroll down to the Forwards heading.
Paste the Groove Inbox address into the Add New Email Forwarding field.
To save the forwarding:
Place the cursor at the end of the Groove Inbox address.
Click Enter on the keyboard. Zoho adds a new line with the Groove Inbox address.
Go to the top right corner of the window and click X to close the window.
Verifying the Account
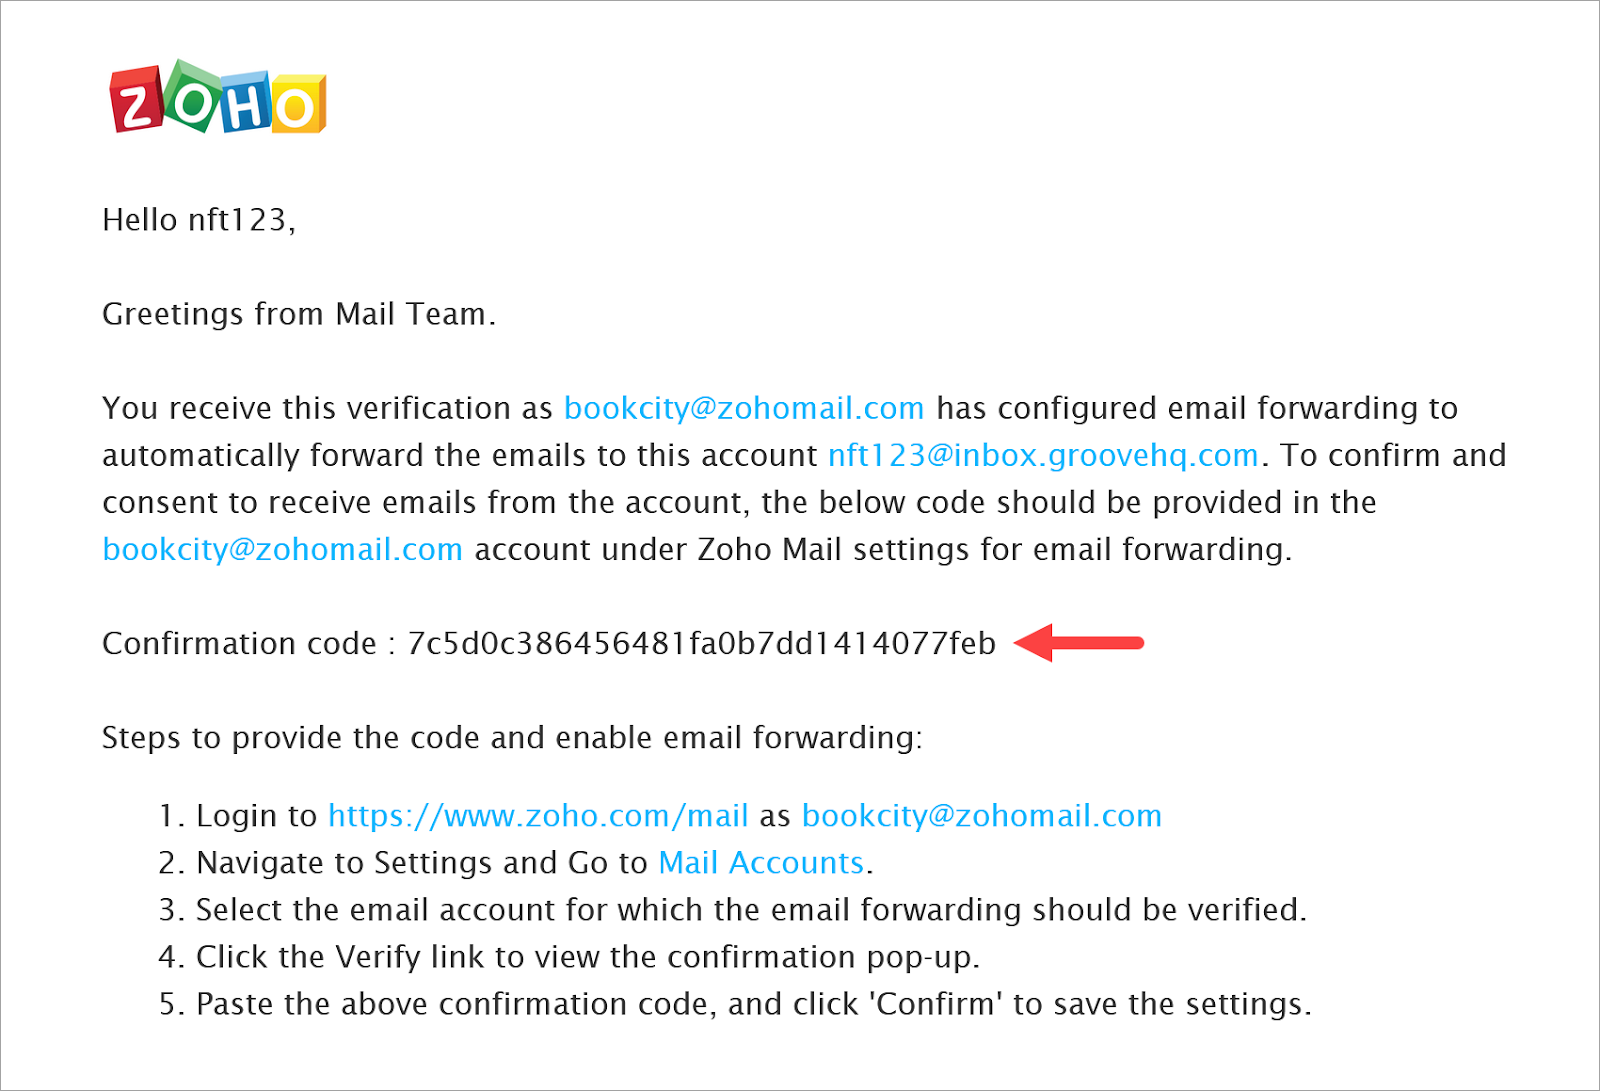
Zoho automatically sends a message to your Groove Inbox with instructions to confirm the account.
Go to the Groove Inbox and open the Zoho email.
Copy the Confirmation code.
Go to the browser with your Zoho account.
Click the Settings (gear) icon → Mail accounts.
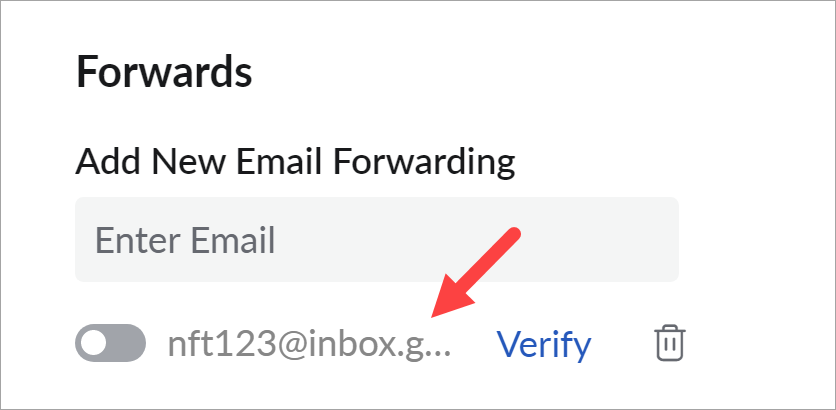
Go to the Forwards heading. Click the Verify link.
Click the Verify link.
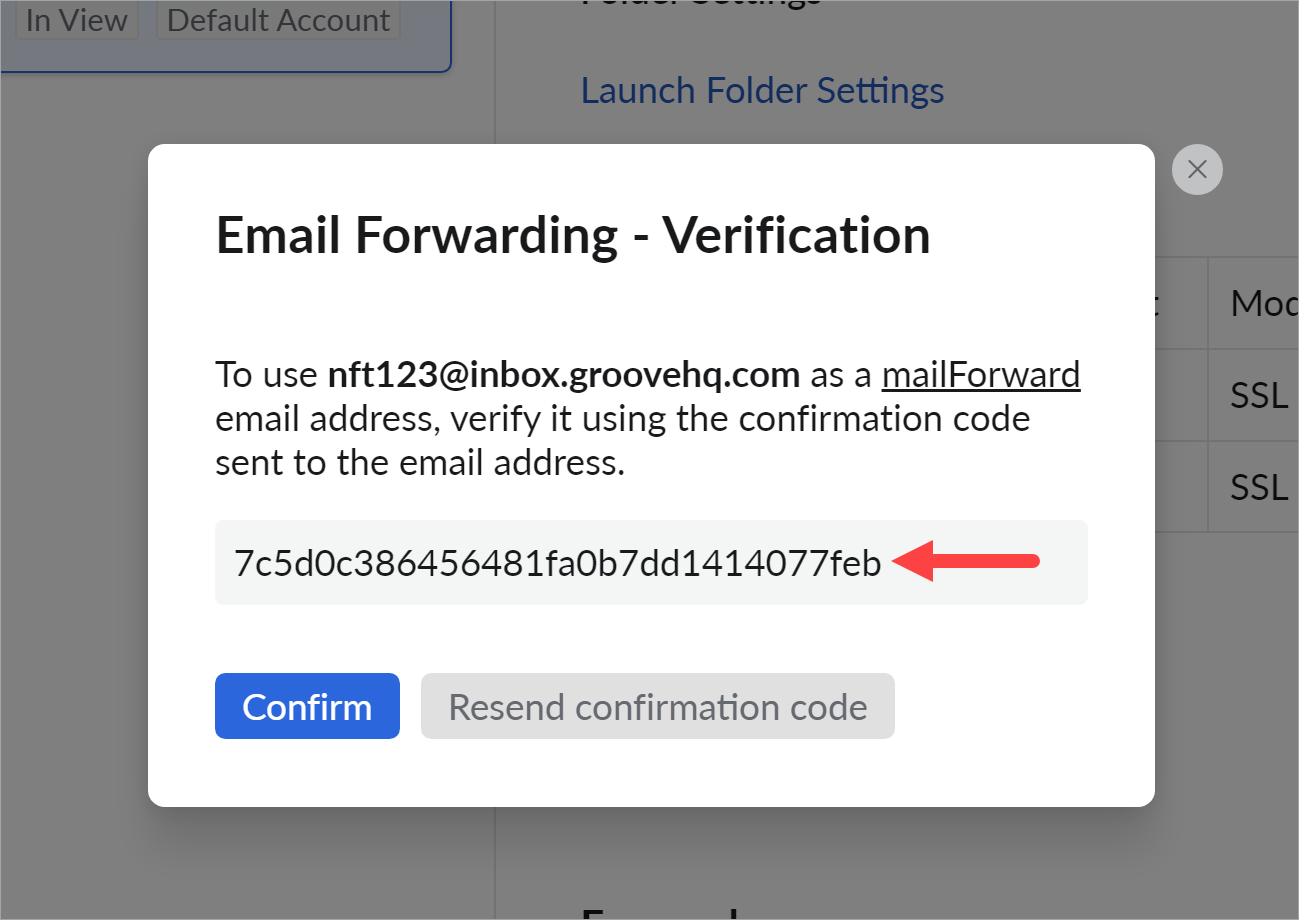
In the popup window, paste in the confirmation code.
Click Confirm.
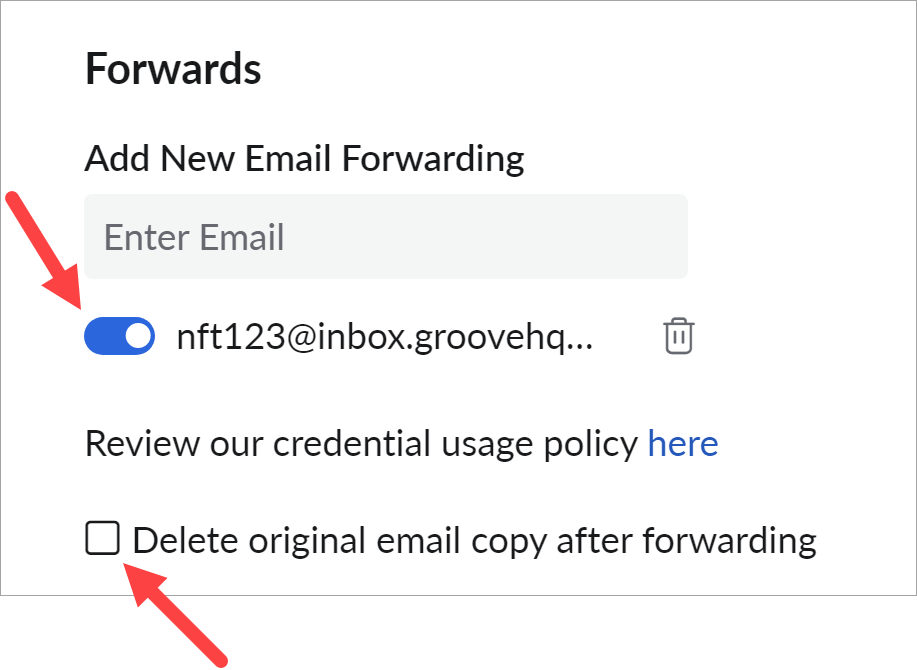
Zoho automatically switches on the toggle that enables forwarding. Optionally, you can delete original emails after Zoho forwards them. Check the box to enable this feature.
Completing the Integration
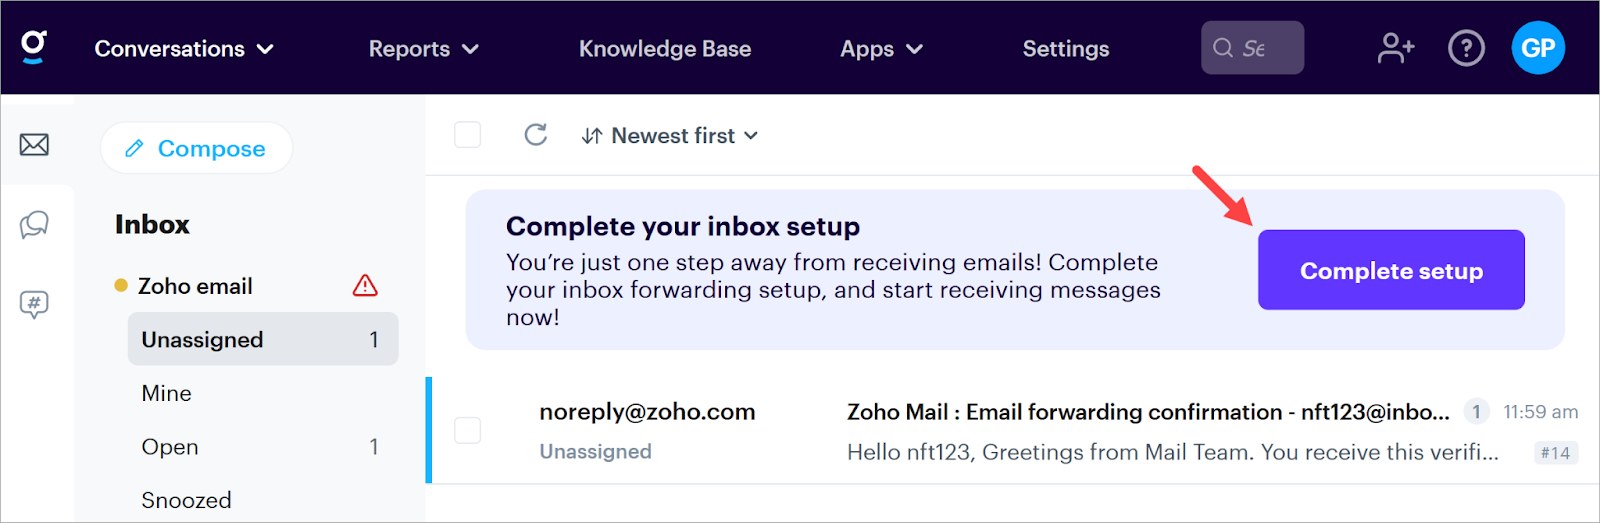
Go back to the browser tab with the open Groove account.
Go to the dashboard and click the Complete Setup button.
Groove sends a test message. If successful, two events happen.
The test message appears in the Zoho account.
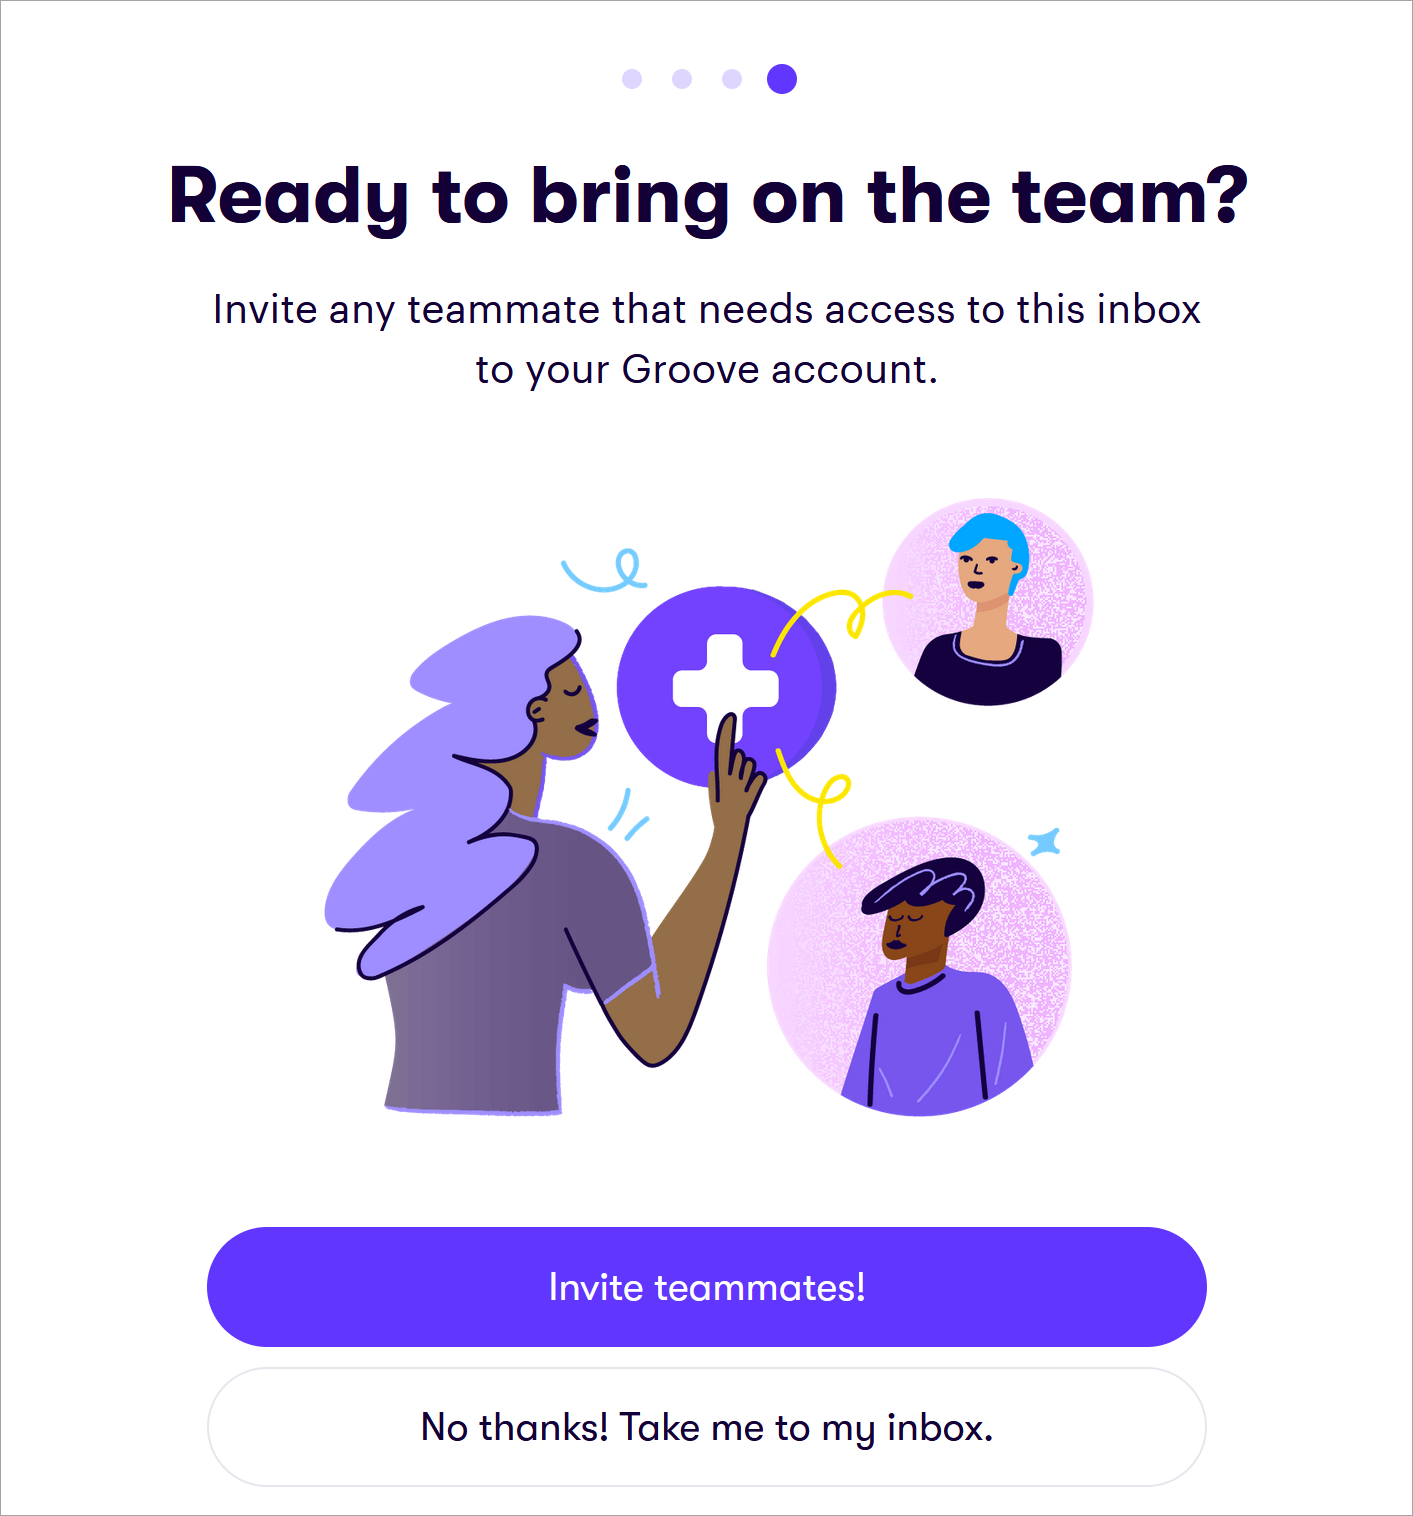
Groove displays a popup window that lets you add members to the Groove Inbox. This is an optional step and you can always add team members later. Learn more.
Checking the Results
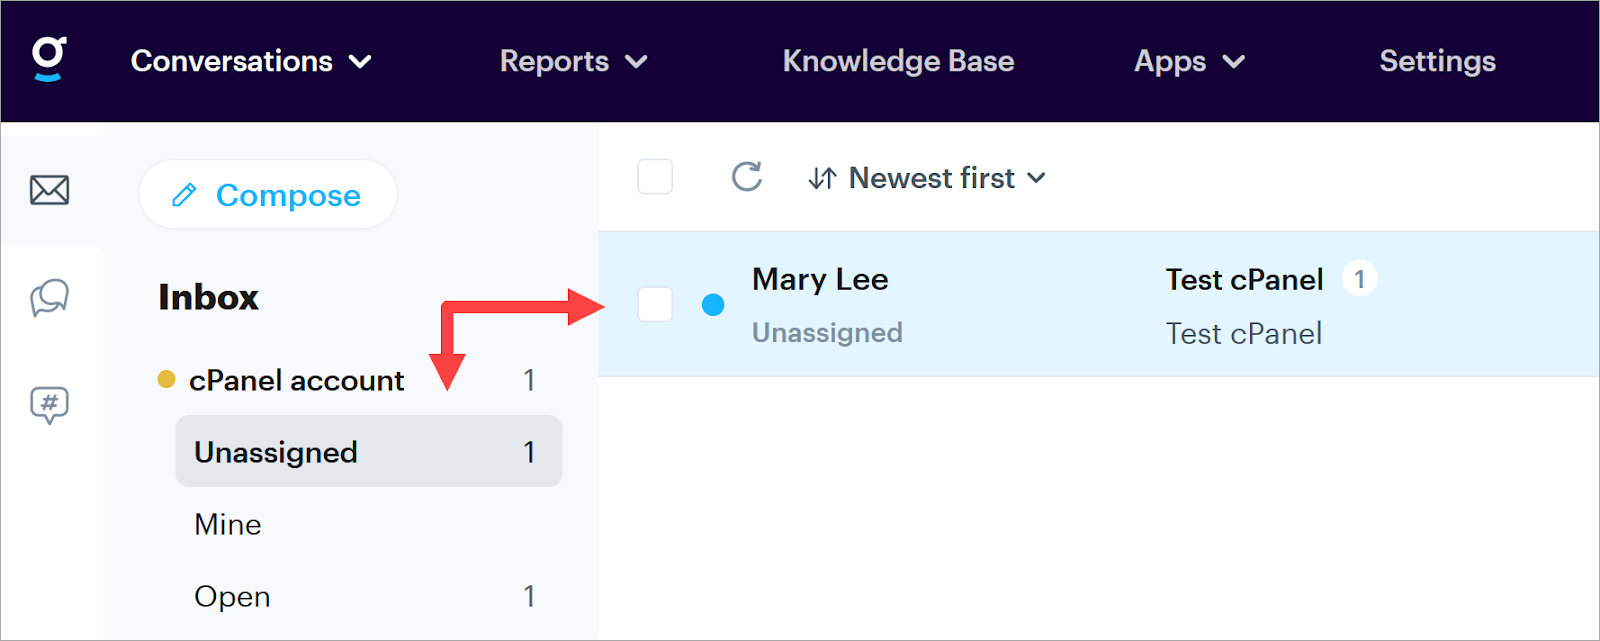
When the connection completes, Groove removes the warning icon from the Inbox name but does not display the test message.
To verify the connection, I sent a test message from a third-party email account to the Zoho address. That message appears in the Groove Inbox. This confirms the Zoho connection to the Groove Inbox works properly.
That’s it!
Now you know how to forward messages from a Zoho email account to your Groove Inbox.
Return to Getting Your Emails Into Groove
Needing a hand getting your email into Groove? Reach out to the support team! Email: support@groovehq.com