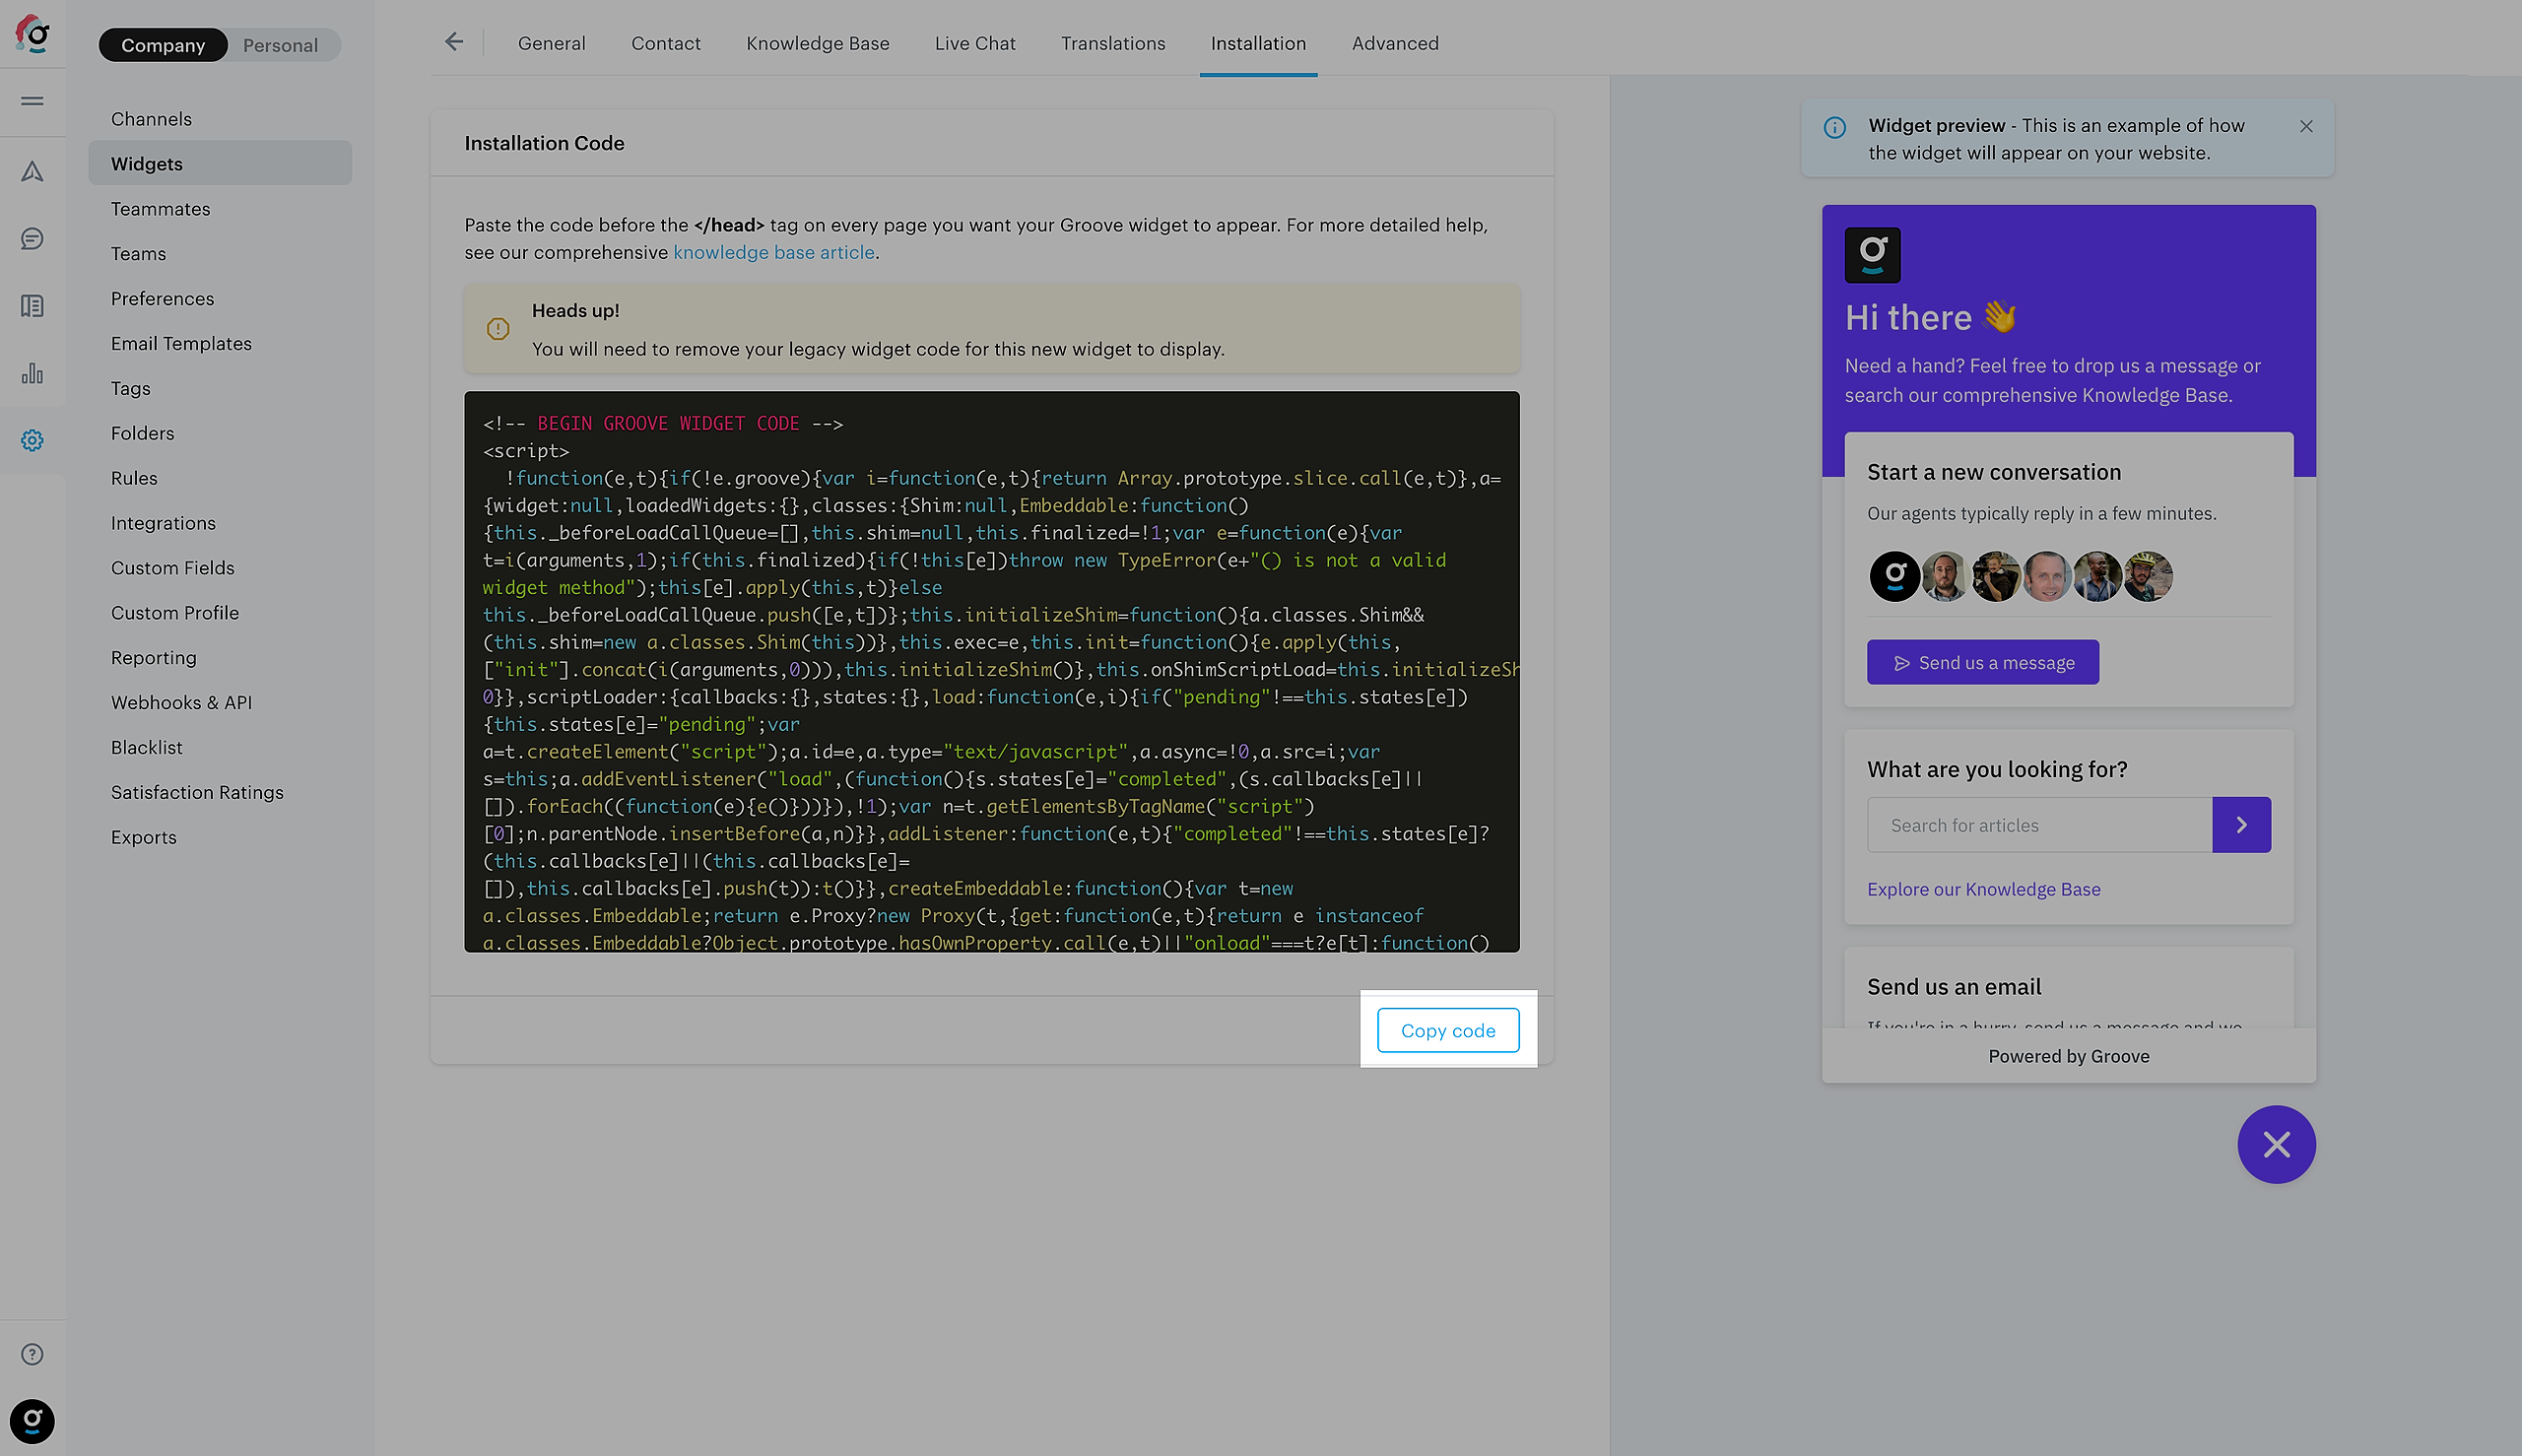
1. Copy the snippet from your widget's settings page
2. Open up Google Tag Manager, and click Add a new tag
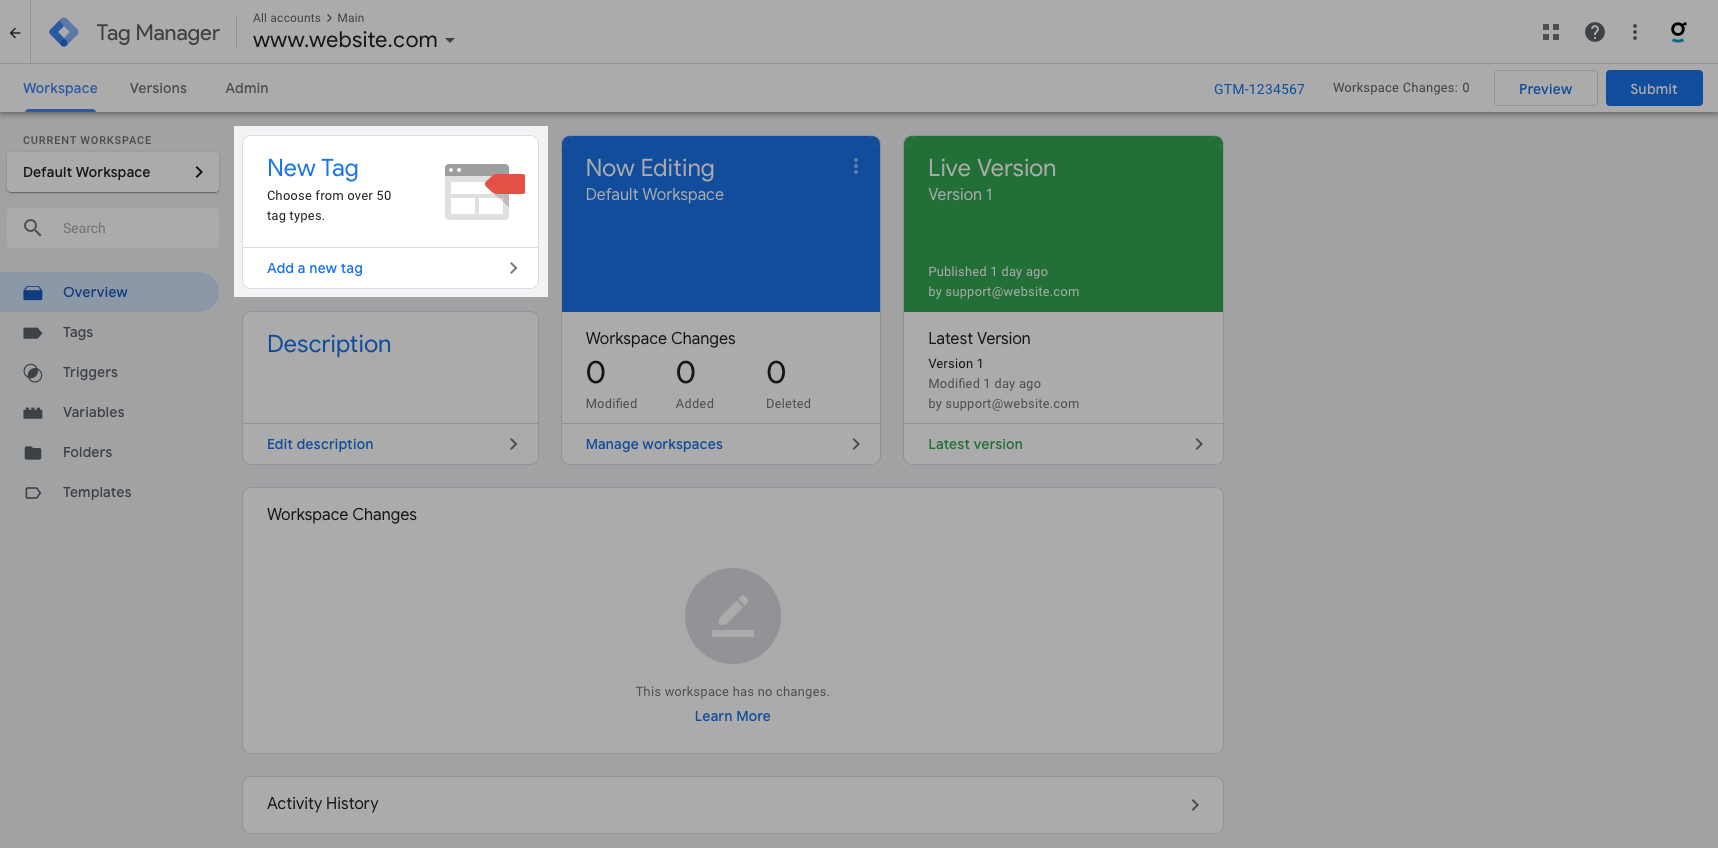
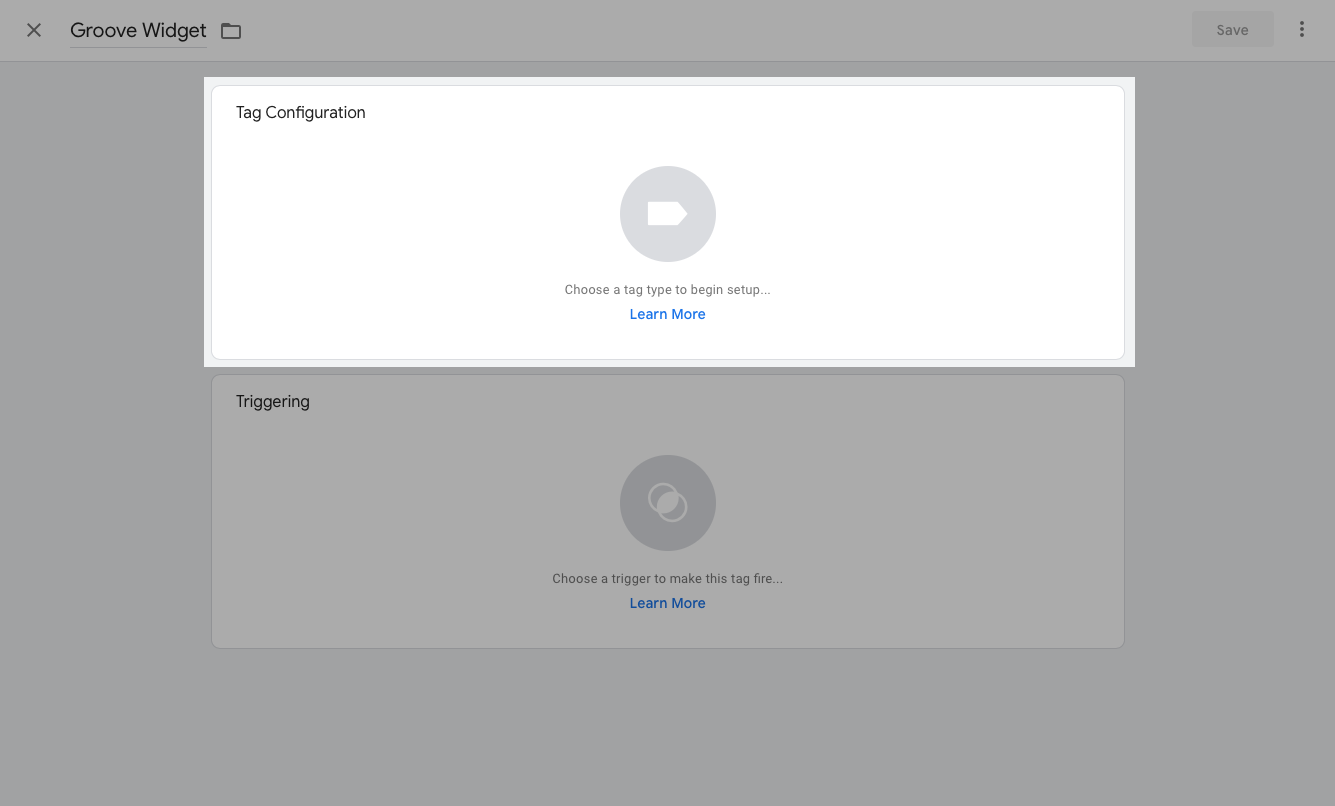
3. Give the tag a name (e.g. "Groove Widget"), and then click Choose a tag type to begin setup…
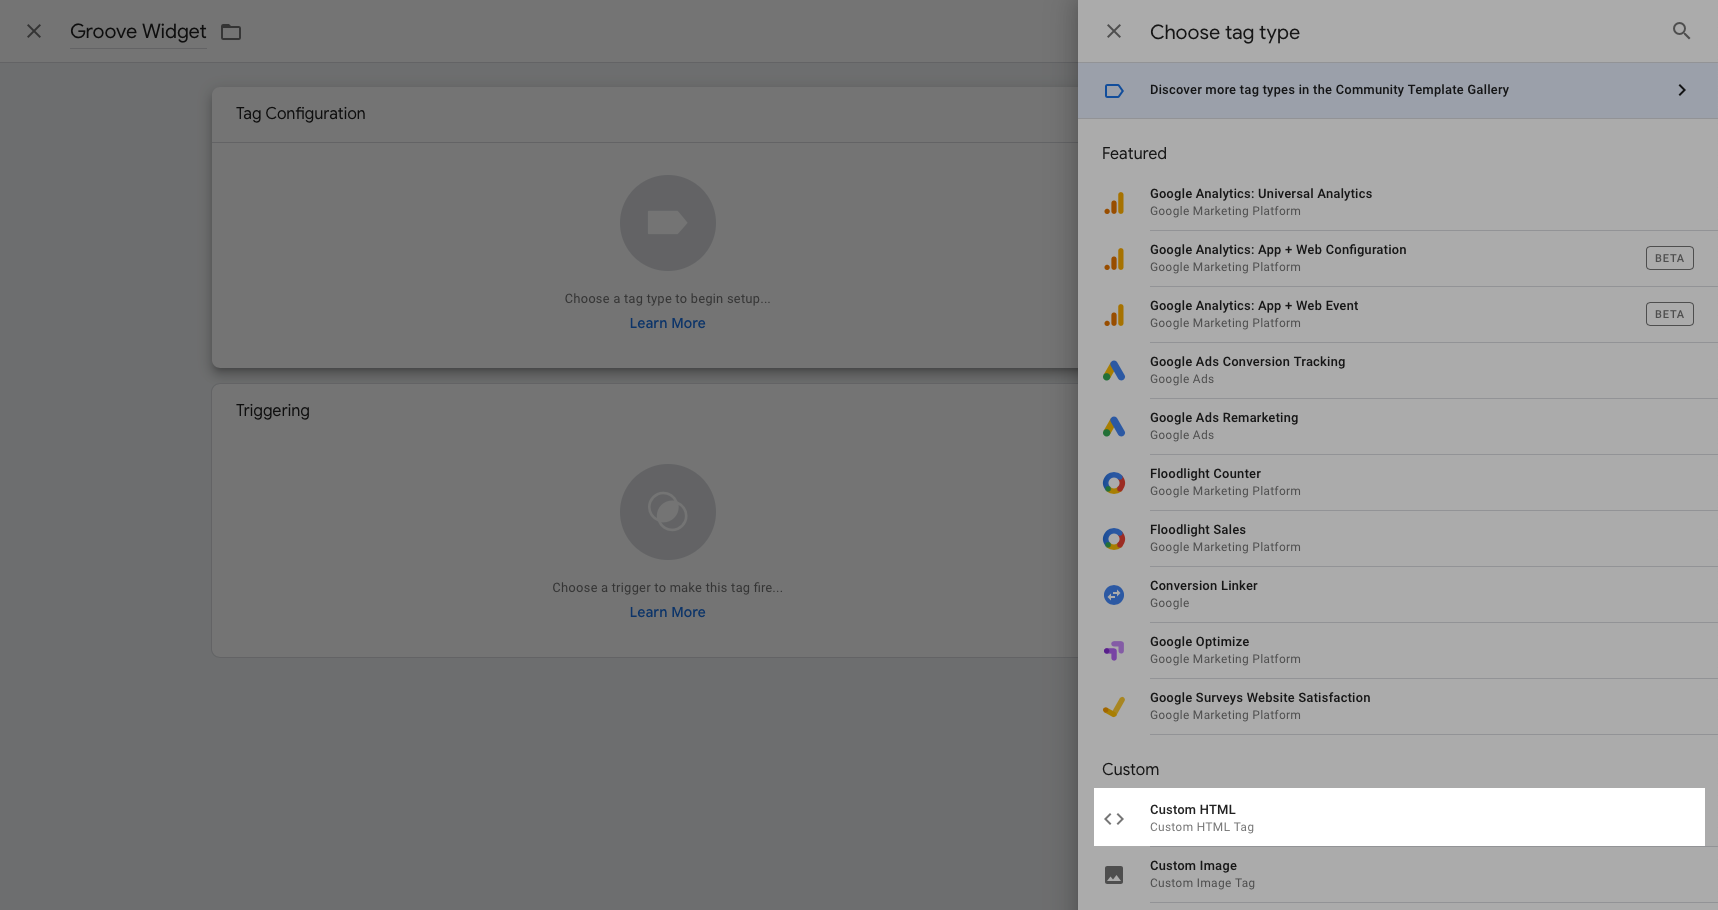
4. Select Custom HTML
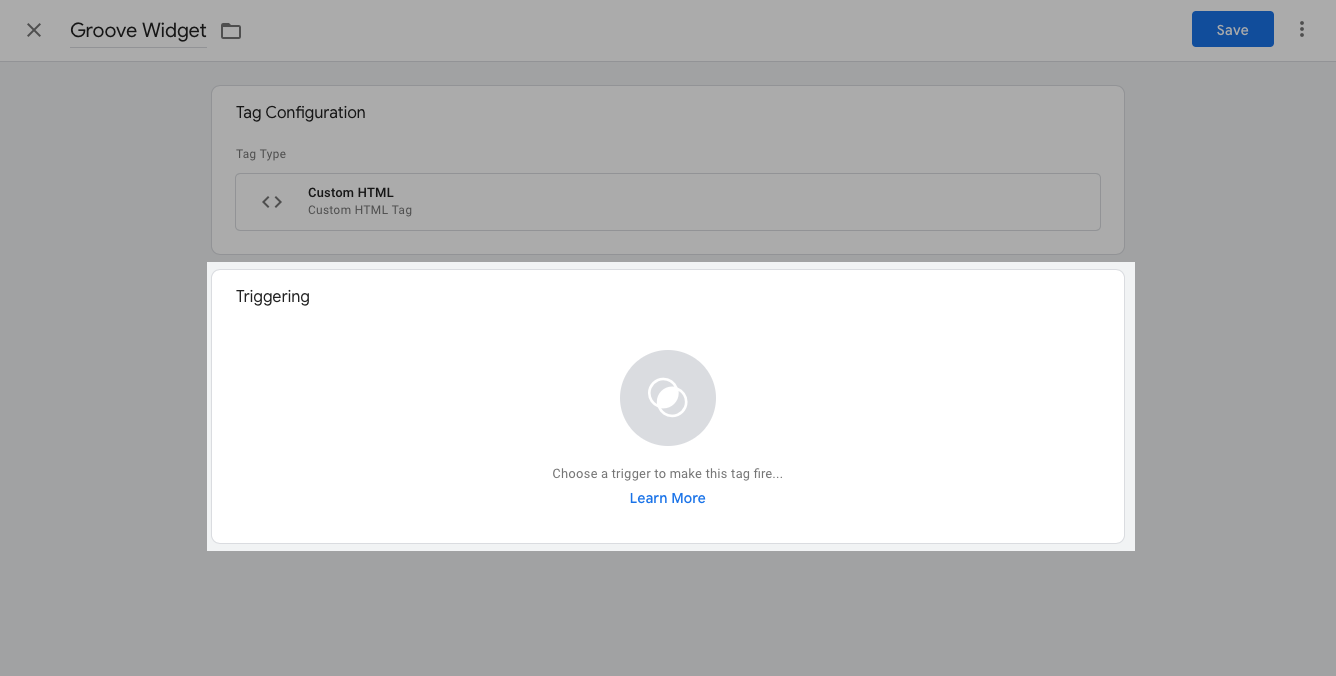
5. Paste in the previously copied HTML snippet, and then click Choose a trigger to make this tag fire…
6. Select All Pages, click Add, and then Save
7. Submit your changes, and then Publish your live environment