Instant Replies are prewritten answers to commonly asked questions from customers, also known as canned replies. They ensure consistent tone and language across customer interactions and enhance productivity.
Creating an Instant Reply
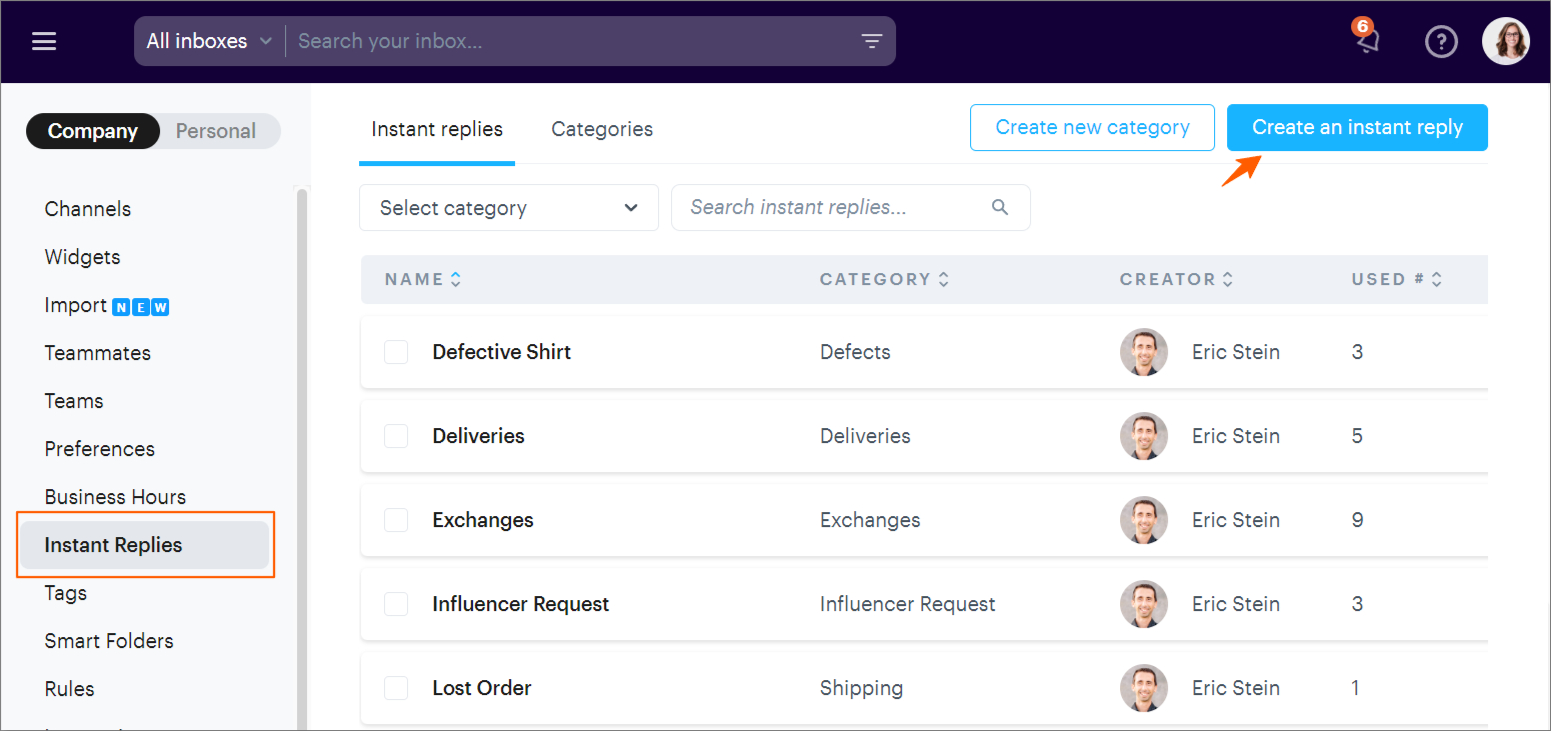
Navigate to Settings:
Go to Settings → Instant Replies → Create an Instant Reply.
Compose Your Reply:
Title: Give your reply a descriptive title.
Category: Select an existing category or create a new one.
Response: Compose your response in the text box.
Save Your Reply:
Click Create to save your instant reply.
Once saved, the instant reply is available for everyone on your team.
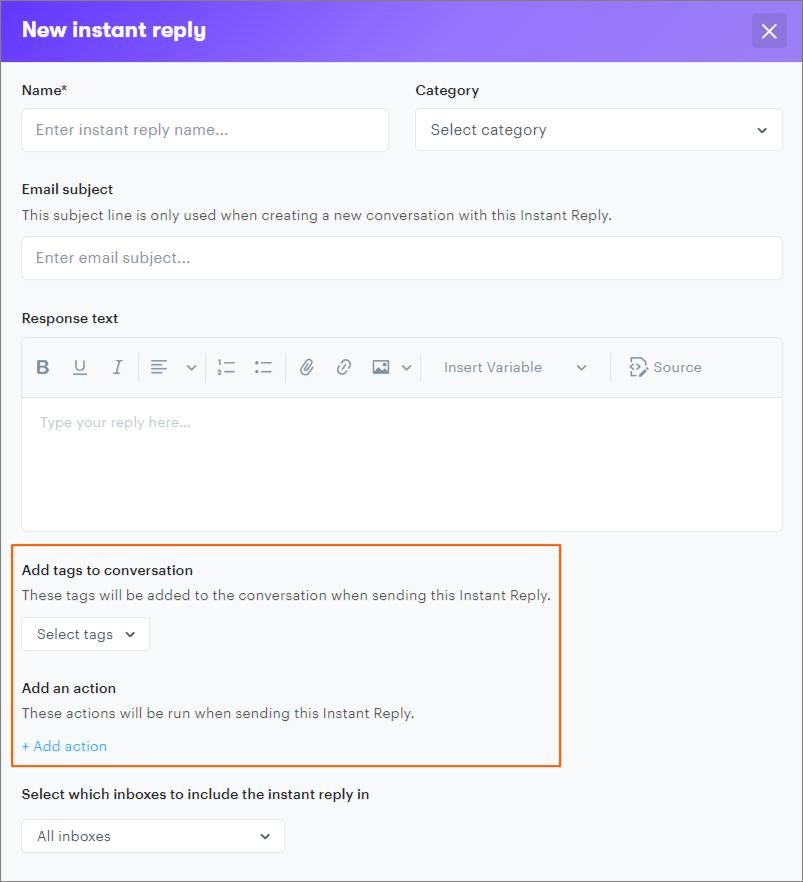
Advanced Instant Replies
If your billing plan includes Advanced Instant Replies, you can automatically add tags and actions to your instant replies for even more streamlined communication. Actions you can do include:
Changing the state (open/closed)
Assigning to a team or teammate
Setting the conversation to snooze
Adding/removing tags
Using Instant Replies
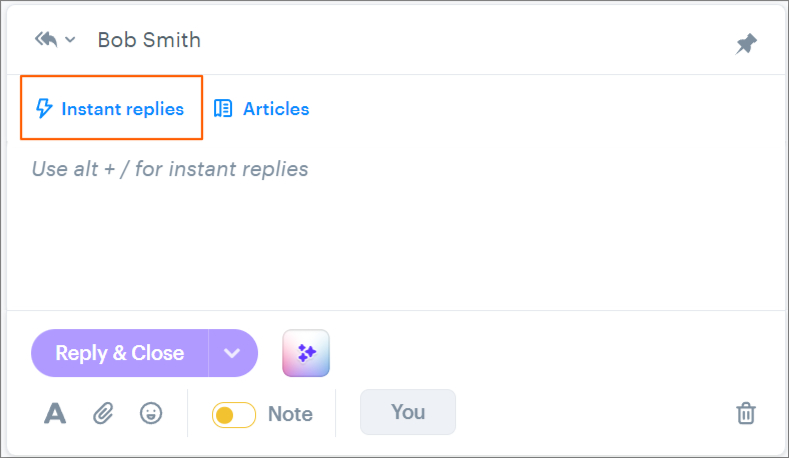
To insert an instant reply in your response:
Click Instant Replies in the top left corner of the reply editor.
Search by keyword or browse recently used replies.
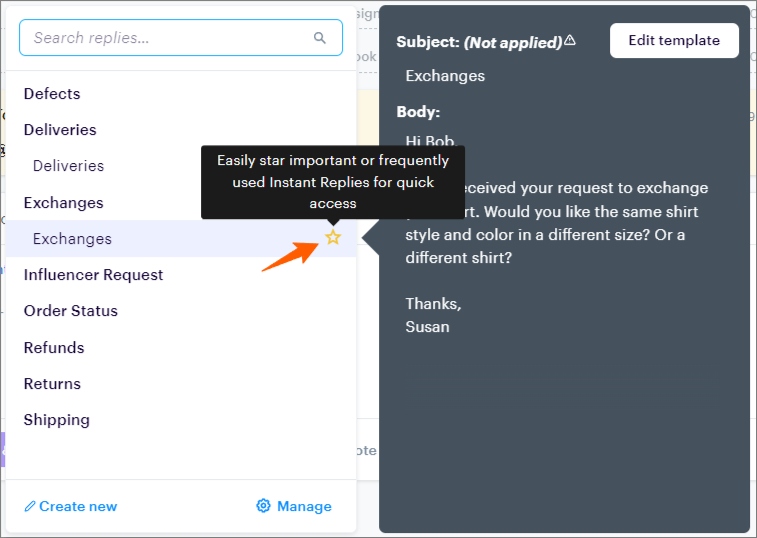
Favoriting Instant Replies
Star a frequently used reply to have it appear first in your list of instant replies for quick access.
Deleting Instant Replies
Admins Only: Only admins can delete instant replies. If you do not see the trash can icon, you likely have agent permissions and will need to ask an admin to delete the instant reply.
Instant Reply Shortcut
You can use a keyboard shortcut to quickly bring up your instant replies:
Mac:
⌘ + /Windows/Linux:
Alt + /
Note: Some keyboards require alternative shortcuts:
Czech:
Numpad
/+AltNumpad
/+Shift+Alt7+Alt7+Alt+Shift
Danish:
Alt+7Alt+Shift+7
This streamlined approach helps ensure you can respond to customer queries quickly and consistently!
How do we export our instant replies?
Please get in touch with our support team for assistance with exporting your Instant Replies. The exports are done in CSV format.