When setting up your Groove Knowledge Base subdomain, you can choose to use the Groove issued SSL certificate or you can use your own SSL certificate. If you would like to use your own SSL, you will need to follow the guide below to finish the setup of this.
To get started:
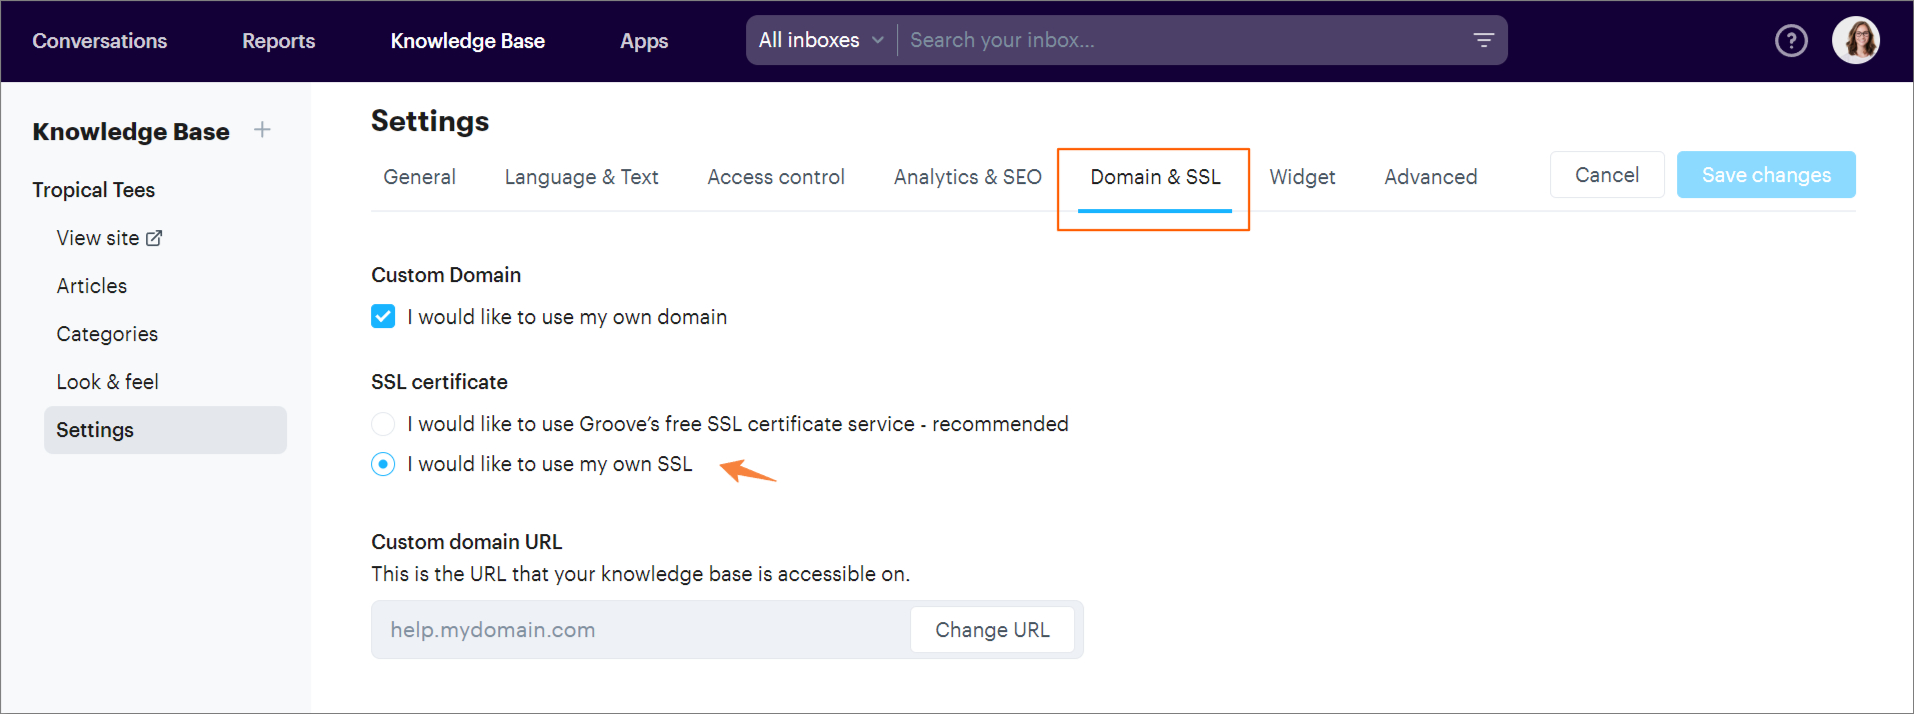
Go to Knowledge Base → Settings → Domain & SSL
Next, select "I would like to use my own SSL," type in your custom domain, and then click Save Changes
To add a custom domain you will need to create a CNAME record within your DNS provider's administration panel and configure it to point to Groove.
Note: When you create the record, the CNAME will be your new subdomain (help.yourdomain.com) and the CNAME will be the default URL for your Knowledge Base. In this example, the host would be help.acmecorp.com and the value would be acme-support.groovehq.com
Setting up with SSL With CloudFlare
Please follow the steps below and verify within Cloudflare. If you have questions on any of these steps, it would be best to consult with Cloudflare support so they can directly review your account.
Log in or create an account with CloudFlare and navigate to your dashboard
Make sure you’ve set up your CloudFlare nameservers
Go to the DNS section on the dashboard for your CloudFlare site and create a CNAME record per the steps outline above
Now go to Crypto section and make sure SSL is set to Full
On the same page, enable Always use HTTPS
Note: if you have the free plan with CloudFlare, it can take up to 24 hours to issue your certificate.
Setting up SSL with AWS CloudFront
Follow the steps below if you use AWS. If you have questions on any of these steps, it would be best to consult with AWS support so they can directly review your account.
Sign in to your AWS console and open CloudFront service and click Create distribution:
Under Web, click Get Started
Fill in the form fields as follows:
Origin Domain Name - Is the domain name of your Groove Knowledge Base URL shown under Settings → General; for example: yourkbsubdomain.groovehq.com
Viewer Protocol Policy - Redirect HTTP to HTTPS
Allowed HTTP Methods - GET, HEAD, OPTIONS, PUT, POST, PATCH, DELETE
Cache Based on Selected Request Headers - All
Query String Forwarding and Caching - Forward all, cache based on all
Alternate Domain Names (CNAMEs) - Is your custom domain, for example: help.groovehq.help
Custom SSL Certificate - Select AWS certificate for your custom domain
Finally click Create Distribution
Wait until distribution gets to Enabled state
Finally, you can go ahead and point your custom domain in AWS Routes 53 to the created CloudFront distribution
Setting up SSL with Nginx/Apache
To use your own SSL certificate and set up your own Termination SSL proxy with Nginx or Apache Web server, use the sample configurations below:
Nginx
server { listen 443 ssl; # Set your own custom domain here server_name help.yourdomain.com; ssl_certificate /path/to/your/fullchain.pem; ssl_certificate_key /path/to/your/privatekey.pem; location / { # "set" enables nginx to follow dynamic IPs set $groove "https://yourkbsubdomain.groovehq.com"; proxy_set_header Host $host; proxy_pass $groove; }}
Apache
<VirtualHost *:443> # Set your own custom domain here ServerName help.yourdomain.com SSLEngine on SSLProxyVerify none SSLProxyEngine on SSLProxyCheckPeerCN off SSLProxyCheckPeerName off SSLProxyCheckPeerExpire off SSLCertificateFile /path/to/your/fullchain.pem SSLCertificateKeyFile /path/to/your/privatekey.pem ProxyPreserveHost On ProxyPass / https://yourkbsubdomain.groovehq.com/ ProxyPassReverse / https://yourkbsubdomain.groovehq.com/</VirtualHost>