The Groove CRM allows you to create any number of custom fields for both your contacts and your companies. Other than the object you're creating the field for there's no difference in how they work or how it's done, so below you'll find instructions for both contacts and companies combined.
For managing the field categories see Managing Field Categories.
Field Types
There are 7 different types of field. Each will have its own way of editing the values and might be displayed differently, and depending on what you need one might be better suited than the other.
Address
Consists of street address, street address 2, city, state, postal code, and country fields when edited.Date
Shows as a formatted date, and consists of year, month, and day fields when edited.Dropdown
Shows as a single line of text, and consists of a customizable set of options when edited.Link
Shows as a clickable link, and consists of link and text fields when edited.Number
Shows as a plain number.Single line
Shows as a single line of text, and is best suited for short text values.Multi line
Shows as multiple lines of text, and is best suited for larger pieces of text.
Adding a Company Custom Field
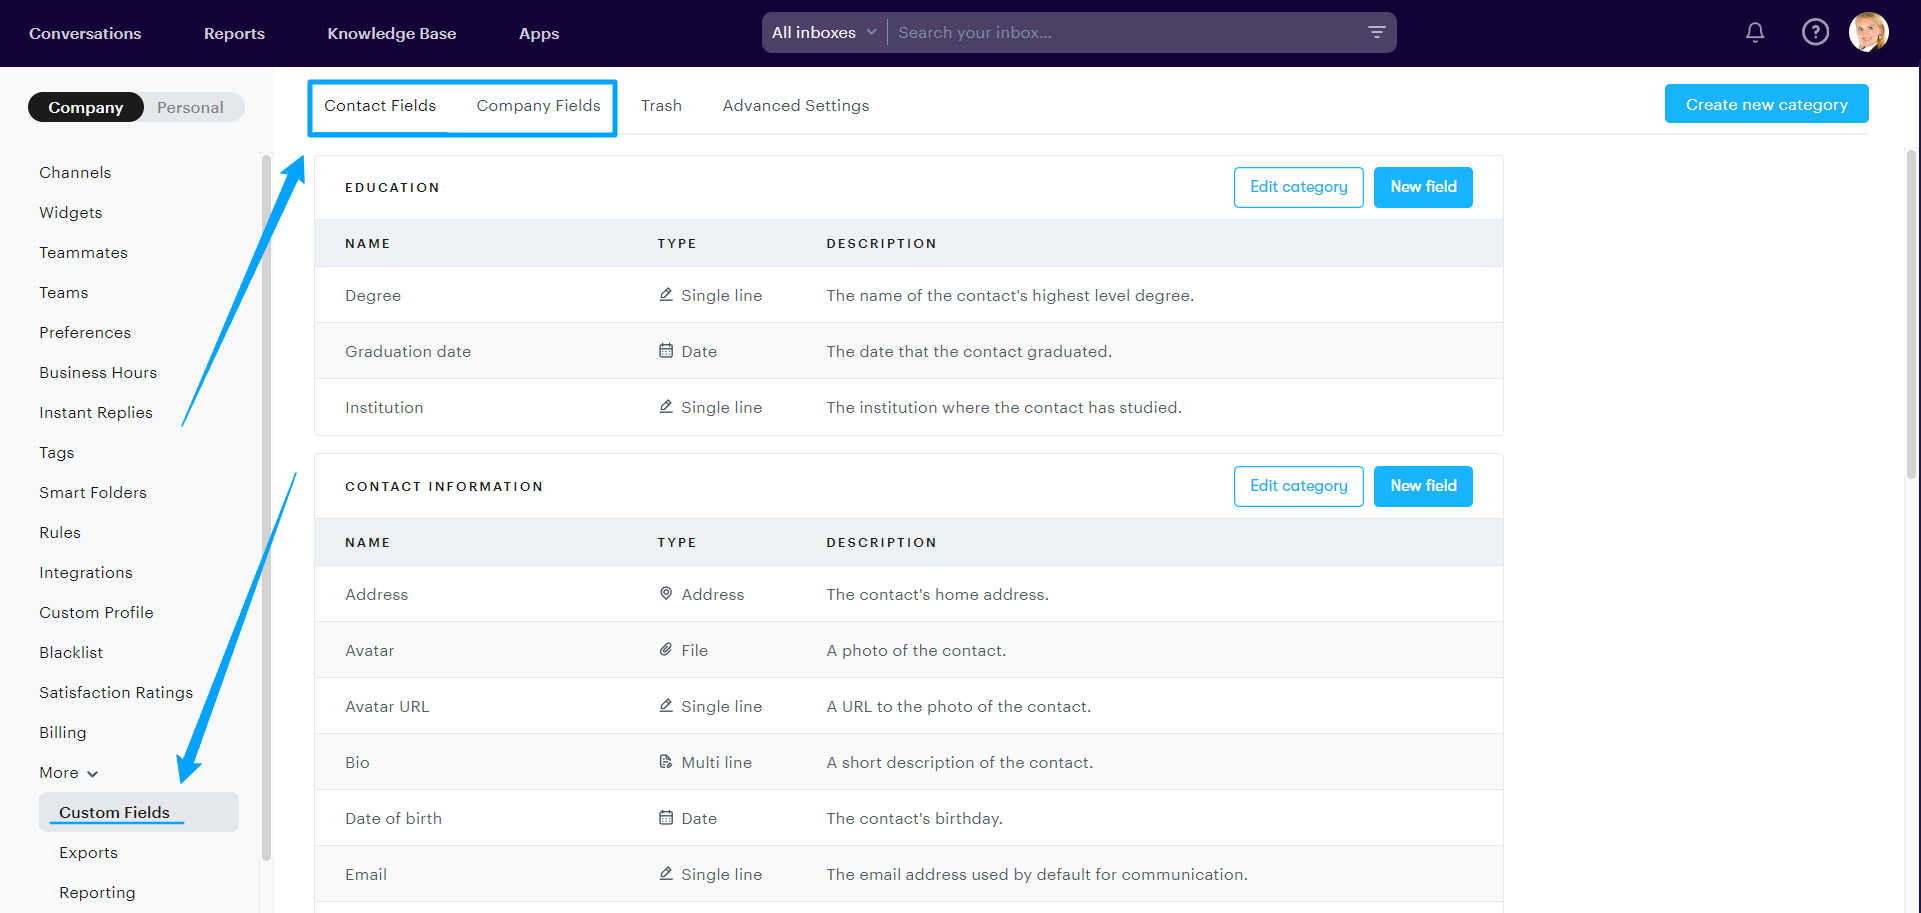
To add a custom field, go to Settings → Company → More → Custom Fields. Next, go to either the Contact fields or Company fields tab (across the top). There, look for the category that you want to add a new custom field, and click the button saying New field.
A modal will show up, asking you to fill in a few fields.
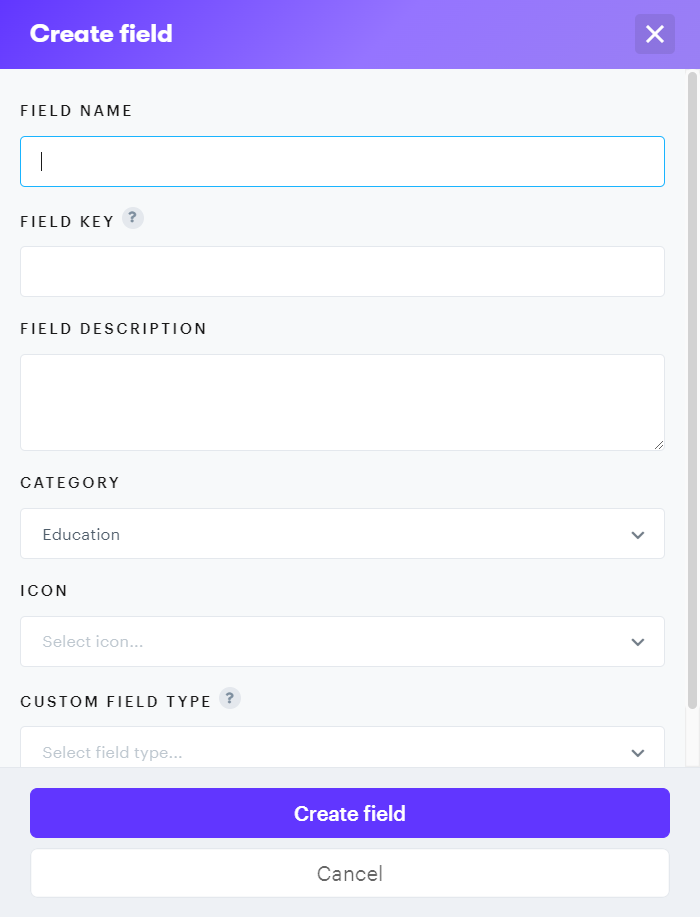
Field name
The name of the field that you will see in the sidebar.Field key
The key for the field, used as an immutable identifier. This can't be edited once the field is created.Field description
An optional description of the purpose of the field.Category
The category under which you want to show the field.Type
The type of the field (see above for more information on that). This can't be edited once the field is created. When selecting "Dropdown", you'll be able to set the dropdown options as well.
Click Create field, and you're all set!
Editing a Company Custom Field
To edit a custom field, go to Settings → More → Custom Fields and then to either the Contact fields or Company fields tab. There, look for the field that you want to edit, and click on the edit button that shows up on the right side of the field row when hovering over it.
You won't be able to edit the "Field key" and "Type", but the rest can be changed, including the dropdown options if the field is of type "Dropdown".

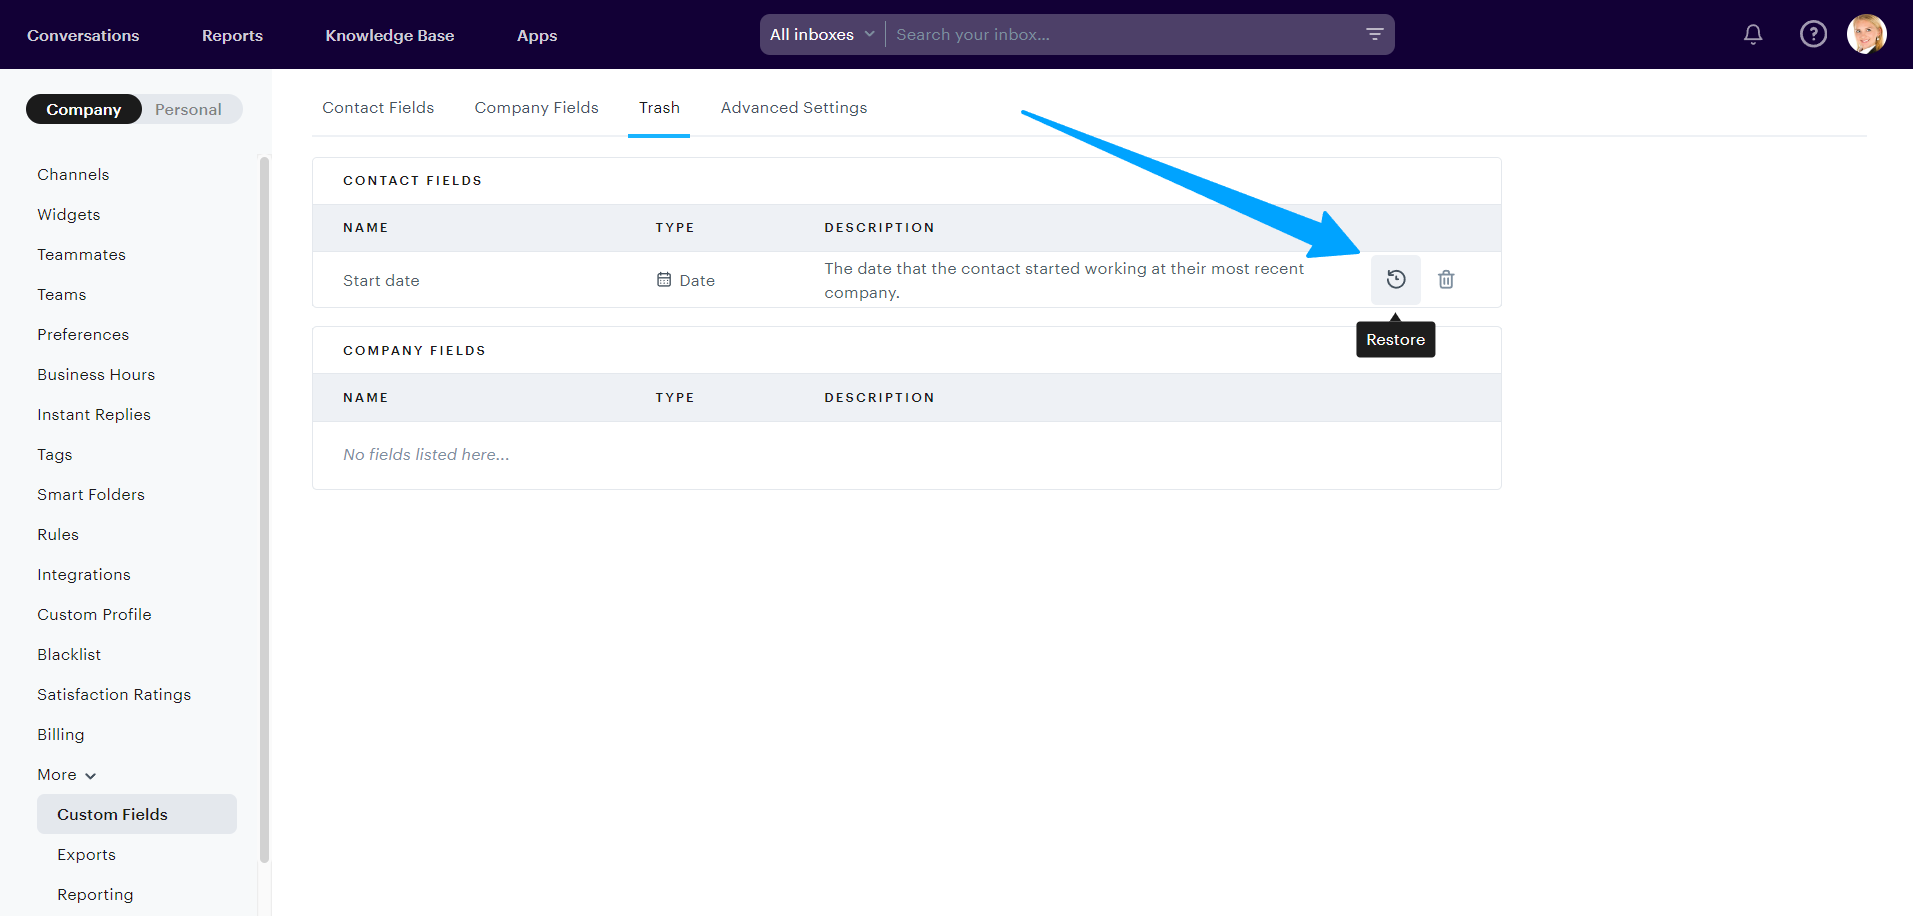
Restoring a Company Custom Field
To restore a deleted field, go to the to the Trash tab. There, look for the field that you want to restore, and click on the restore button on the right side of the field row.