Do you plan to use Groove's shared SMTP server's (powered by Amazon SES) to deliver your emails? If yes, you will need to complete the steps below to allow for increased deliverability to your customers.
Note: If you had previously set up DKIM and SPF records for your SMTP sending, you will need to migrate to the newer improved CNAME version below.
Getting started
Adding CNAME records to your DNS validates your sending email address from Groove, improving your email deliverability and white labeling your emails.
This is done by making your email deliverability compliant with the DMARC authentication standard, adding an additional layer of security against potential hackers and spoofing of your domain.
This feature is only available to Inboxes making use of Groove's SMTP servers. If you have connected your Inbox with Gmail OAuth, you will need to configure your own DMARC setup within the Google's admin section.
Step 1: Login to your DNS provider
Locate the DNS control panel for your domain or contact your DNS hosting company to get assistance in finding that.
Step 2: Find Your CNAME Records
Next, in Groove, you need to go to the Inbox you would like to add the CNAME records for:
- Go to Settings → Channels → Email
- Select which inbox you would like and click the pencil icon to edit
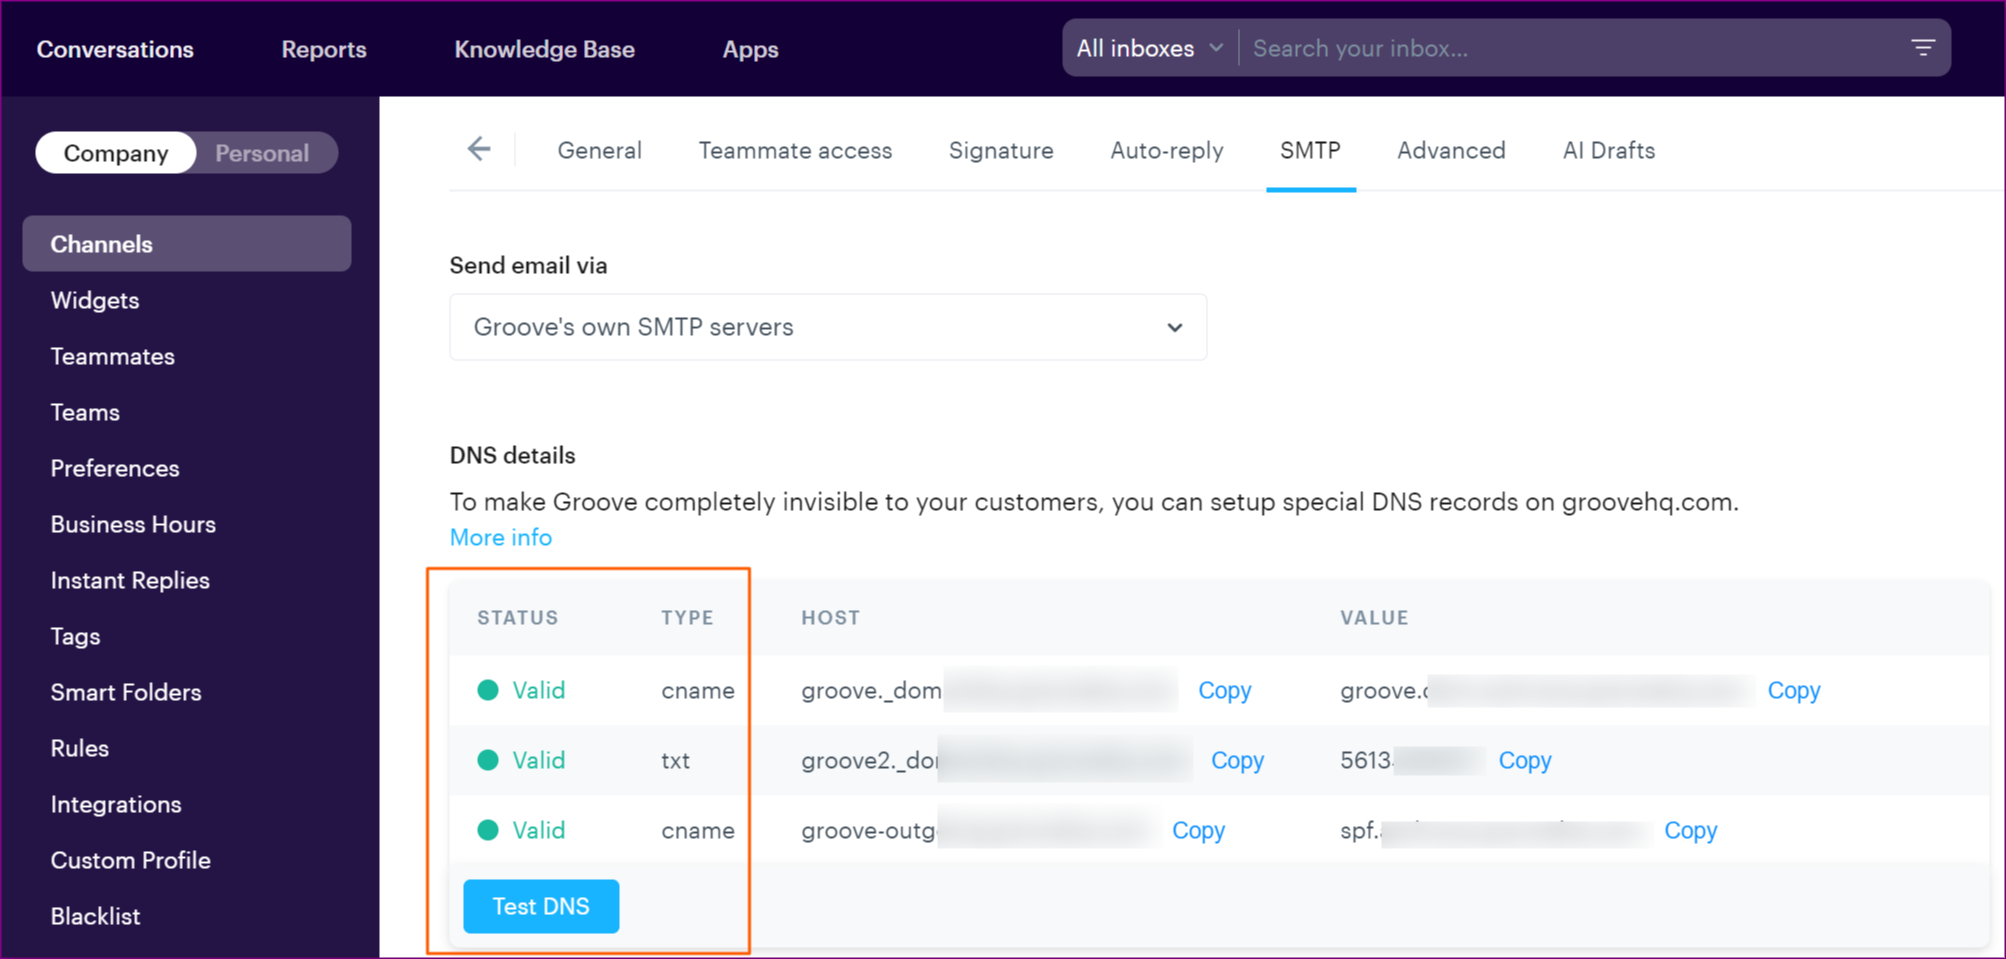
- Go to the SMTP configuration tab, you will see the 2 CNAME records and 1 TXT record that you will need to add to your DNS
Step 3: Adding CNAME records in your DNS provider
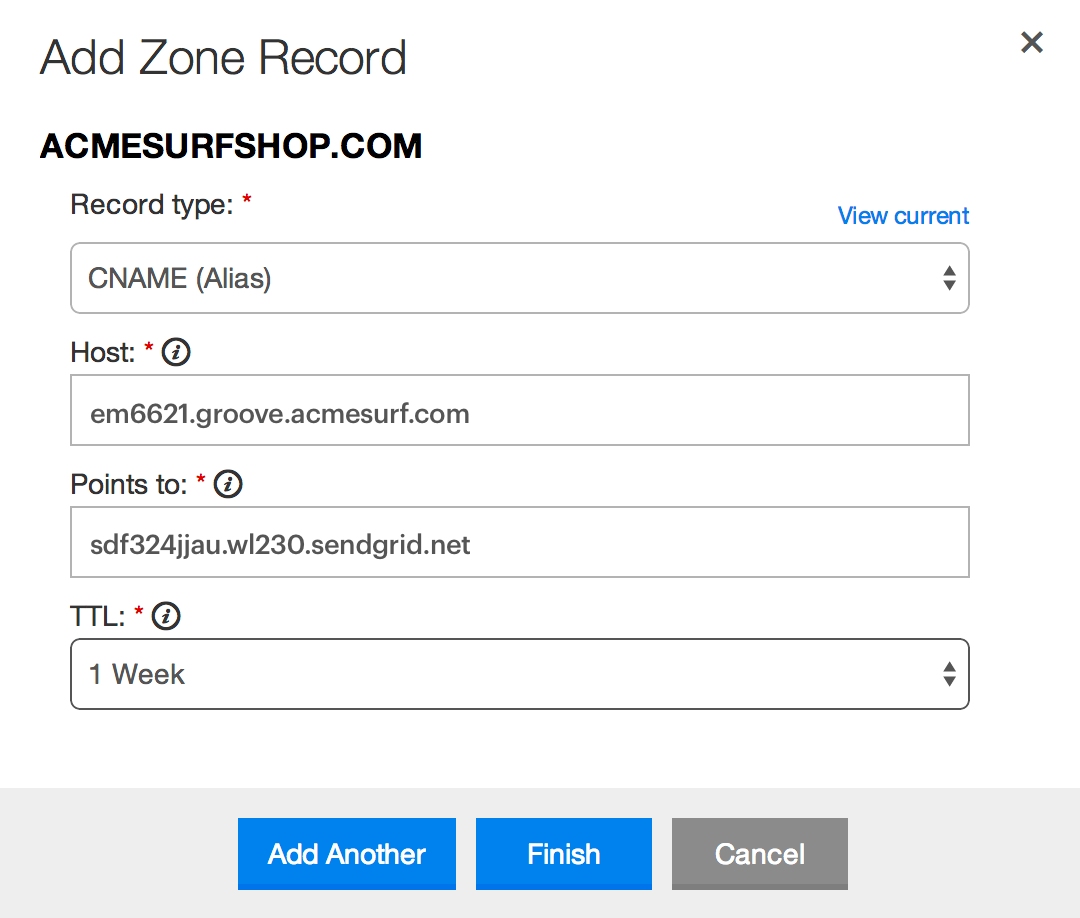
Next, you'll need to create the CNAME records within your DNS provider's administration panel and configure it to point to your Groove host. Each of the CNAME records will need to be added individually. Please refer to your DNS providers documentation for exact steps to add these records.
NOTE: Some providers only require the subdomain when adding the CNAME record, and not the domain name to be included. When copying the record from Groove, you may need to remove your domain name. Example: instead of groove._domainkey.yourdomain.com, you would just have groove._domainkey as your subdomain in your DNS provider. Google Domains is an example provider that requires this, as well as a period "." at the end of the pasted value.
Here is an example of adding a CNAME record to a DNS provider - a TTL (Time To Live) of 3600 seconds (1 hour) is perfectly fine:
Step 4: Checking Your New DNS Settings in Groove
Go back to Groove and to your Inbox and SMTP tab. Here you will be able to test that your CNAME records have published. Just under the CNAME records listing is a "Test DNS" button that will show you if the records are set up correctly or not. For each CNAME record there are 2 possible states:
- Invalid: The records are set up incorrectly or haven't been setup
- Valid: You're good to go!
If you are getting an Invalid message, please verify with your DNS provider that the new records are published. In some cases, you may need to escalate this to verify with your provider.
Groove will run a verification daily at midnight Pacific Time to check that your DNS is configured properly. If there is an issue detected, your white labeling will be disabled.
Other DNS providers:
Below are links to some popular providers' help pages on CNAME or DNS. If you don't find your provider listed here, need extra help, or are not sure how to log in to your DNS provider account, just contact their support. The DNS provider's support team can help you out if these articles don't do the trick!
- Google: Adding A or CNAME record
- Cloudflare: Create CNAME Records at Cloudflare to Work With Help Scout
- GoDaddy: Domains Help: Add a CNAME record
- Wix: Adding or Updating CNAME Records in Your Wix Account
- Namecheap: How to Create a CNAME Record For Your Domain
- Network Solutions: How Do I Manage DNS and Advanced DNS Records?
- DNSMadeEasy: CNAME Record
- Hover: Managing DNS records
- Rackspace: Manage DNS records in the MyRackspace Portal
- Bluehost: What Is A CNAME - How To Create & Edit CNAME
- WordPress: Add a New DNS Record


