Please note: this feature is only available (to Owner and Admin users) on paid plans and not available to trial accounts.
What is an Auto-Reply?
When a customer sends you an email, Groove will send an auto-reply message to the customer immediately confirming receipt of their email.
This auto-reply will only trigger on the first message of a new conversation—if the customer is replying to an existing conversation, the auto-reply will not trigger multiple times.
Enabling Or Editing The Auto-Reply
By default, Groove does not turn on an auto-reply when a new mailbox is created.
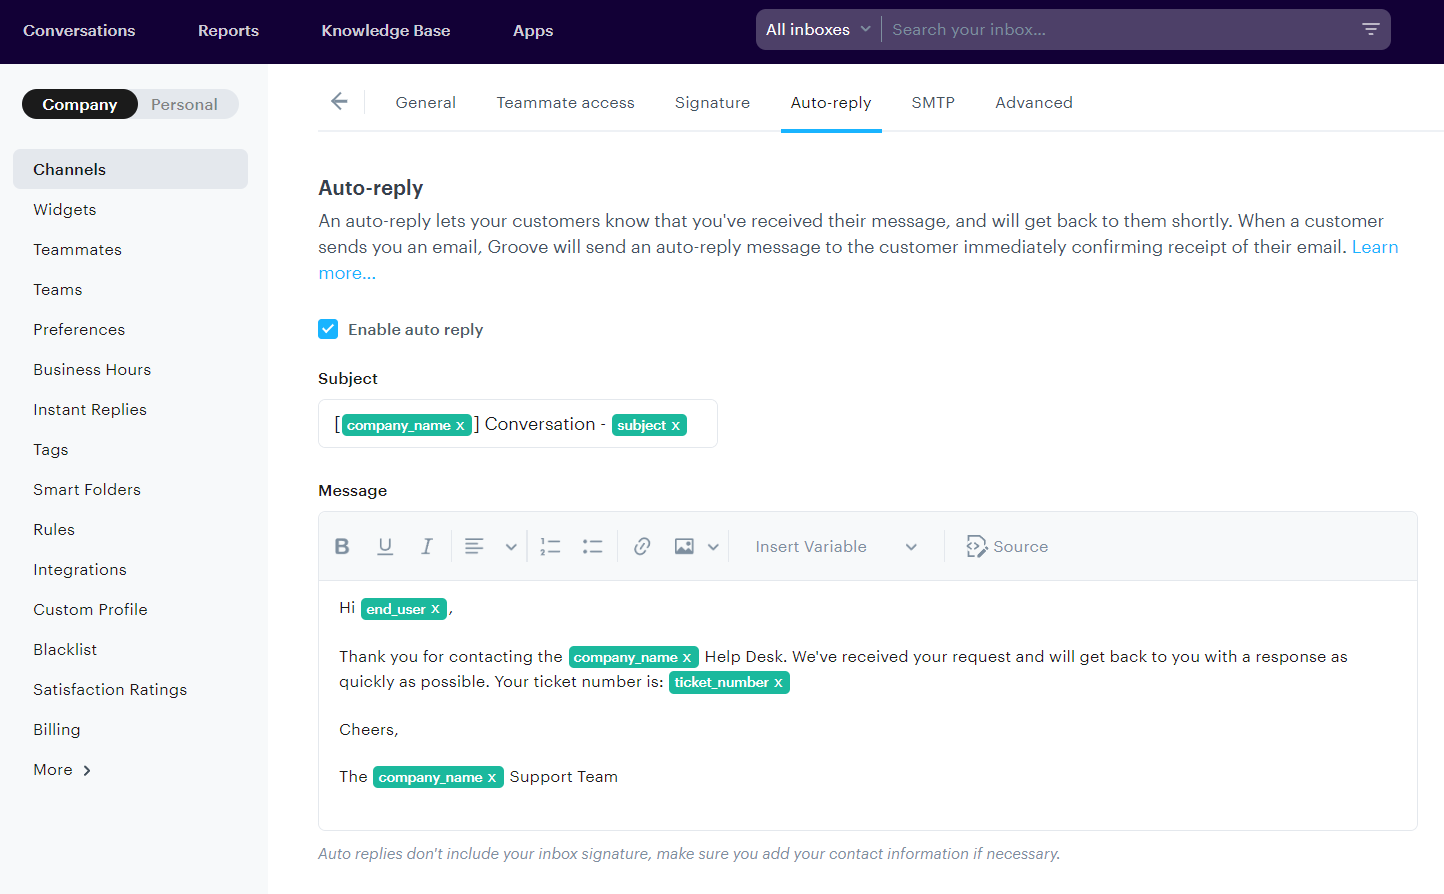
To add or edit the auto-reply message, go to your Settings → Company → Channels, then click the pencil icon of the inbox you want to edit, and navigate to the tab Auto-reply, then check Enable auto reply.
Groove starts you off with a standard reply. You can edit the reply and make any changes to the message.
Auto-Reply Variables
A selection of variables are supported in both the subject and body of your auto-reply message. These variables will automatically insert certain details into your auto-reply message whenever it triggers.
Name | Variable | Description |
|---|---|---|
Conversation subject |
| Inserts the subject line of the customer's email |
Conversation number |
| Inserts the conversation number |
Conversation contact full name |
| Inserts the first and last name of the customer |
Conversation contact first name |
| Inserts the first name of the customer |
Conversation contact last name |
| Inserts the first name of the customer |
Conversation contact company name |
| Inserts the customer's company name |
Conversation contact email |
| Inserts the customer's email |
Agent full name |
| Insert the agent's full name |
Agent first name |
| Insert the agent's first name |
Agent last name |
| Insert the agent's last name |
Conversation comment |
| Inserts the body content of the customer's message |
Organization name |
| Inserts the organization name from your account settings |
Mailbox name |
| Inserts the mailbox name |
Mailbox email |
| Inserts the email address of the mailbox |
Once you've filled in all the details, remember to click on the Save changes button when you’re finished.
Auto-reply not working?
Sometimes you may have users sending in mails that contain headers that prevent auto-replies, for example:X-Auto-Response-Suppress: DR, OOF, AutoReply
If you view the raw email (top right corner of a conversation → view RAW email), you can hit CTRL + F and search for "Response" to see if this may be the case.