The Shopify integration brings all the most used features from Shopify right into Groove. It allows you to:
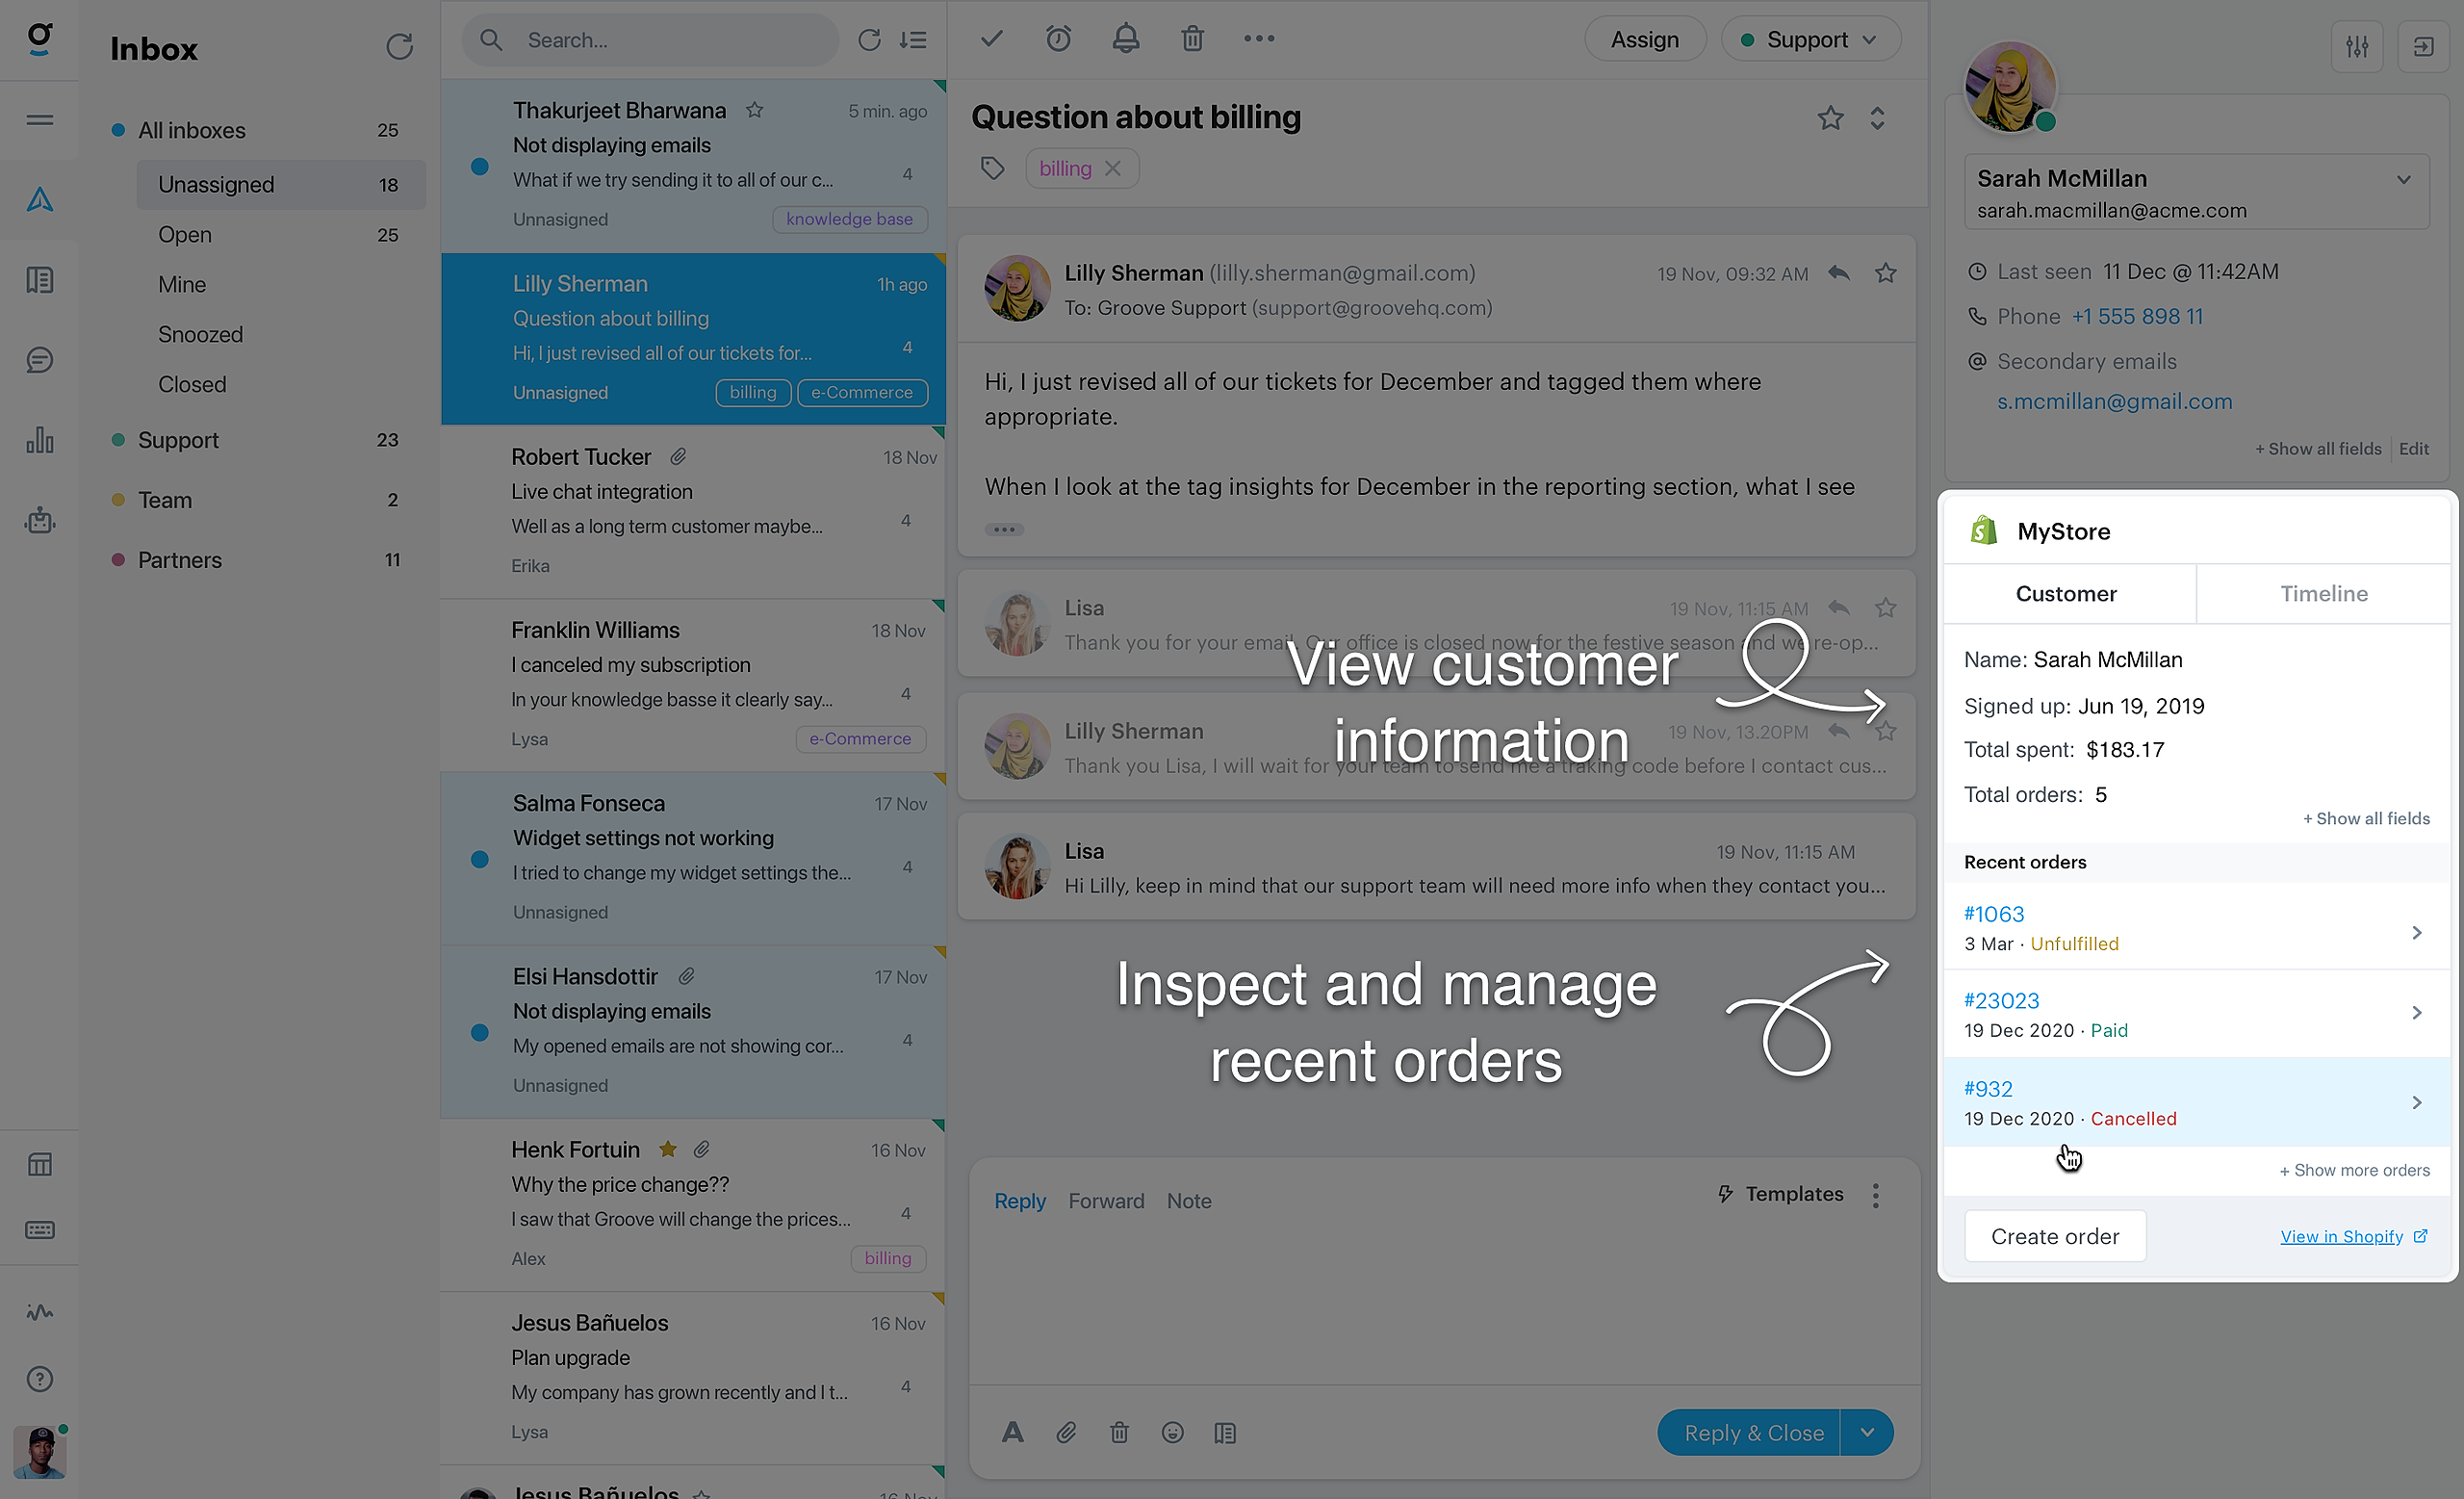
View customer data in the sidebar, along their recent orders and their timeline
Inspect order details for their recent orders, and manage their orders by cancelling, duplicating, or refunding it
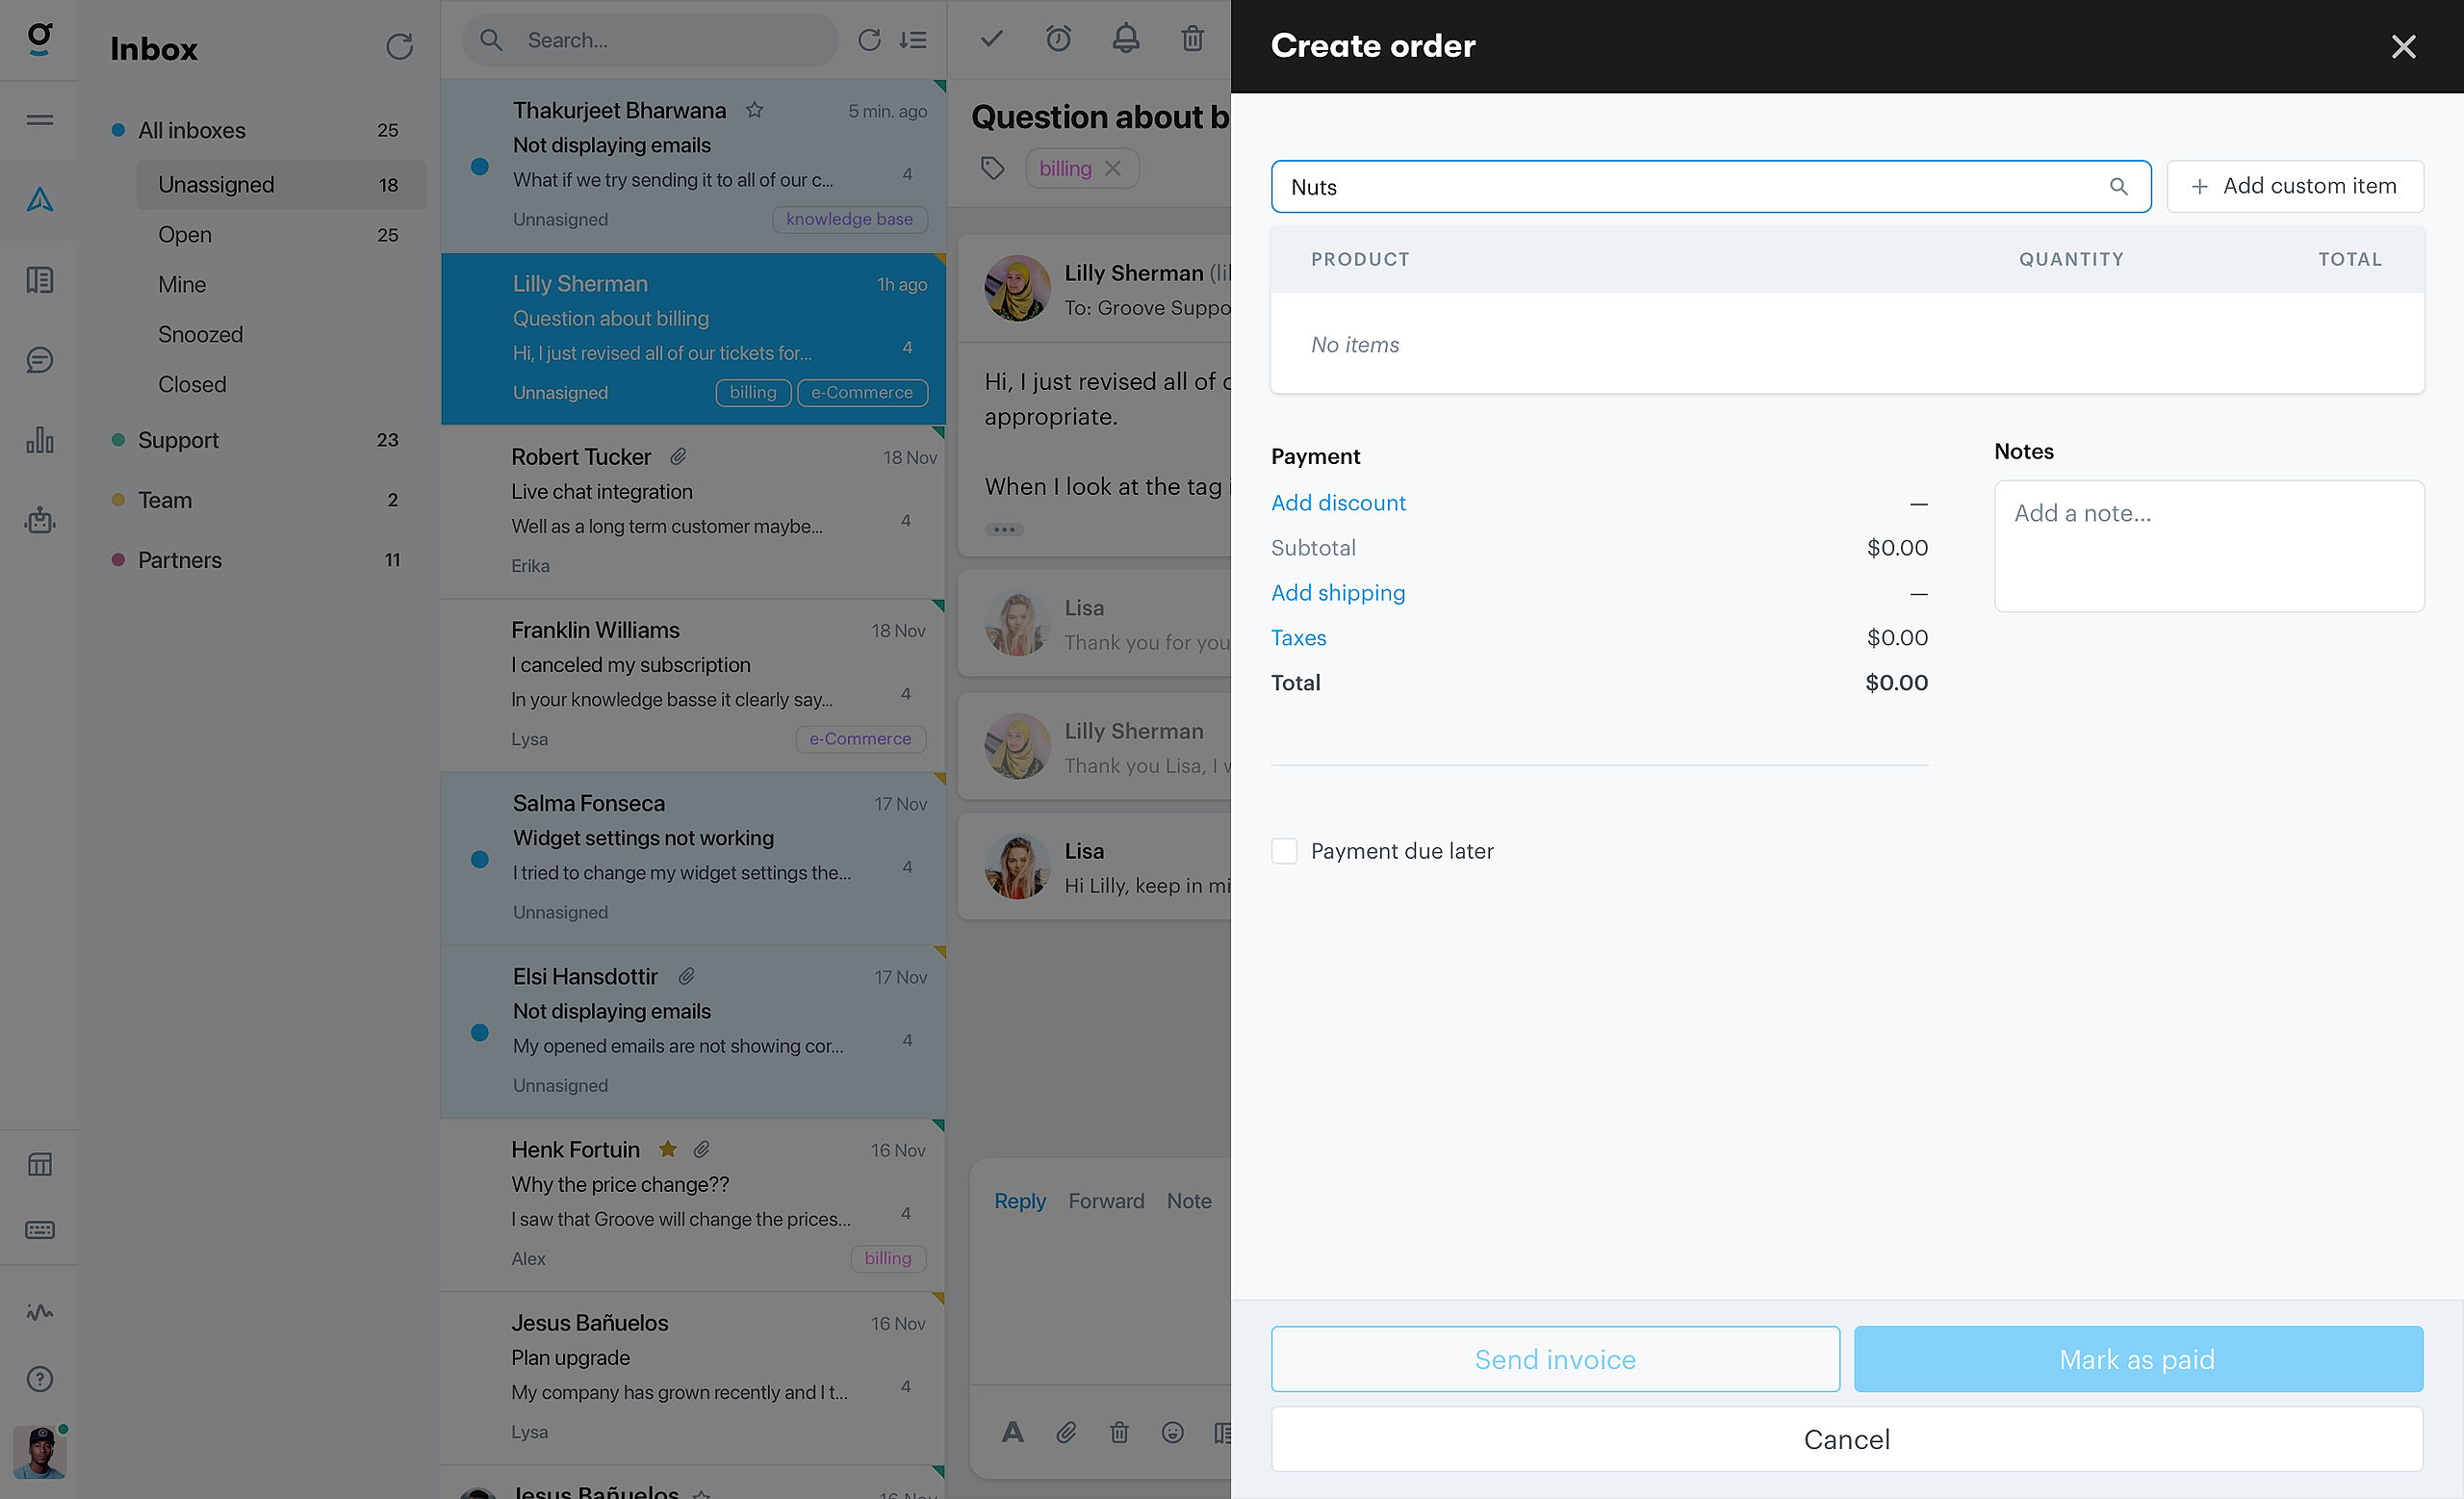
Create new orders, including the ability to preview and send invoices
Super note: The integration is free to use. The prices listed on the Shopify App Store listing are for new Groove signups coming from Shopify, and don't apply if you already have a Groove account when installing the integration.
Adding a Shopify Store
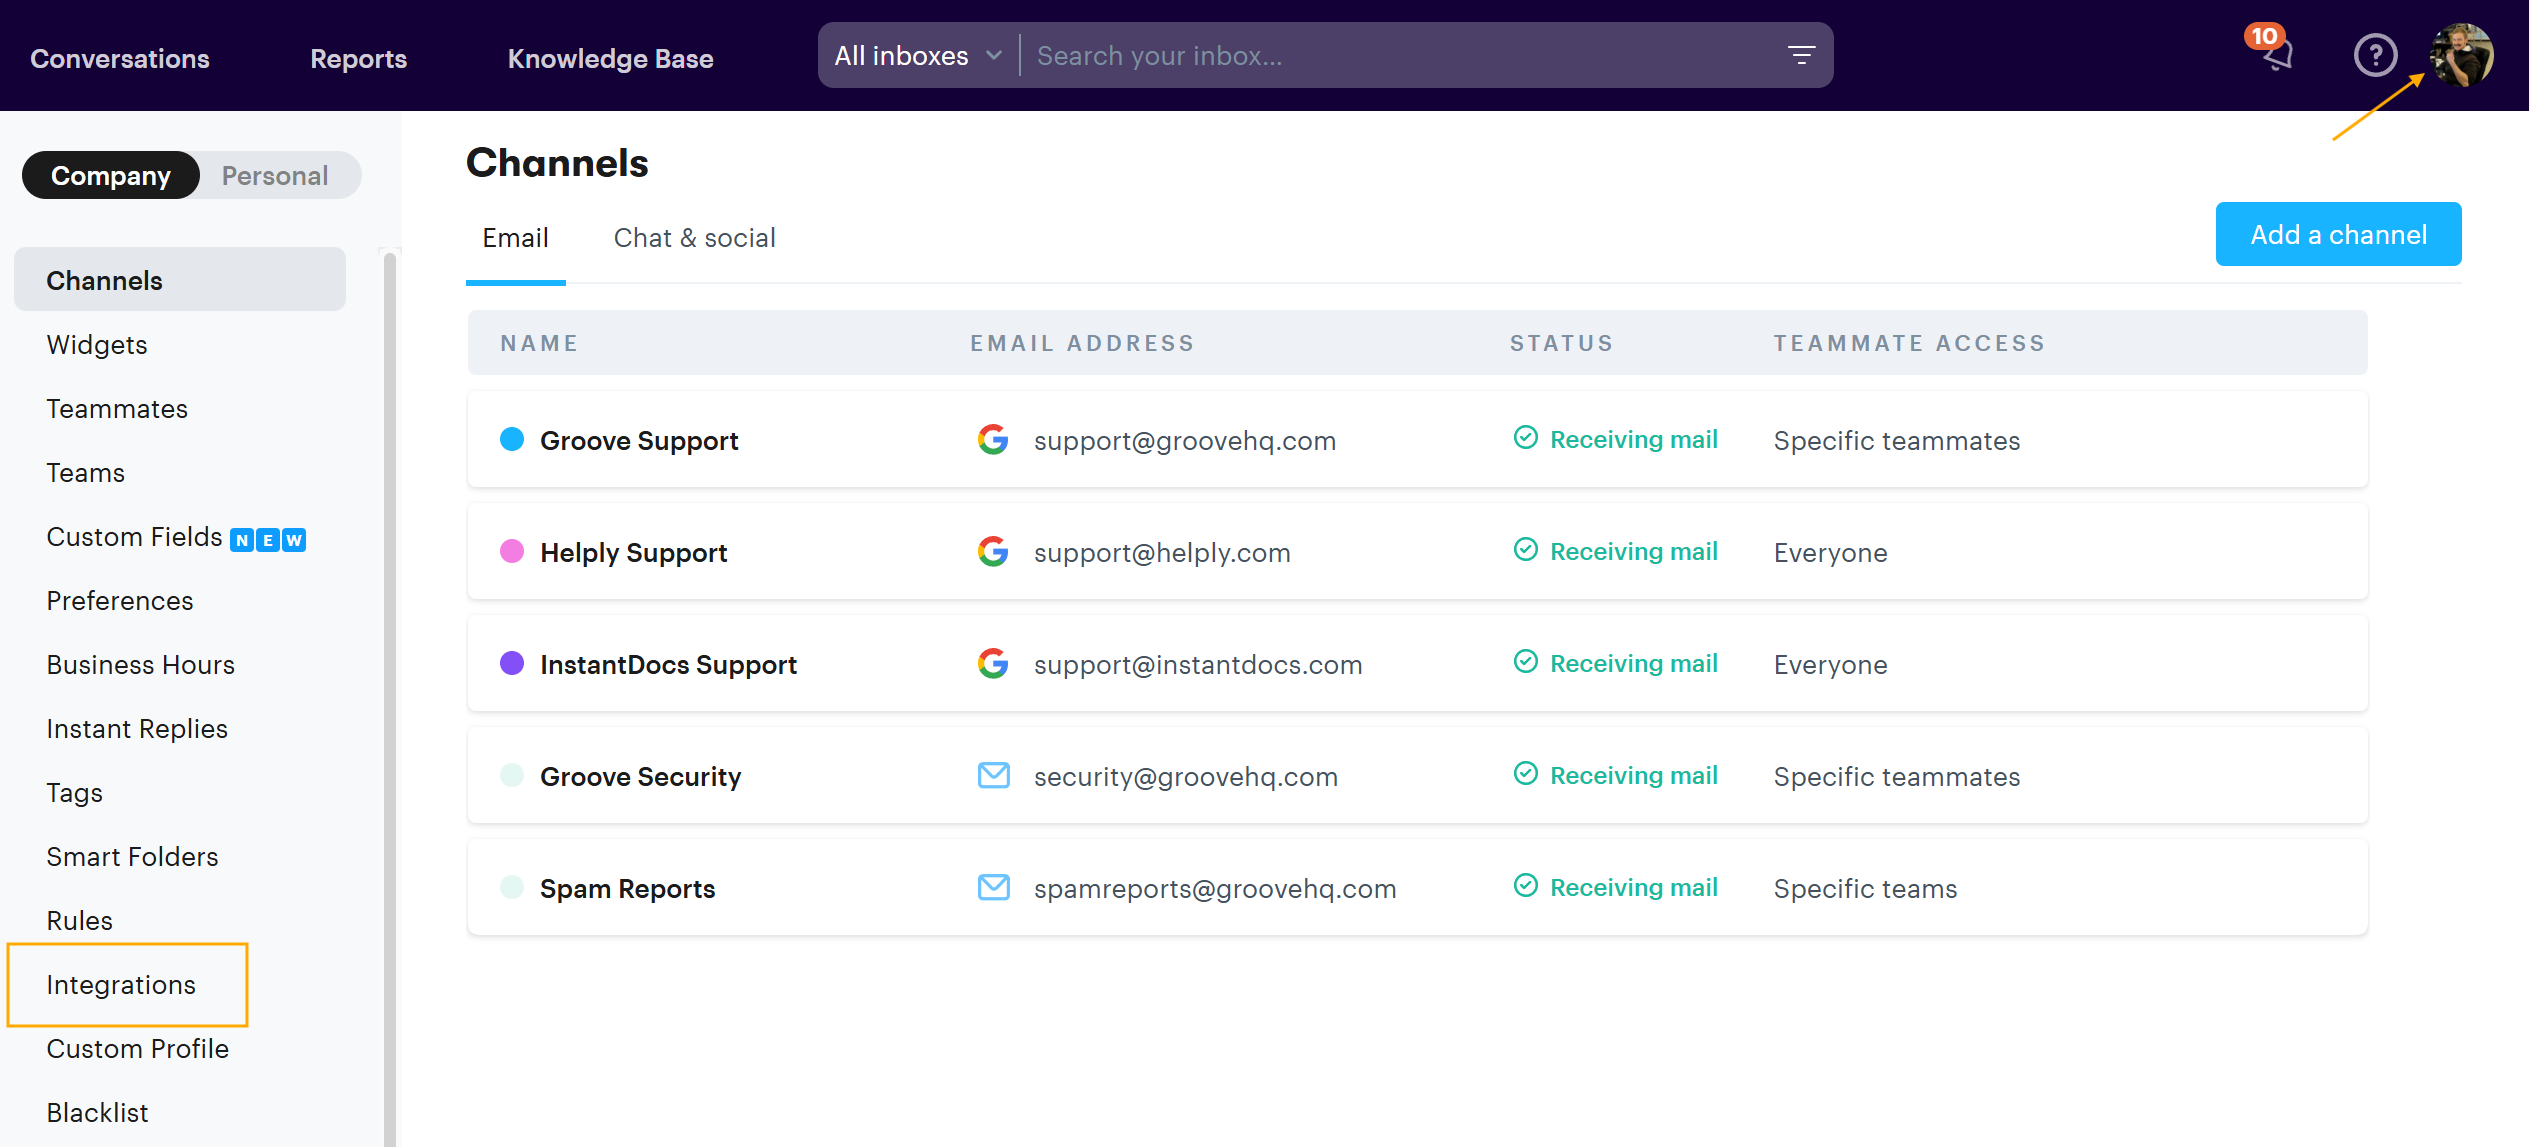
To add the integration to your account, go to your account Settings → Integrations:
You'll be redirected to the listing on the Shopify App Store, where you'll need to click Add app. If you're not already logged into Shopify you'll be need to do so first, and then you'll be asked to authorize the Groove integration.
If at any time you want to add additional stores, navigate to Settings → Integrations again, click Configure on the Shopify row, and then click the Add a store button below the stores table. Then, follow the steps as described above.
Note: A Groove account can be linked to multiple Shopify stores, but a Shopify store can only be installed to one Groove account.
Configuring a Shopify Store
Once you have added your Shopify store, you can click Edit store from the main configuration screen to configure it. At this point we offer two settings:
Shopify field syncing
This allows you to update the Groove contact when the first name, last name, or email address changes in Shopify. That way, you can keep your Shopify contacts in sync with the main contact fields in Groove.
Note: Turning this on this will only sync fields from that moment on.Channels
This allows you to specify which channels you want to display the store in. In case you have multiple channels and/or multiple Shopify stores that can help keep things tidy.
Removing a Shopify Store
To delete a store from your account, navigate to Settings → Integrations and click Configure on the Shopify row. Then, for the store you want to delete, click Edit store, and navigate to the Advanced tab. There, click Remove Store.
Using the Shopify Integration
Once you've added and configured your Shopify store, you can start making use of it. To do this, navigate back to the Inbox and open up any conversation. If the conversation's contact is also a contact in Shopify (based on their email address) then the integration will show their contact information and allow you to manage their orders.
Contact Information
We list a bunch of the Shopify contact fields so that you have immediate additional context to your conversations. Additionally, you can click + Show all fields to reveal more fields.
Below the fields we list the customer's recent orders. At a high level this shows the order number, the date that the order was placed, and the status. However, clicking on it will show you more detail and allow you to manage the order. Continue reading under "Order Management" below to learn more.
Lastly, by switching from the Customer tab to the Timeline tab you'll see recent events associated with them. This can include order creations and updates, changes to their contact information, and comments from colleagues.
Order Management
The Shopify integration lets you manage customer orders right from within Groove, so without having to switch back and forth with Shopify.
Create Order
To create an order, go to the Customer tab and click the Create order button at the bottom of the card. This opens up a drawer where you can add products or custom items, set discounts both at the product and the order level, add notes and tags, and send an invoice to the customer.
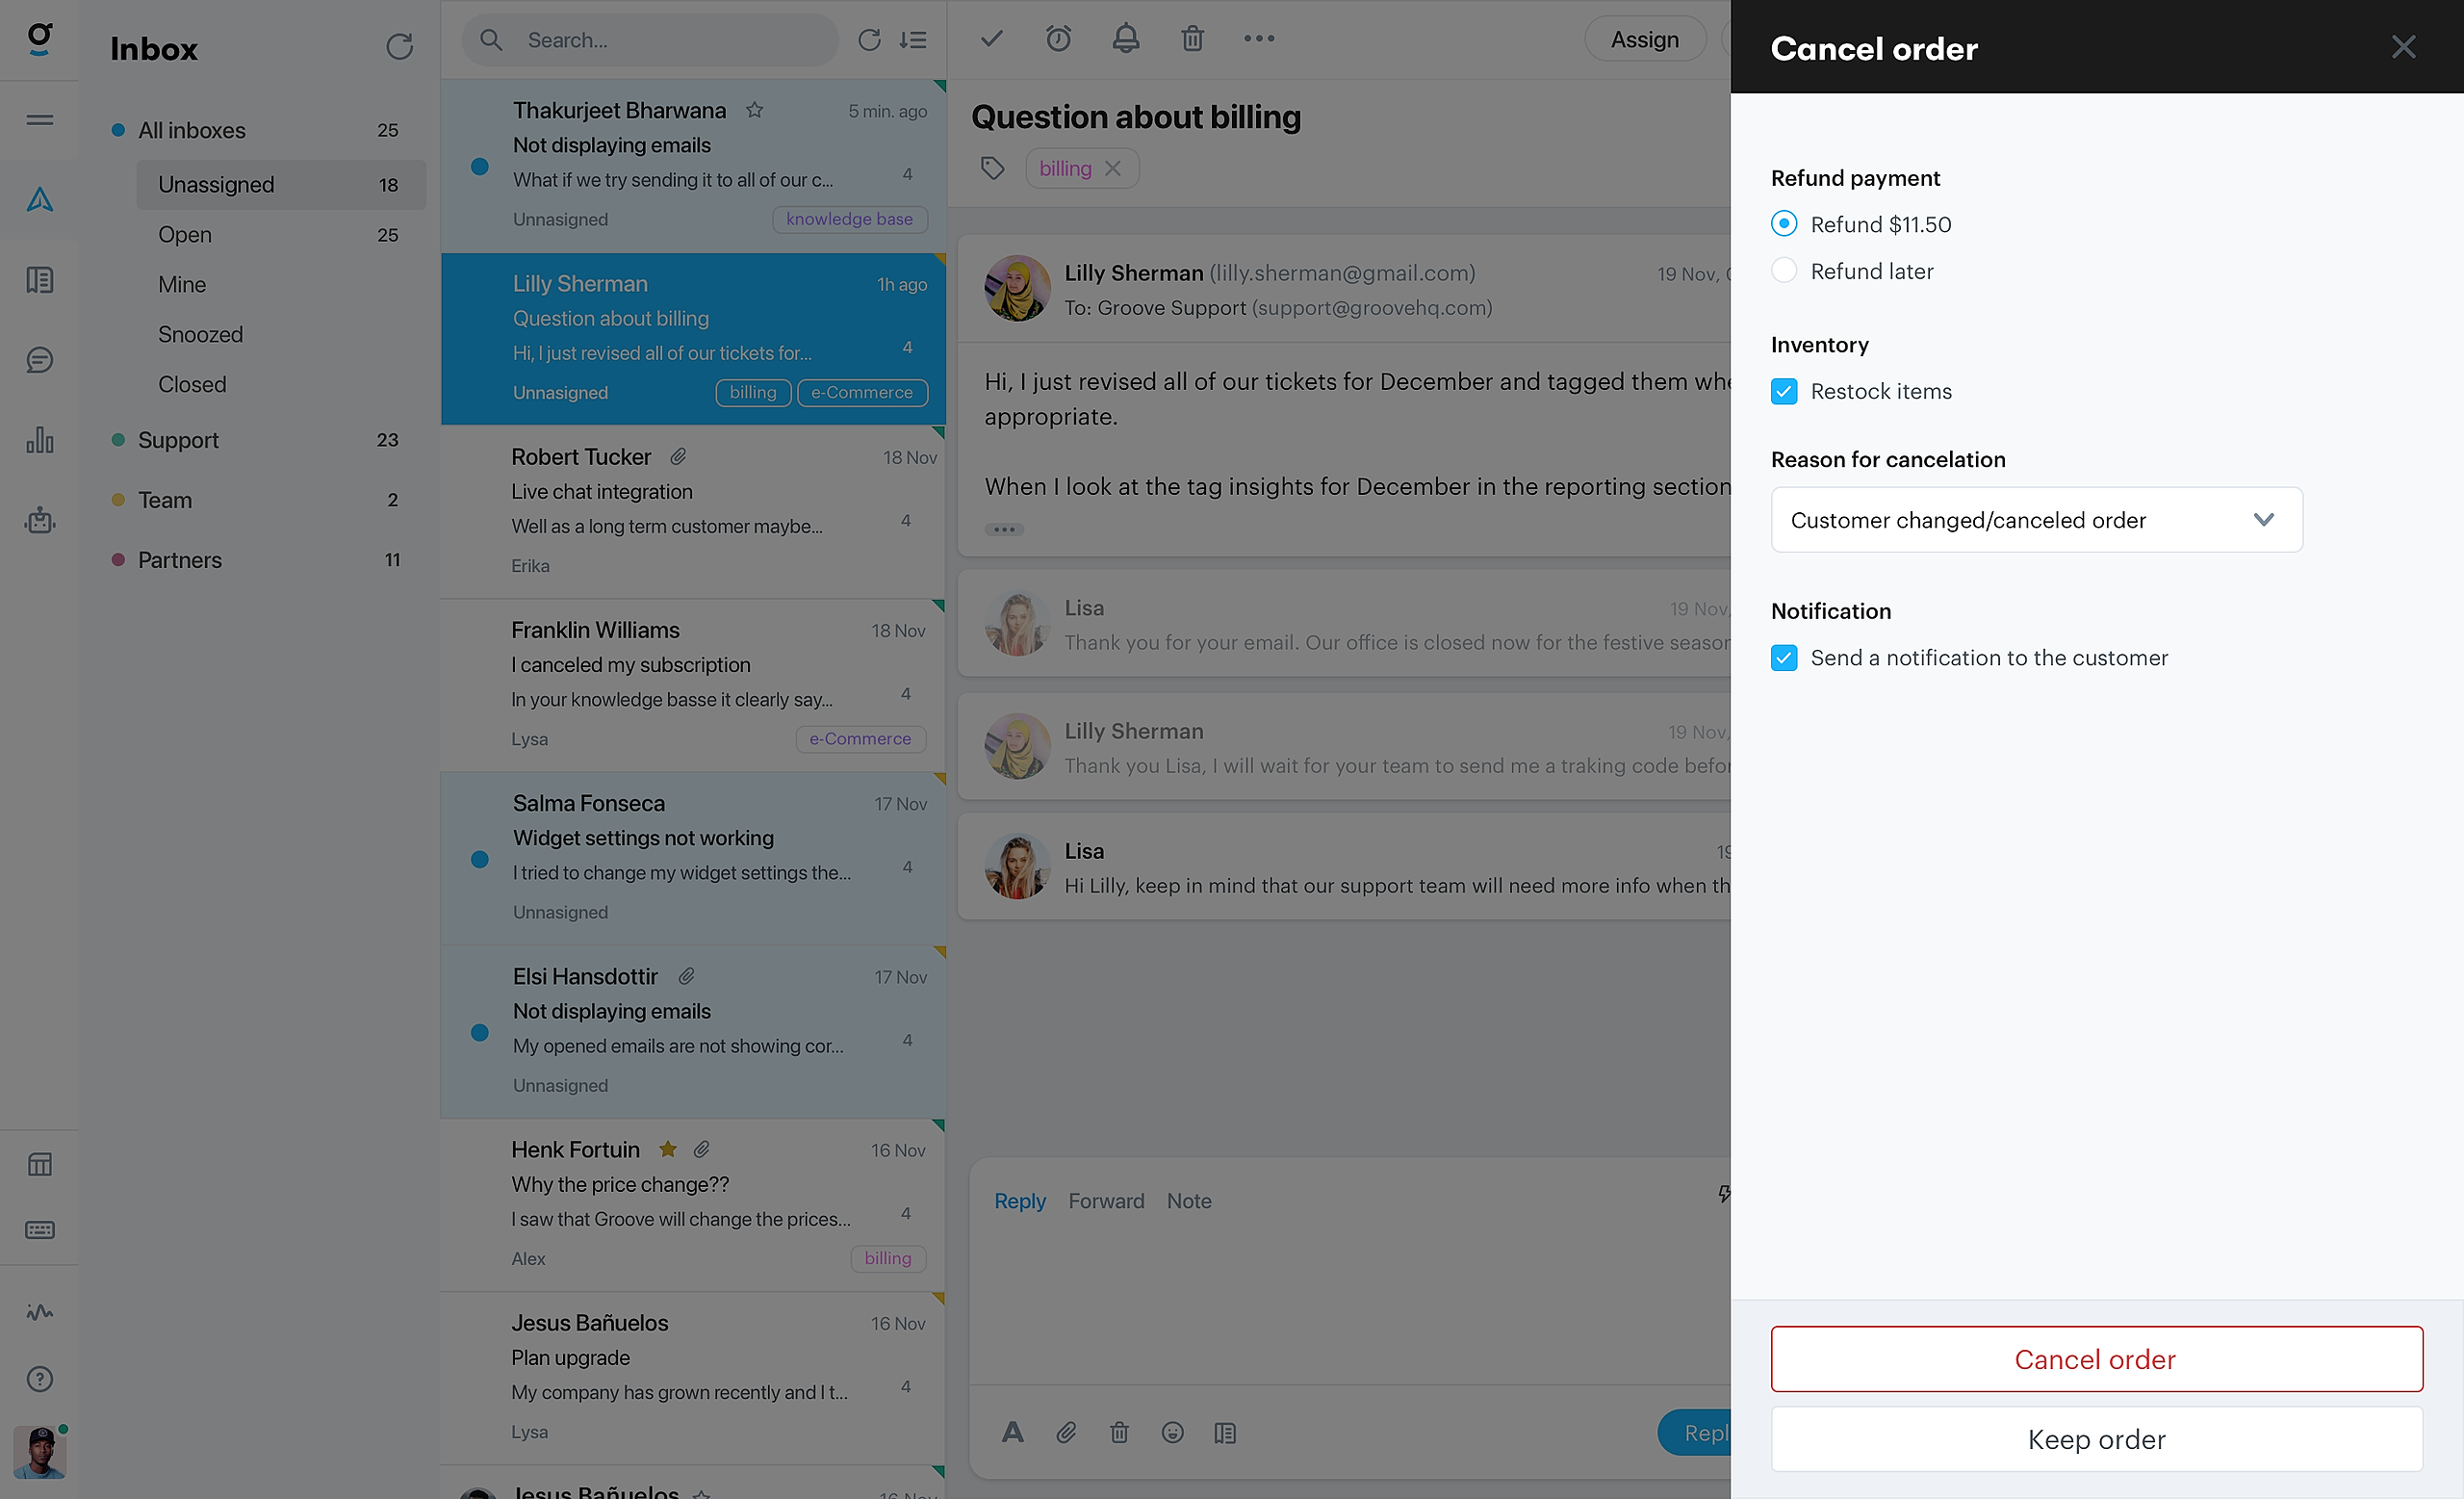
Cancel Order
To cancel an order, go to the Customer tab, click on the order that you want to cancel, and then click the Cancel button at the bottom of the card. This opens up a drawer where you can configure the cancellation options.
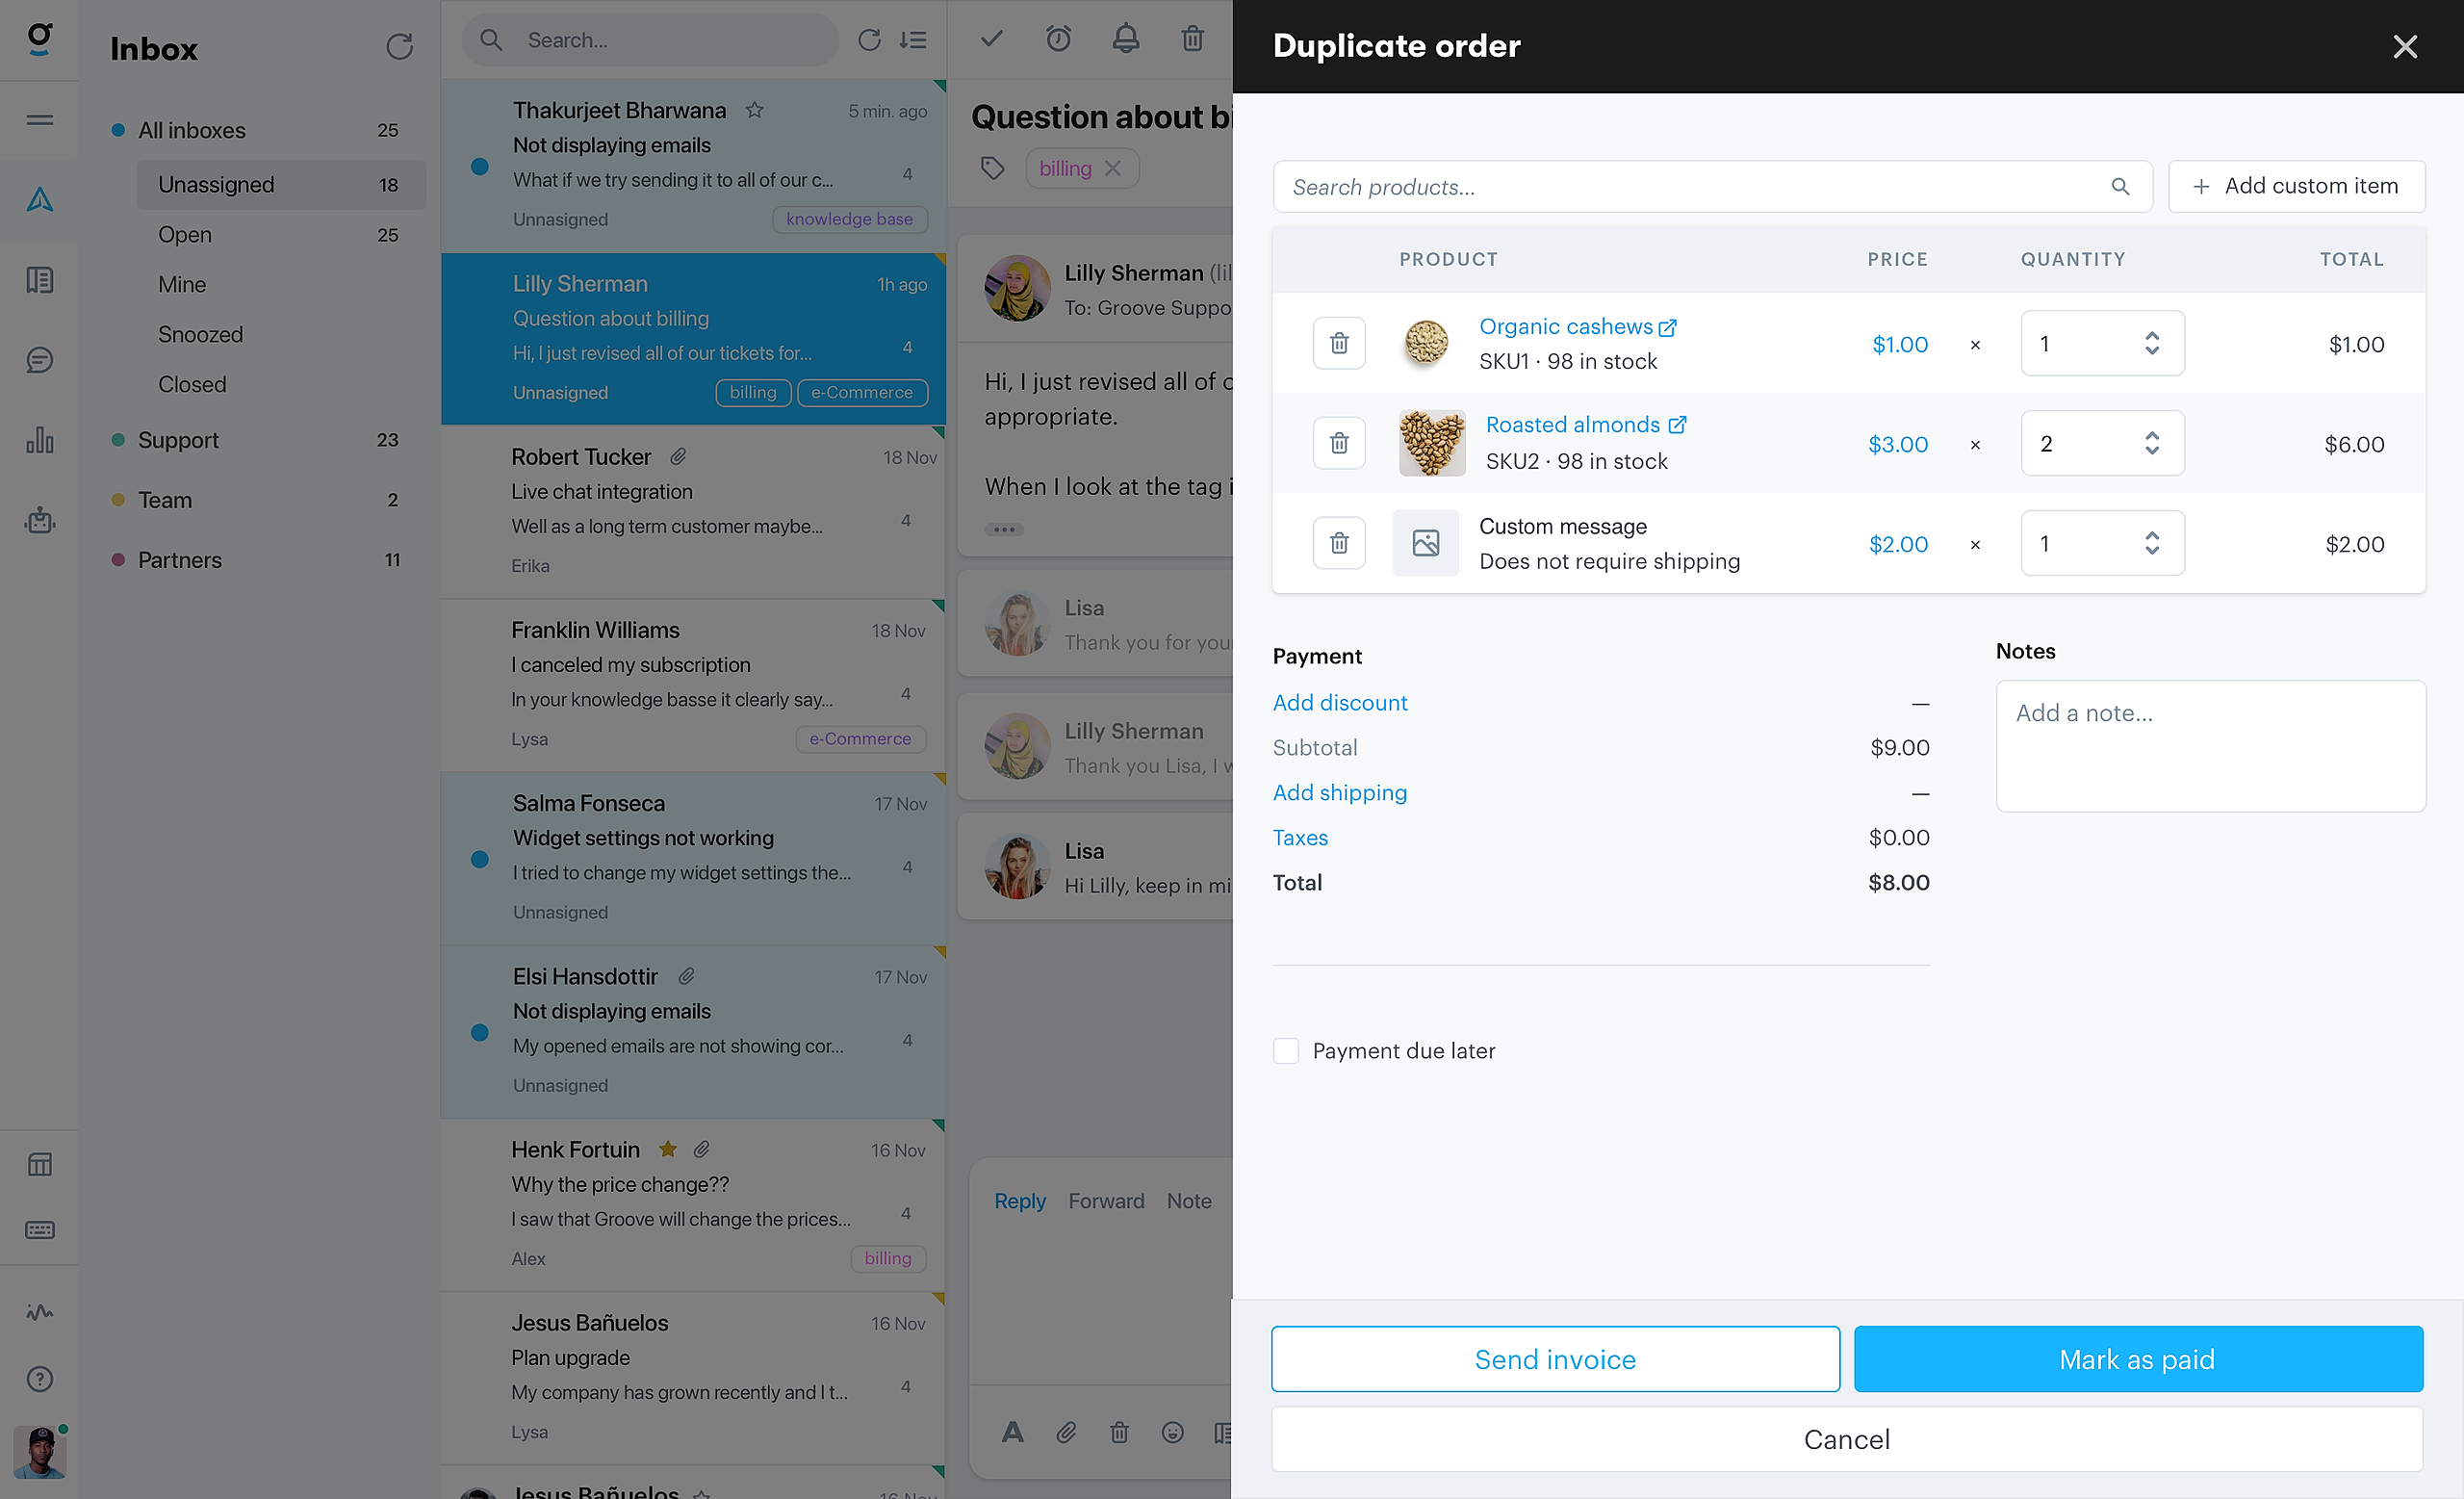
Duplicate Order
To duplicate an order, go to the Customer tab, click on the order that you want to duplicate, and then click on the Duplicate button at the bottom of the card. This opens up a drawer similar to the "Create order" one, with the only difference being that the product table is prefilled with the products from the initial order.
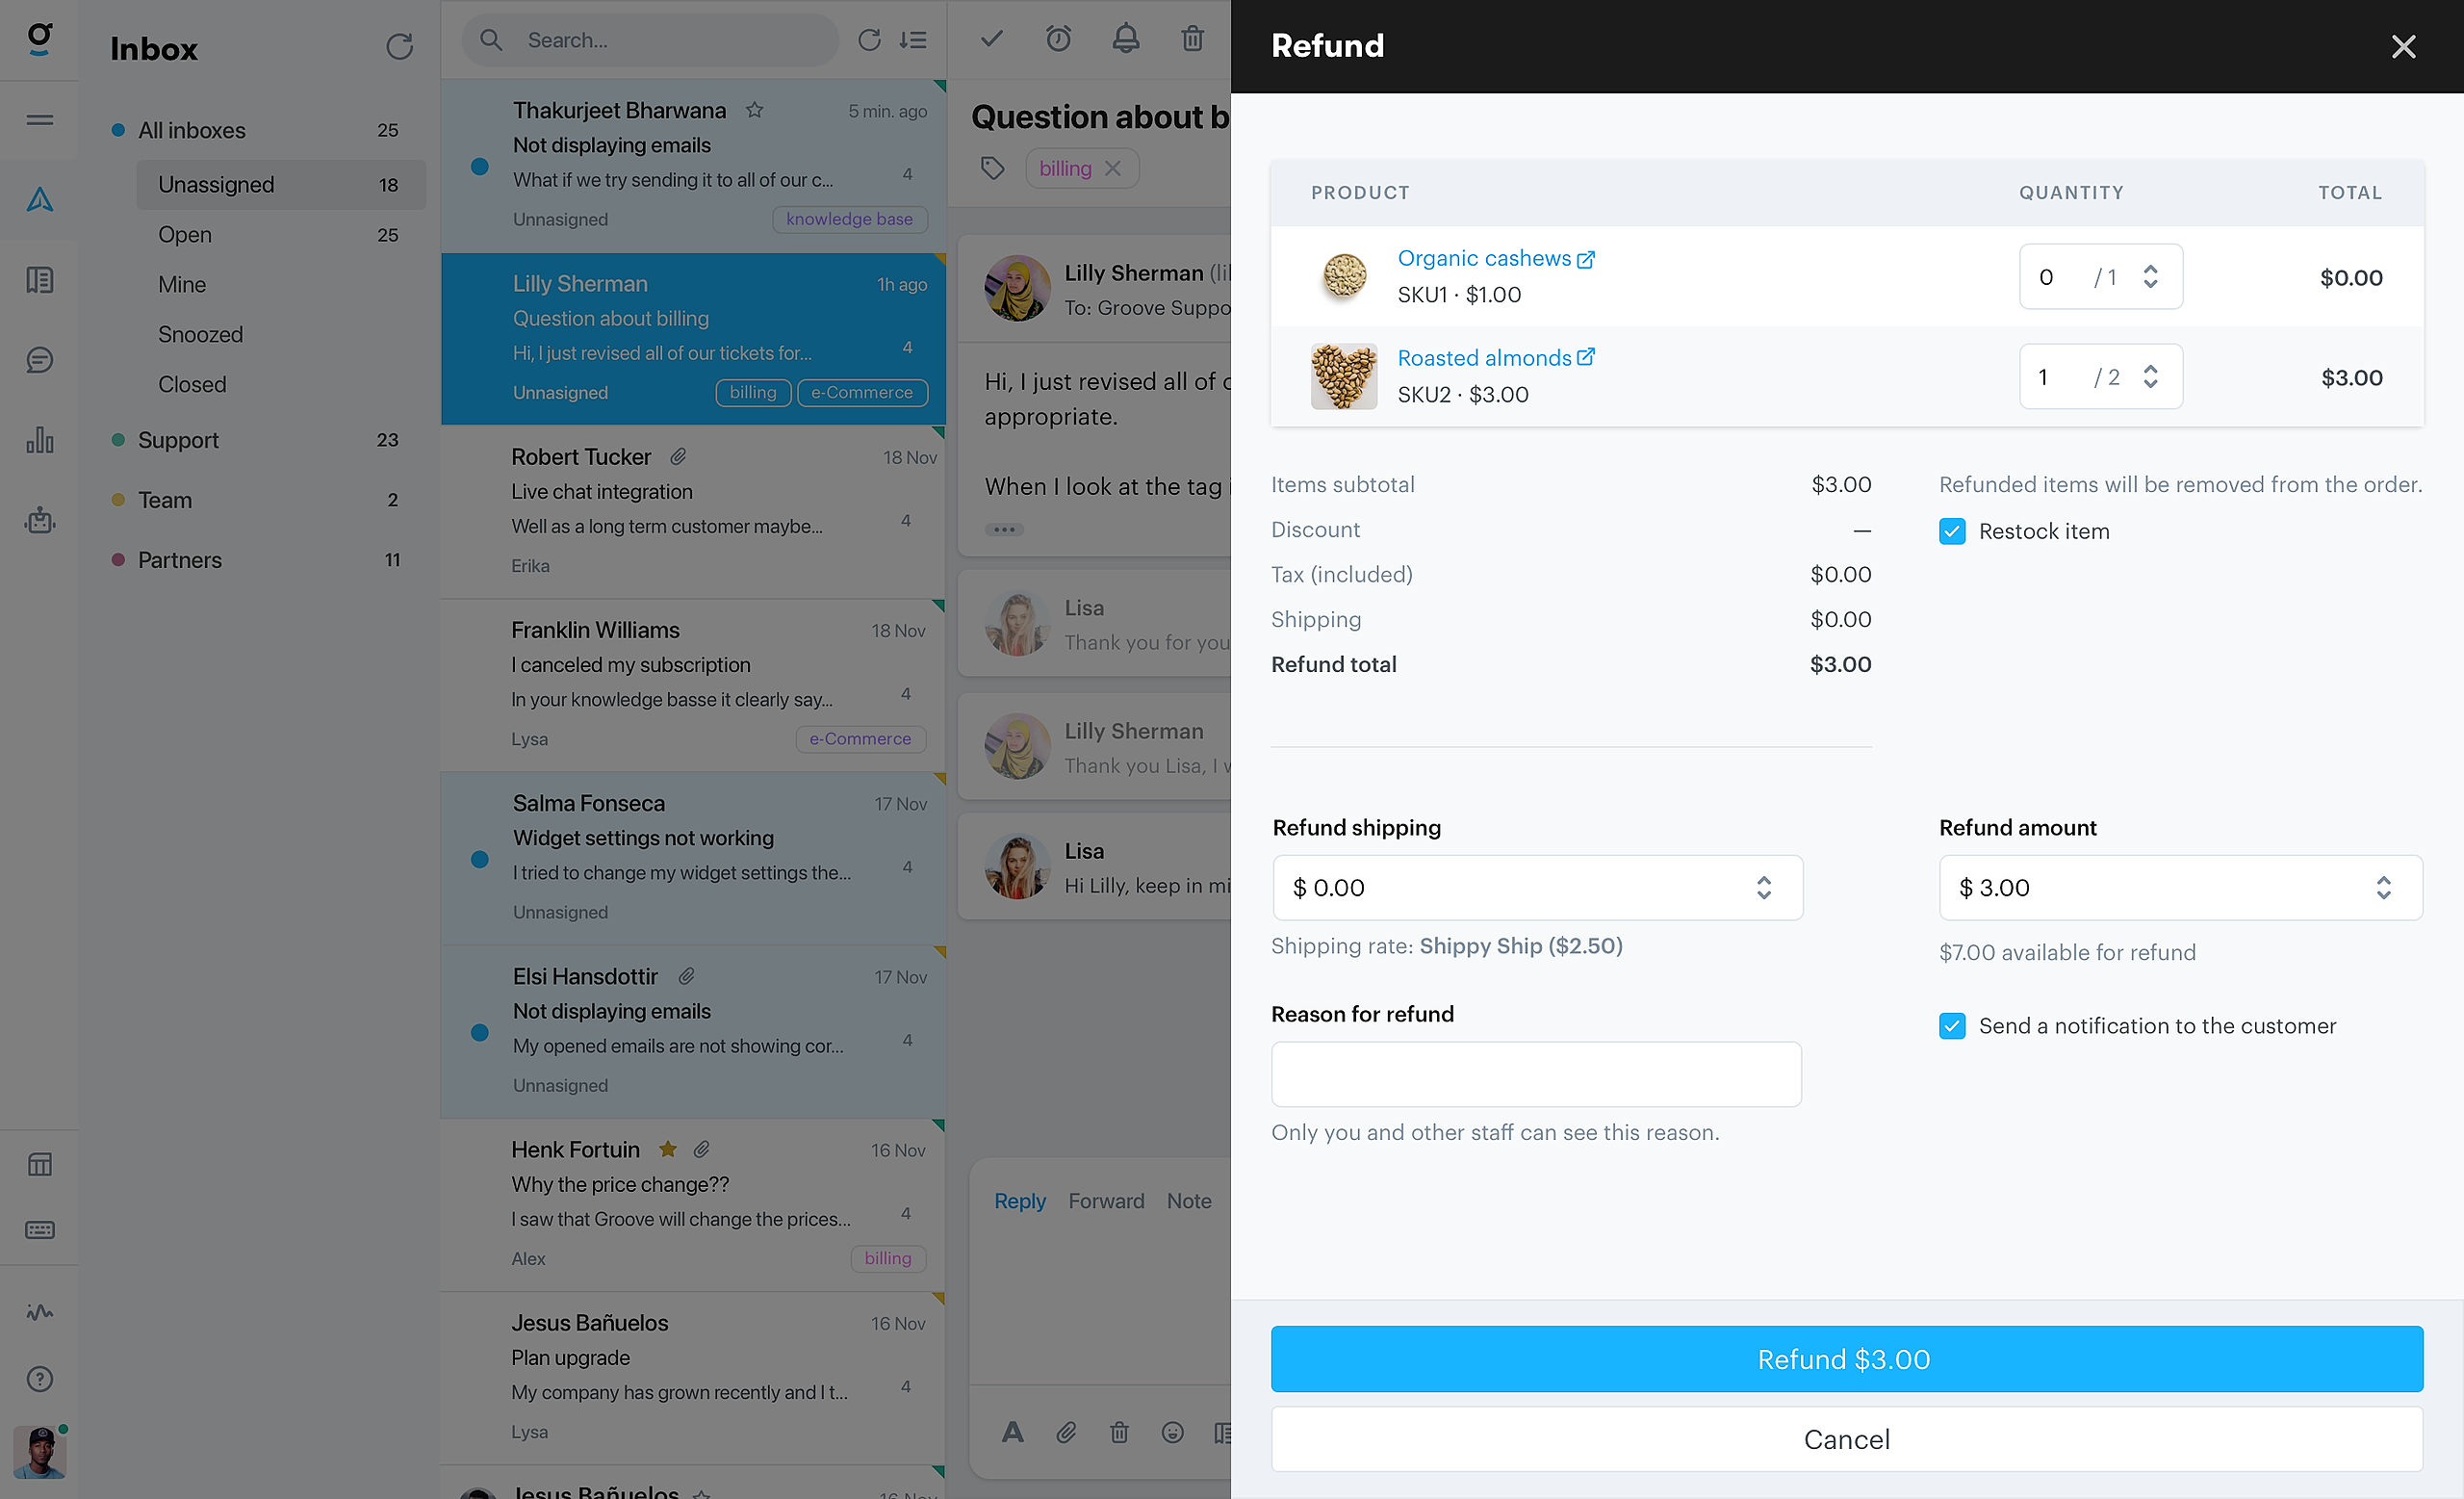
Refund Order
To refund an order, go to the Customer tab, click on the order that you want to refund, and then click the Refund button at the bottom of the card. This opens up a drawer where you can specify the products and shipping that you want to refund, as well provide a reason, set the products to restock, and send a notification to the customer.
Note: If you want to return items before issuing refunds you will need to do so in Shopify. We provide a direct link for this from the refund drawer.
To install the Groove widget on your Shopify store, here are some quick steps to get it up and running!