The Groove Android app makes the inbox completely accessible on-the-go. It offers almost the same functionality as the website app, including core features such as collision detection and contact and company information.
Downloading and Setting Up
The app can be downloaded directly from the Play Store:
https://play.google.com/store/apps/details?id=com.groovehq.app. Once it's been installed you'll need to log in with your Groove subdomain, email address, and password. We don't currently offer signup through the app.
Note: If you've only ever logged in on web with Google or Outlook 365, you'll first need to set a password.
Inbox
Conversations
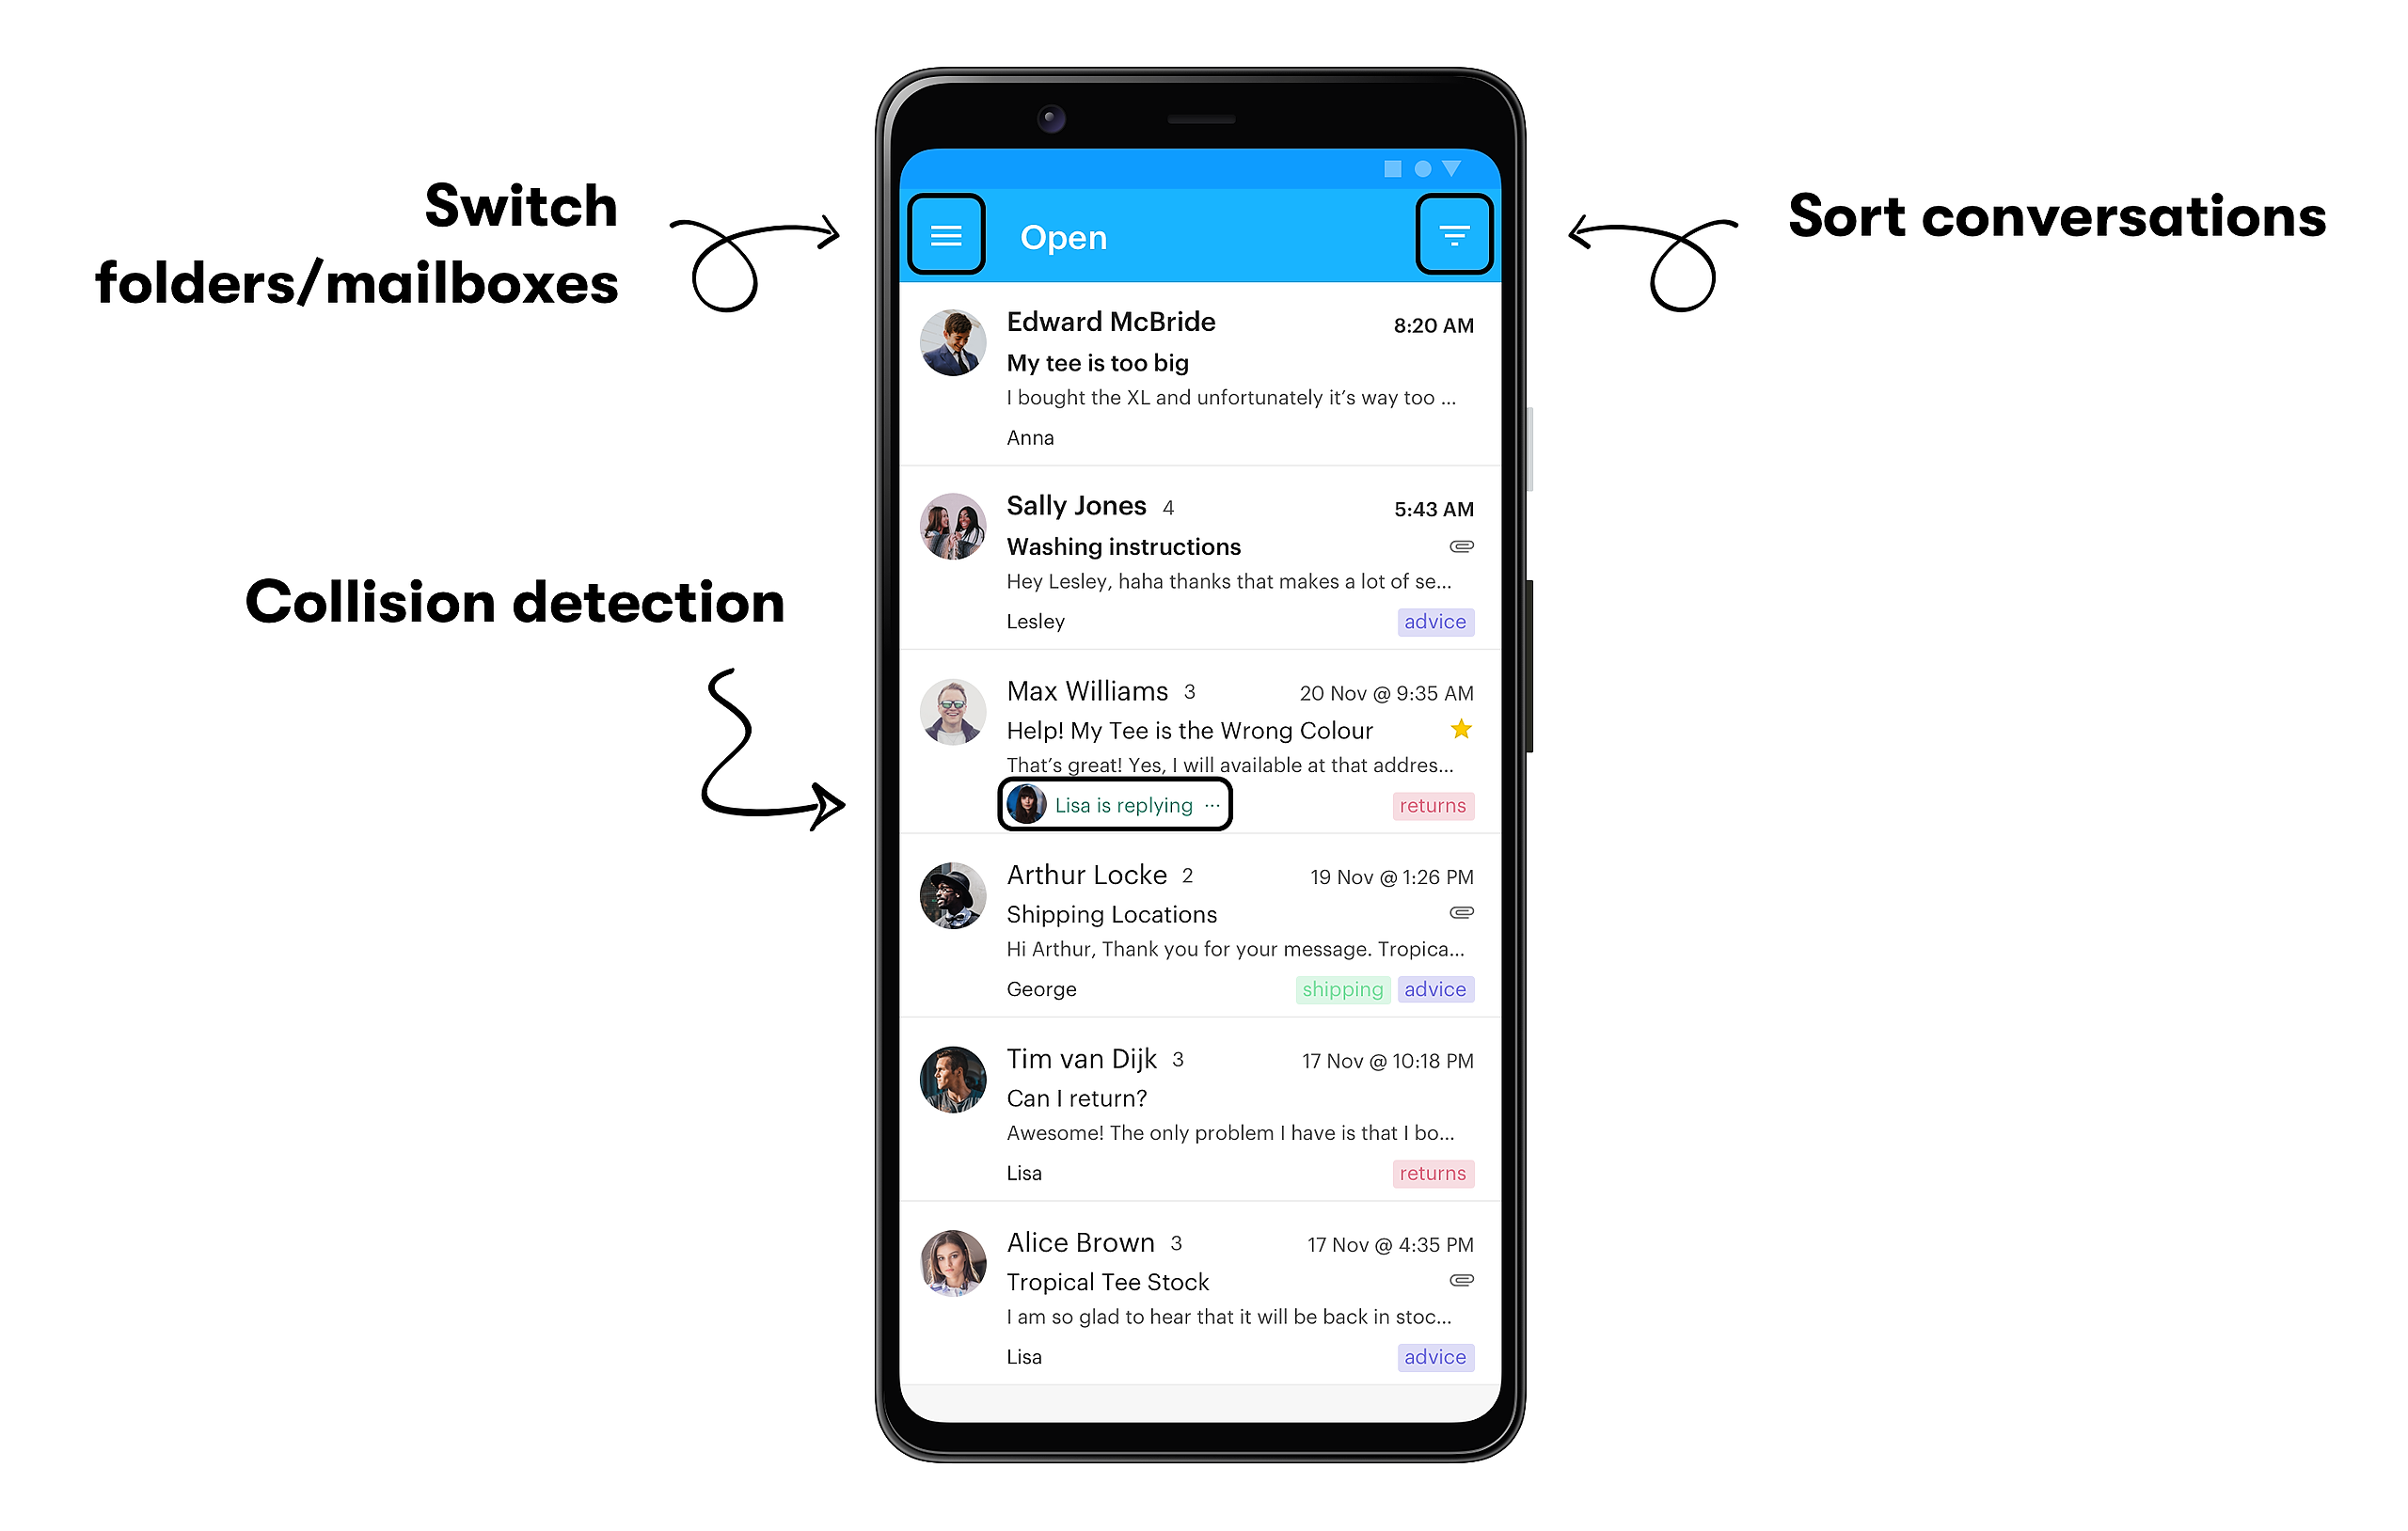
The first screen you'll see after logging in (or—if you're already logged in—after opening the app) is the conversations screen. This shows you a list of all conversations currently within the selected smart folder. In the top left you'll see a button to switch between smart folders and inboxes (read more on that under "Inboxes" below). In the top right you'll see a sorting button, allowing you to sort the conversations by newest (the default) or by oldest.
The conversations show the same information you're familiar with from the website: the name of the contact that sent the message, the conversation subject, a preview of the last message, and some additional meta information such as the assignee, the assigned tags, and the count of the messages within the conversation.
If your account has multiple agents and they happen to be in the same smart folder you'll see the message preview replaced with collision detection information. This is shared between the app and the website, so no matter on which device you are you can always make sure not to step on anyone's toes.
Inboxes
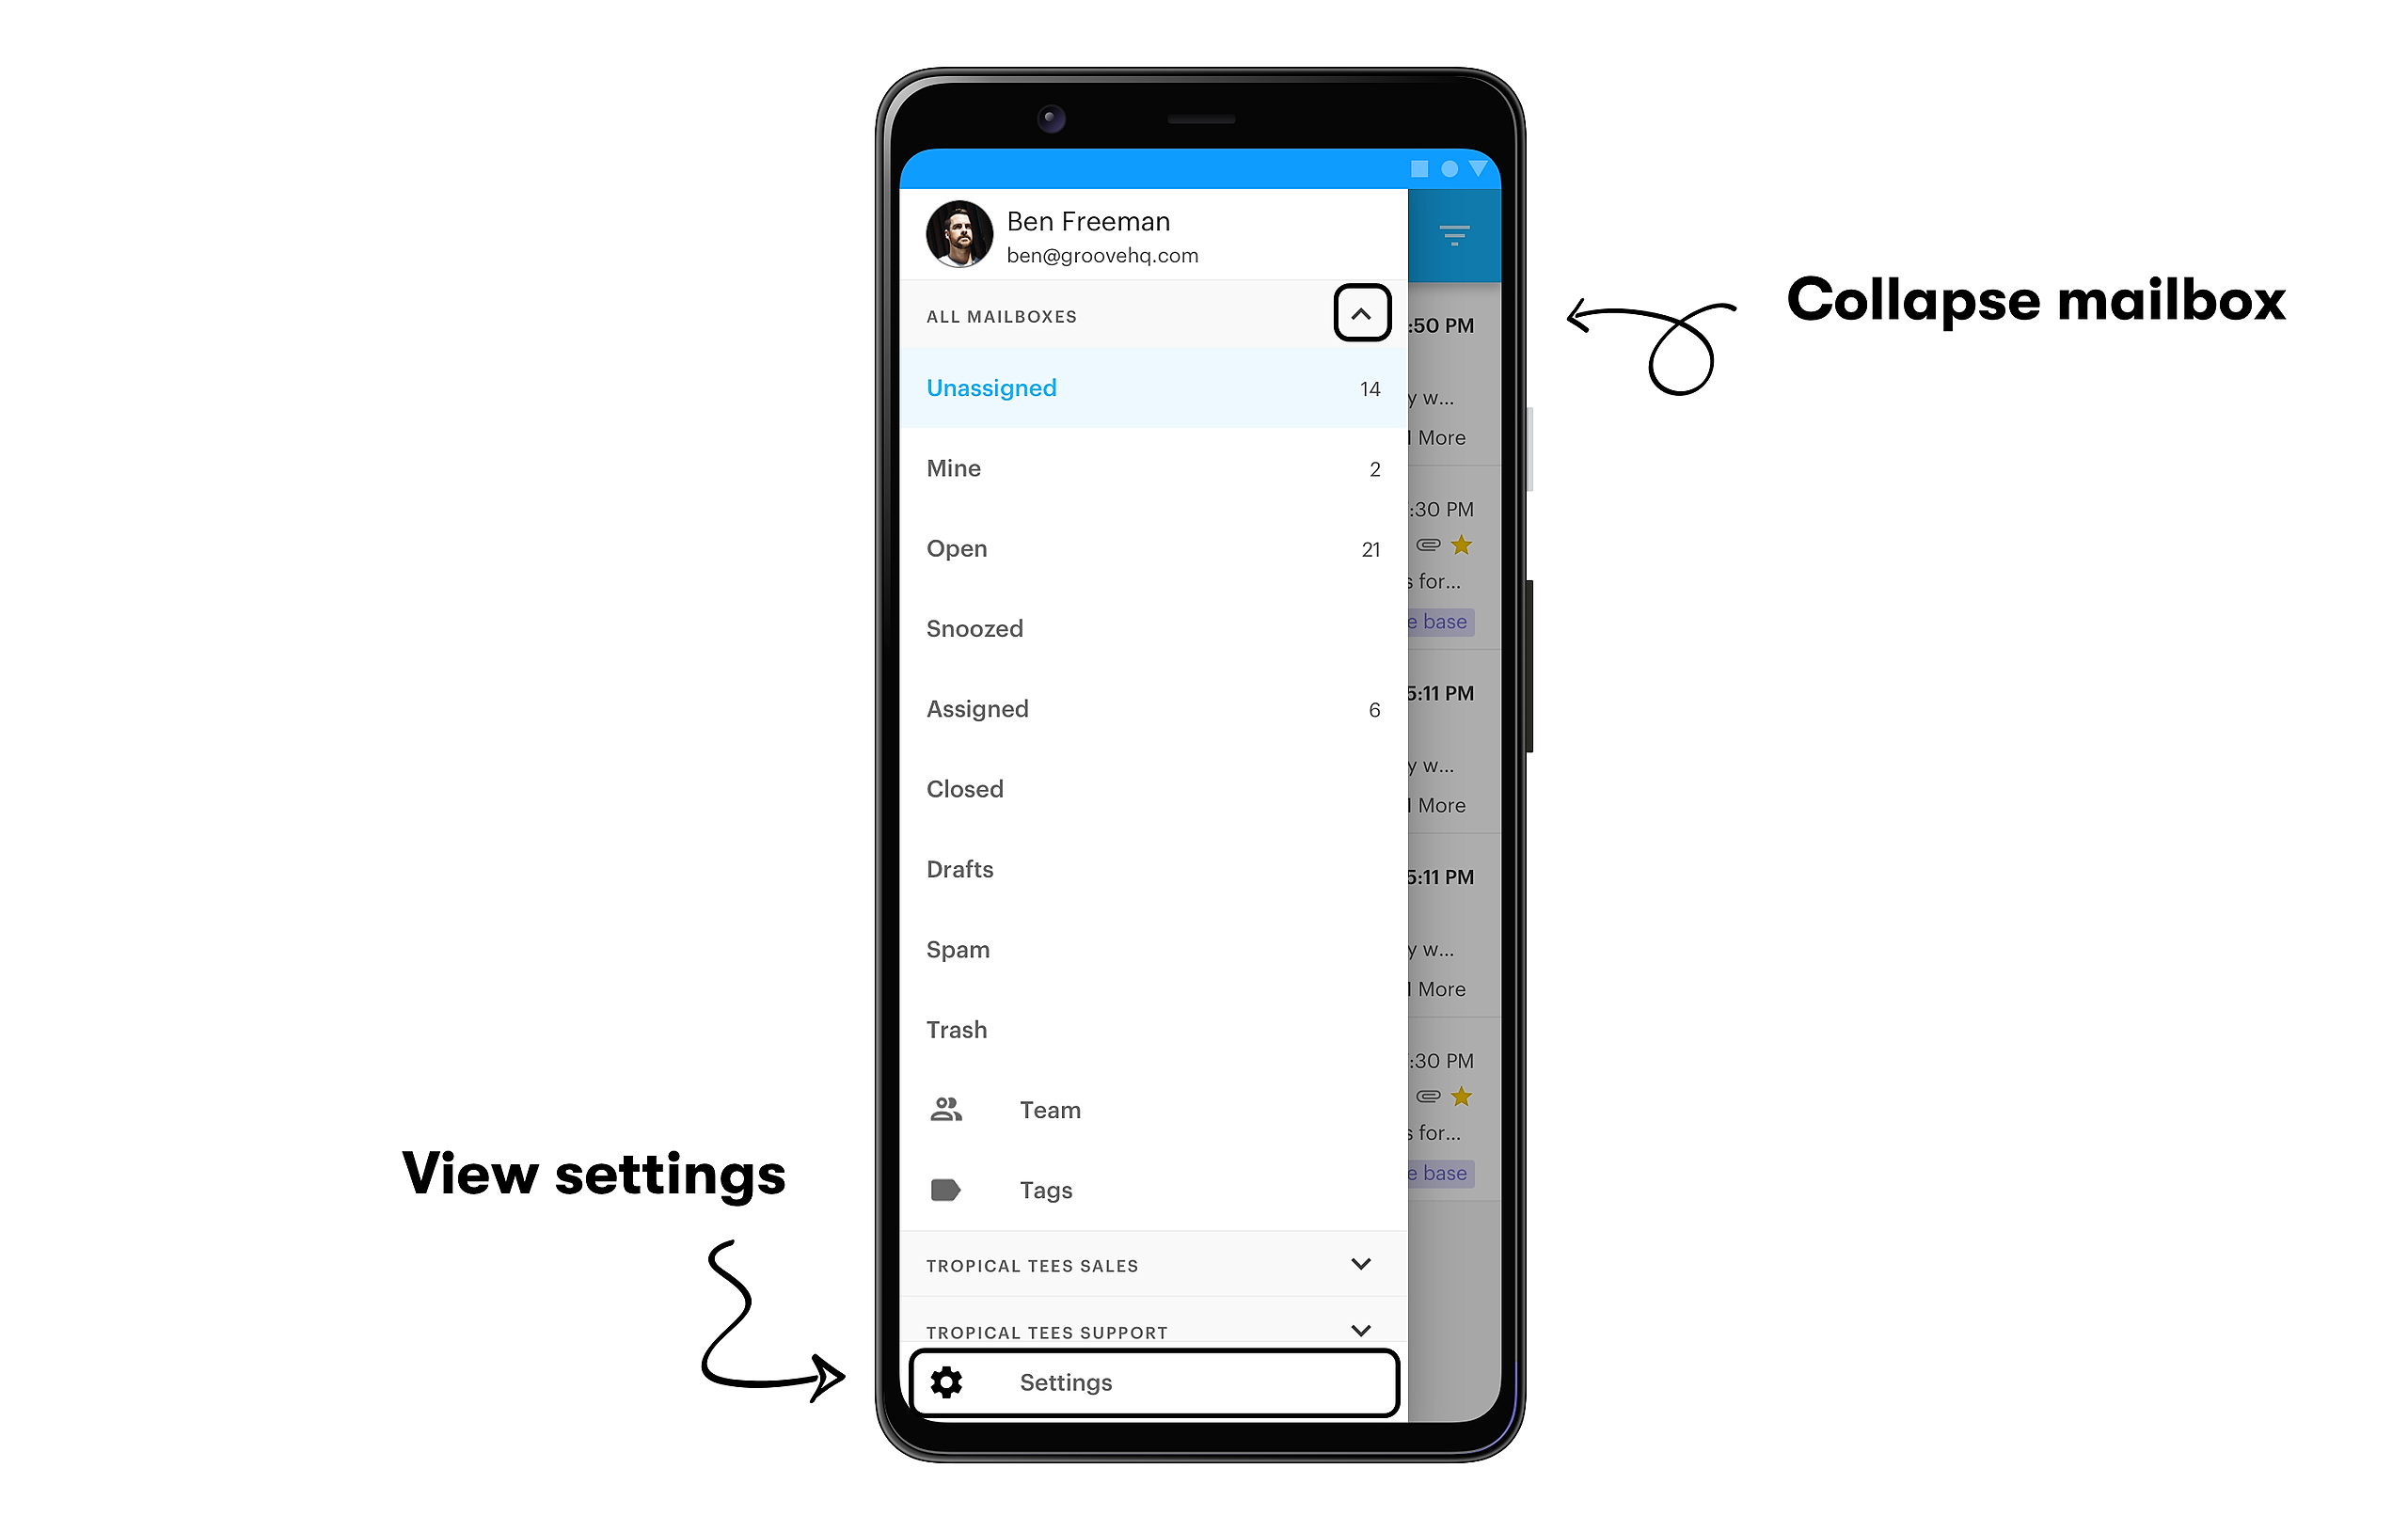
The navigation drawer shows you a complete list of all your inboxes and smart folders, in the same way you'll see it in the left sidebar on the website. You can go directly into any of the folders to view their contents, or open up the "Team" or "Tags" folders for a further breakdown per agent or tag.
Conversations
Messages
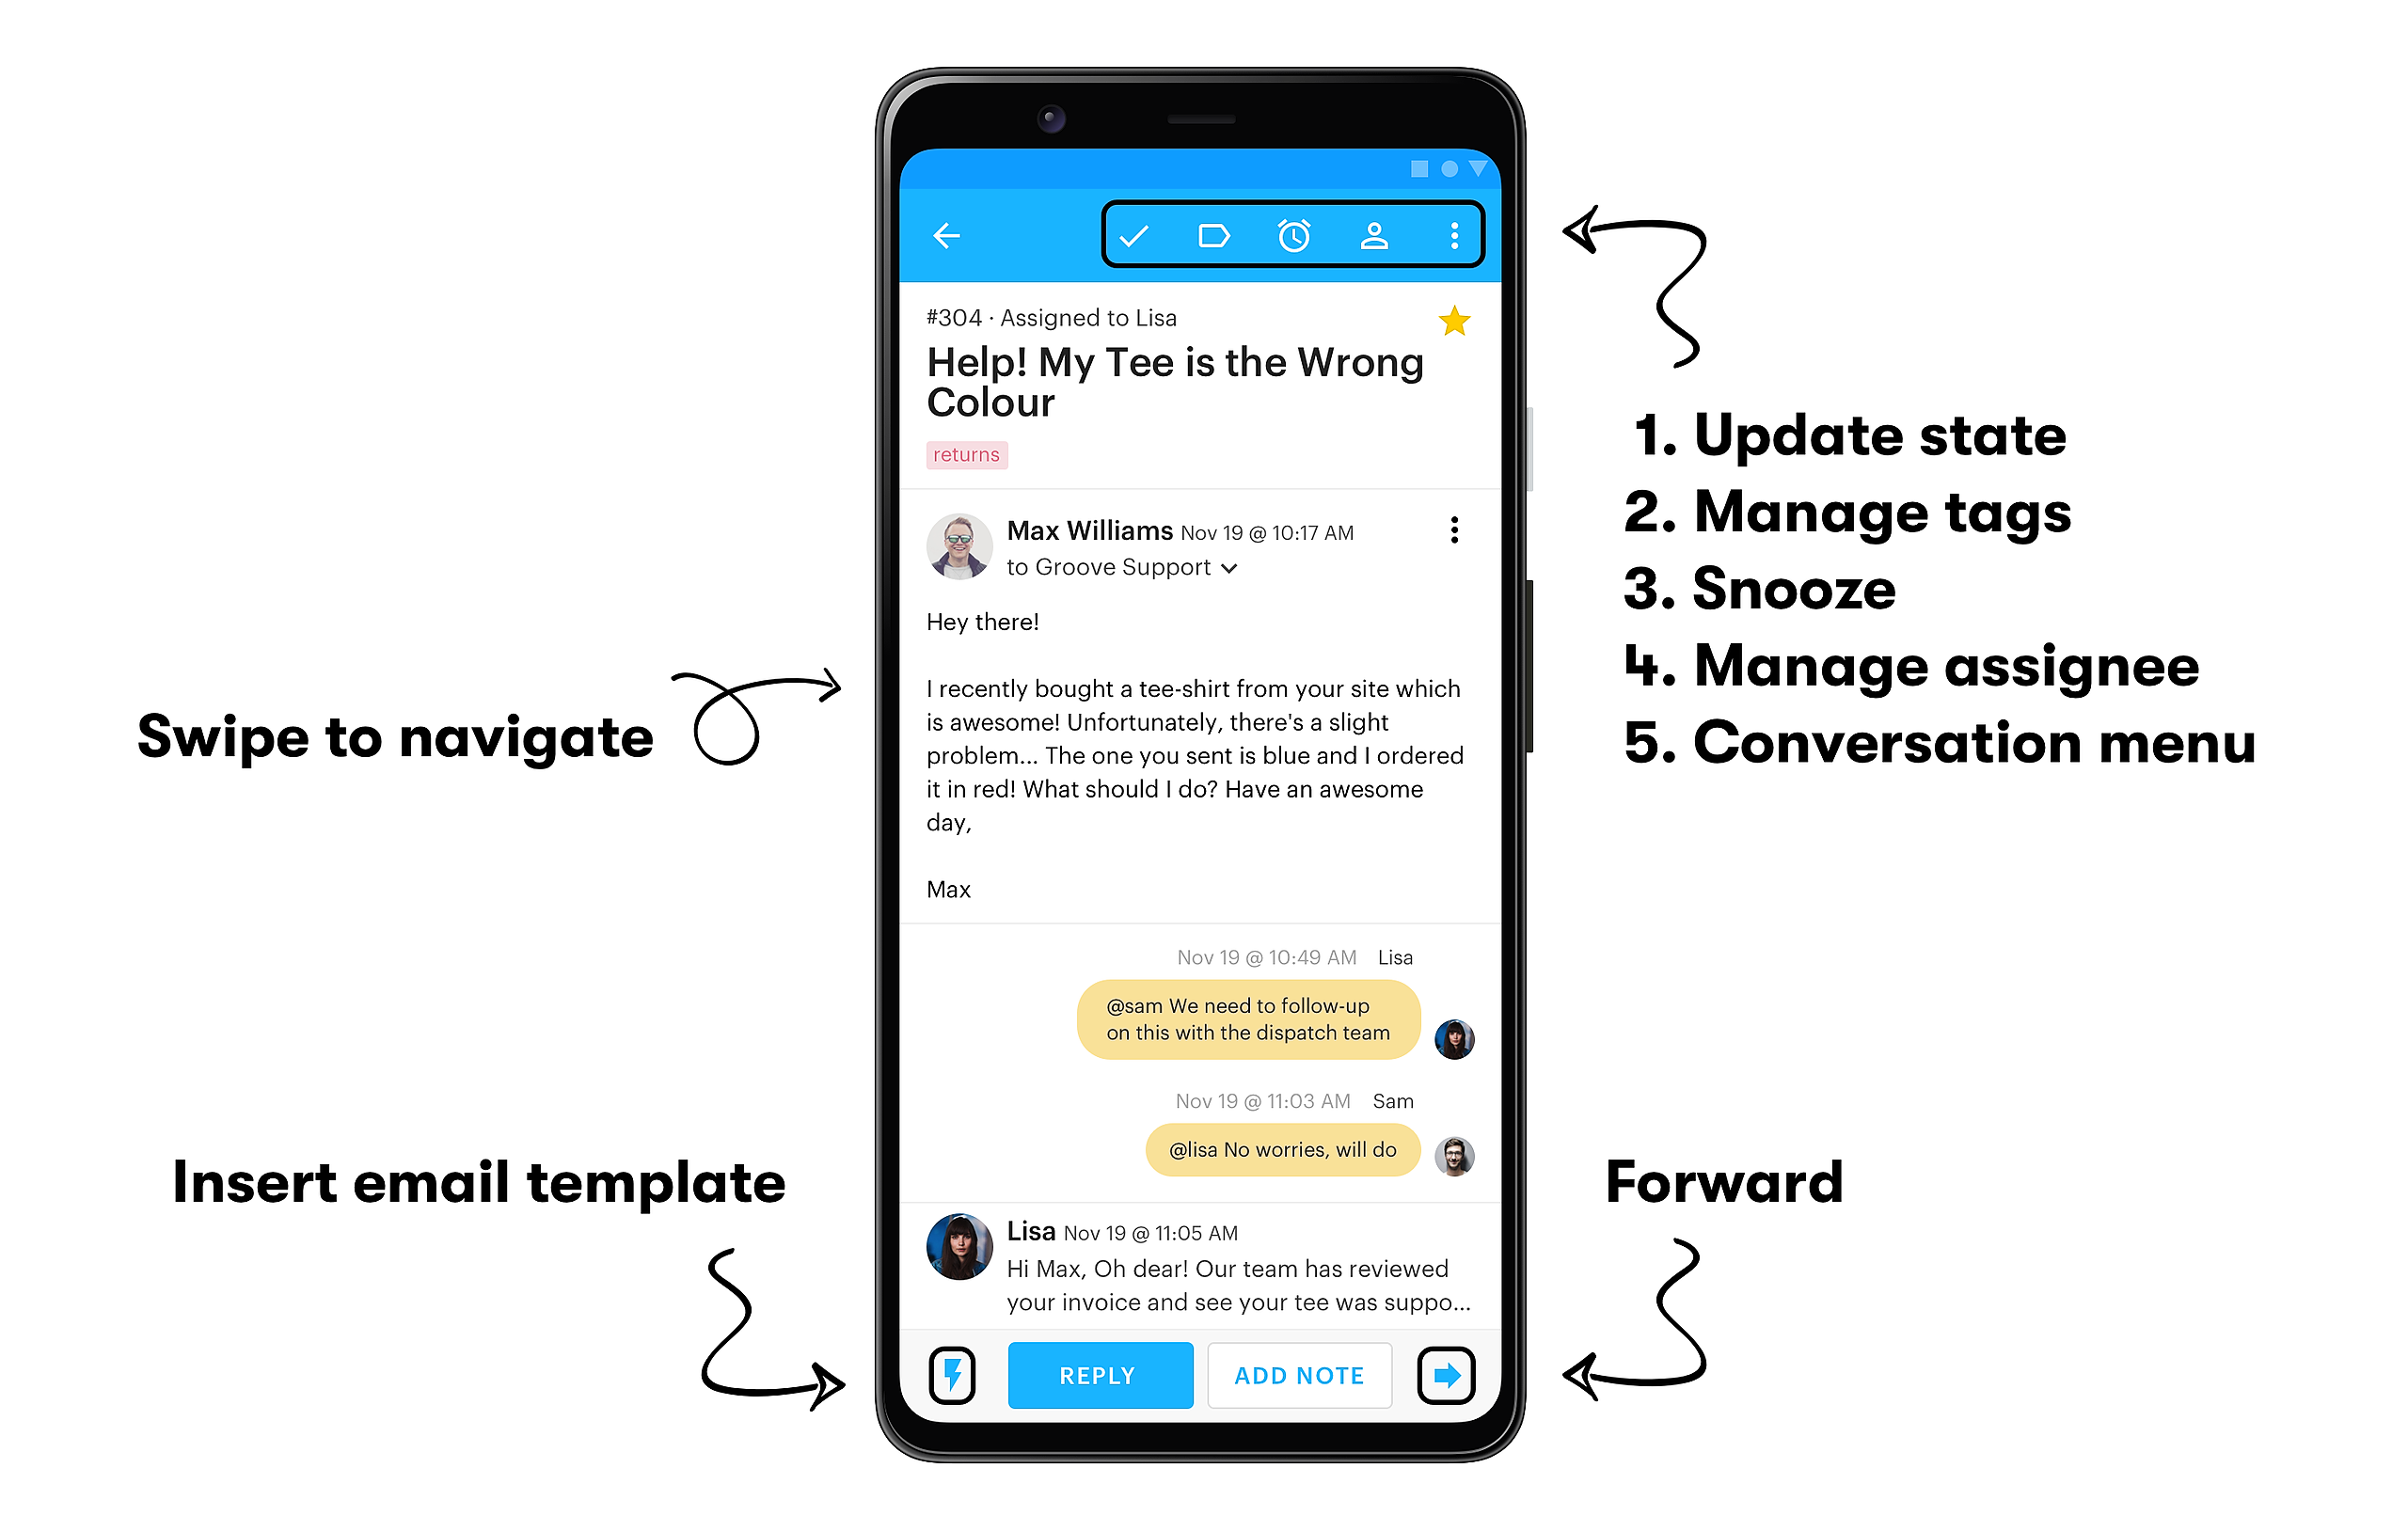
Tapping a conversation will lead you to the full conversation screen, opening up the last message. Messages can be tapped to have them expand or collapsed, and tapping the "⋮" on the top right of the message allows you to share the direct link to that message.
In the top of the screen, in the navigation bar, there are 2 buttons on the right: the "i" button opens up the contact information screen (more on that later), and the "⋮" button brings up a menu with some quick actions for the conversation.
In the bottom of the screen, in the toolbar, there are a maximum of 5 buttons, depending on the state of the conversation. On the right you'll see 2 buttons that allow you to quickly navigate between conversations in a folder without having to go back to the list each time. In the center you'll see the currently conversation state, and tapping it will open up a menu allowing you to change that state. On the left you'll see 2 buttons for some additional actions: one to update the tags, and one to update the assignee. Those last two are hidden if the conversation has been deleted or marked as spam.
Contact Information
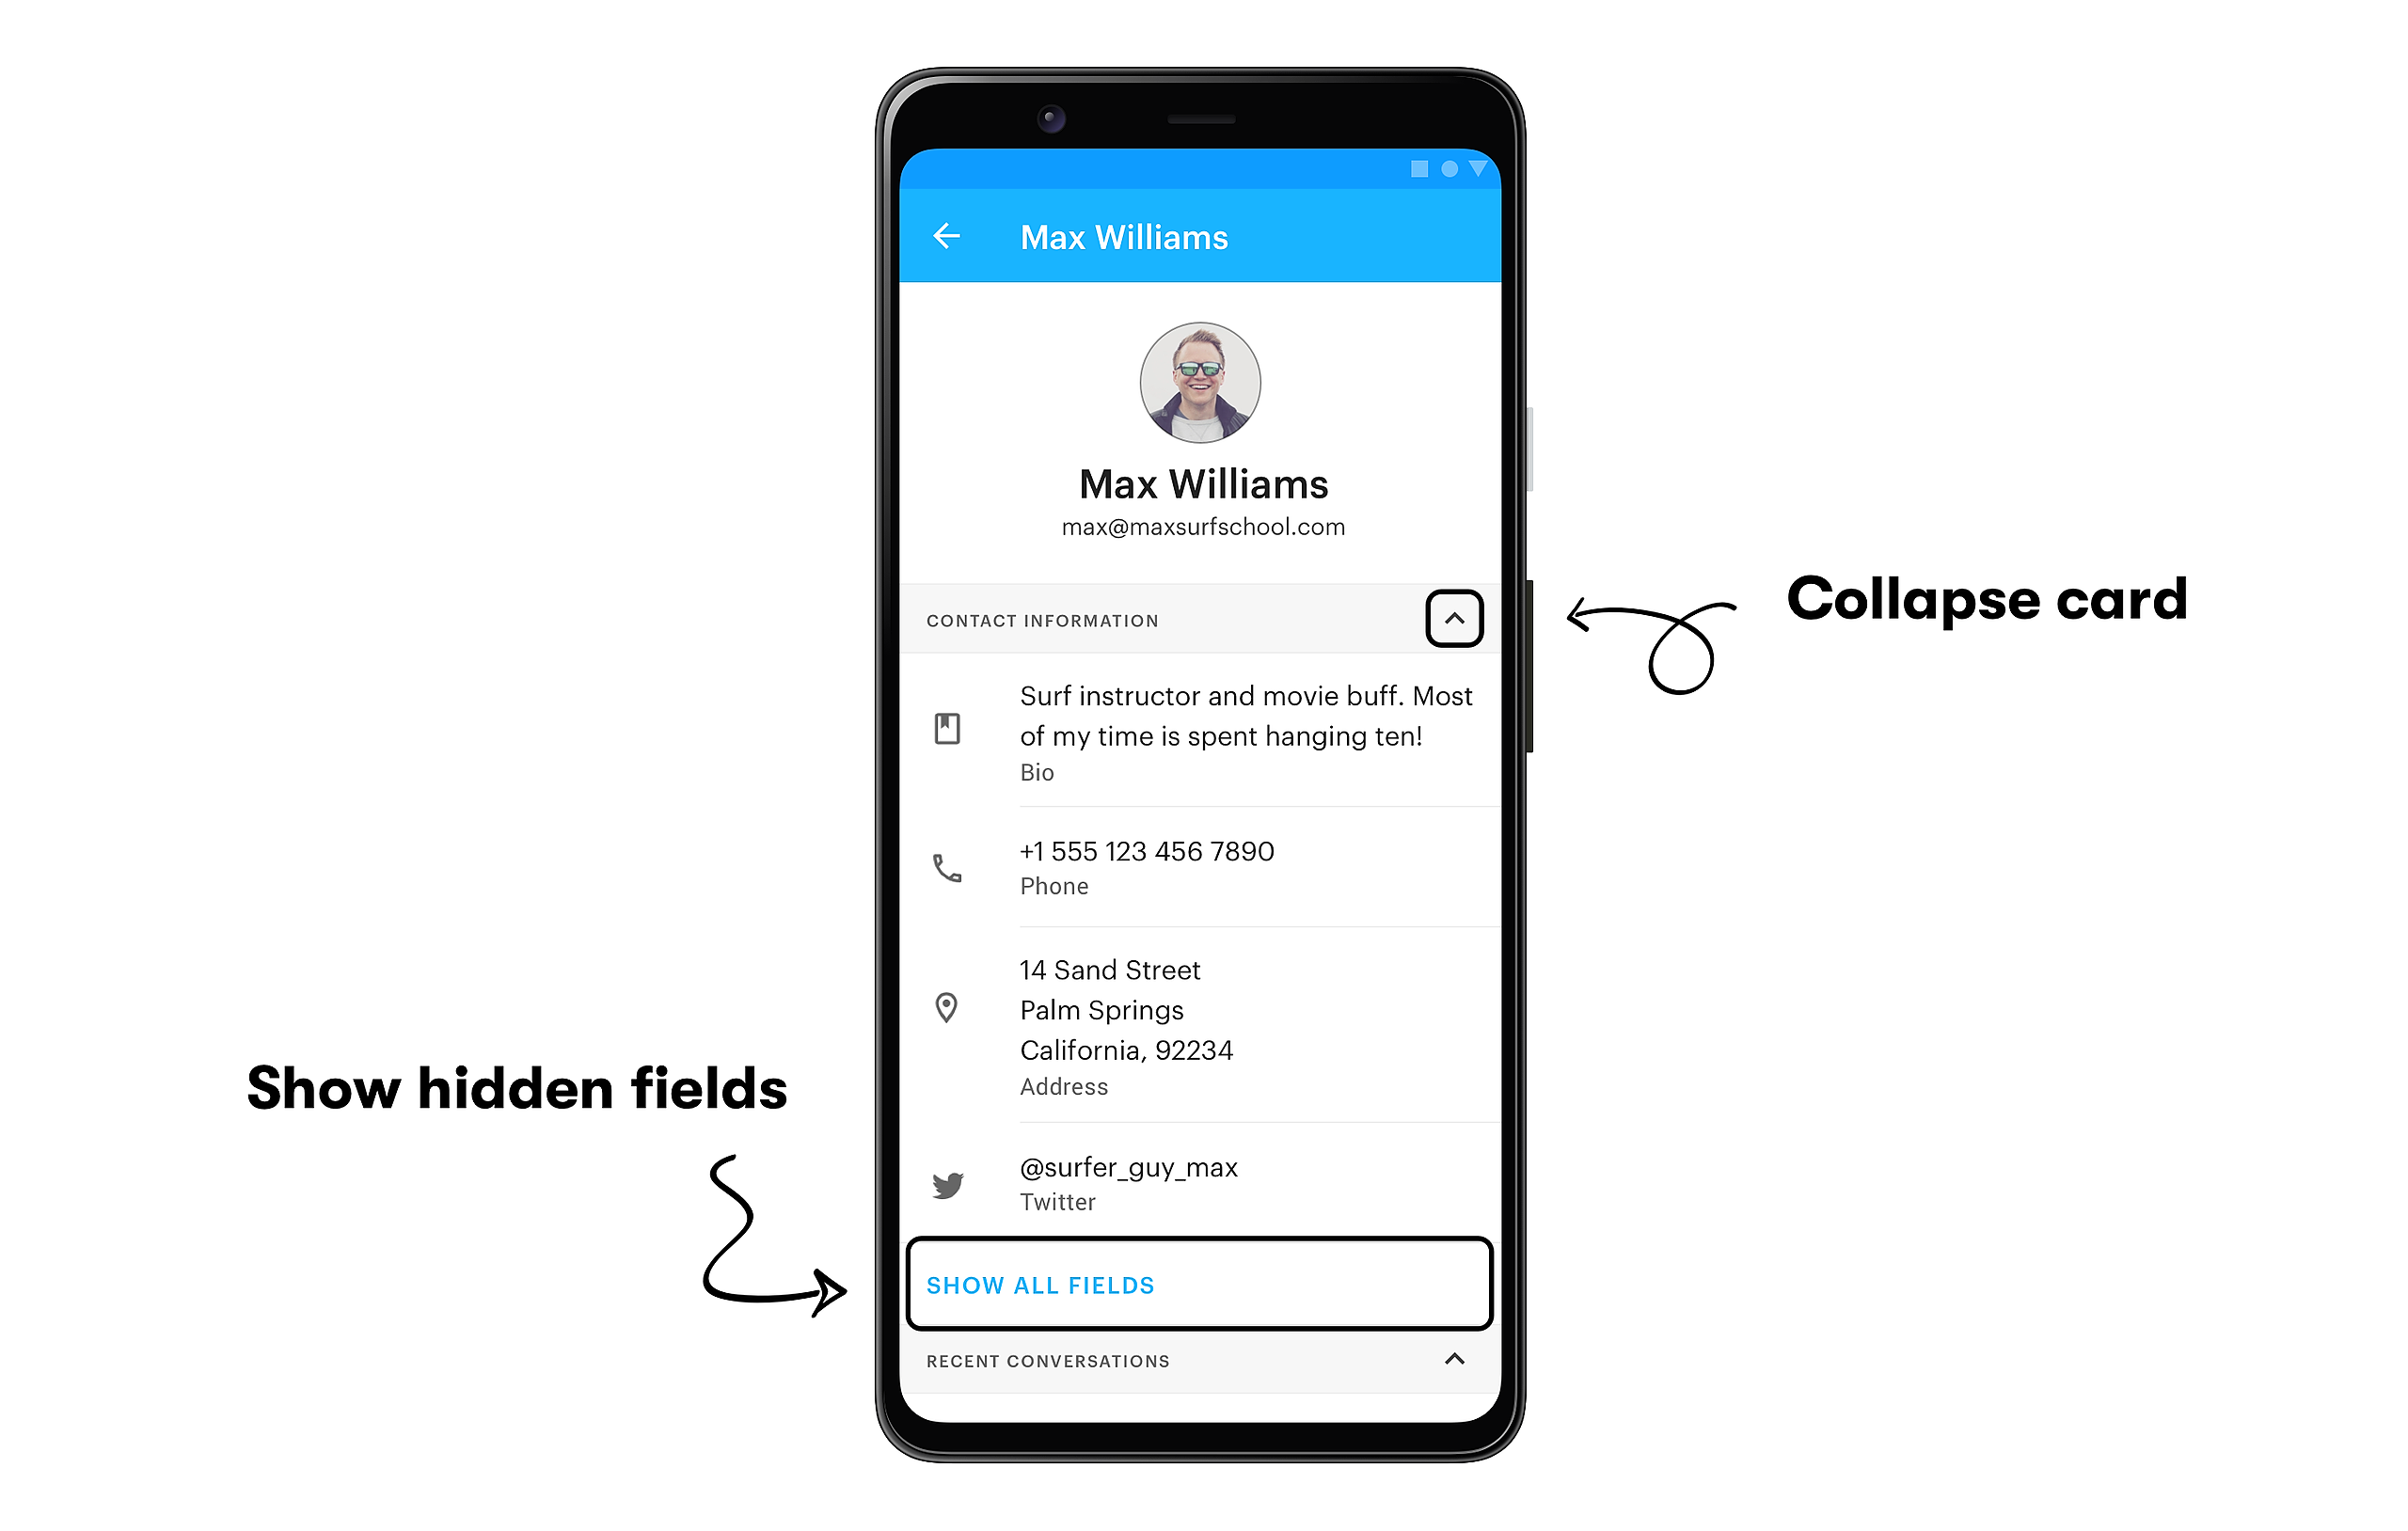
As mentioned earlier, tapping the "i" button in the navigation bar opens up the contact information screen. This is similar to the right sidebar in the website inbox, showing you context about the contact and potentially their company.
The layout and visibility of both the cards and the fields are taken from your website settings, so that things are always arranged as you expect them to. Long pressing a field allows you to copy it, and tapping any link will open it up directly in your default browser.
There's also the same "Recent conversations" card as on the website, allowing you to quickly view any other conversation the contact has had with you recently.
Note: Editing field values or the layout of cards and fields is currently not supported from the Android app.
Replying / Forwarding / Adding a Note
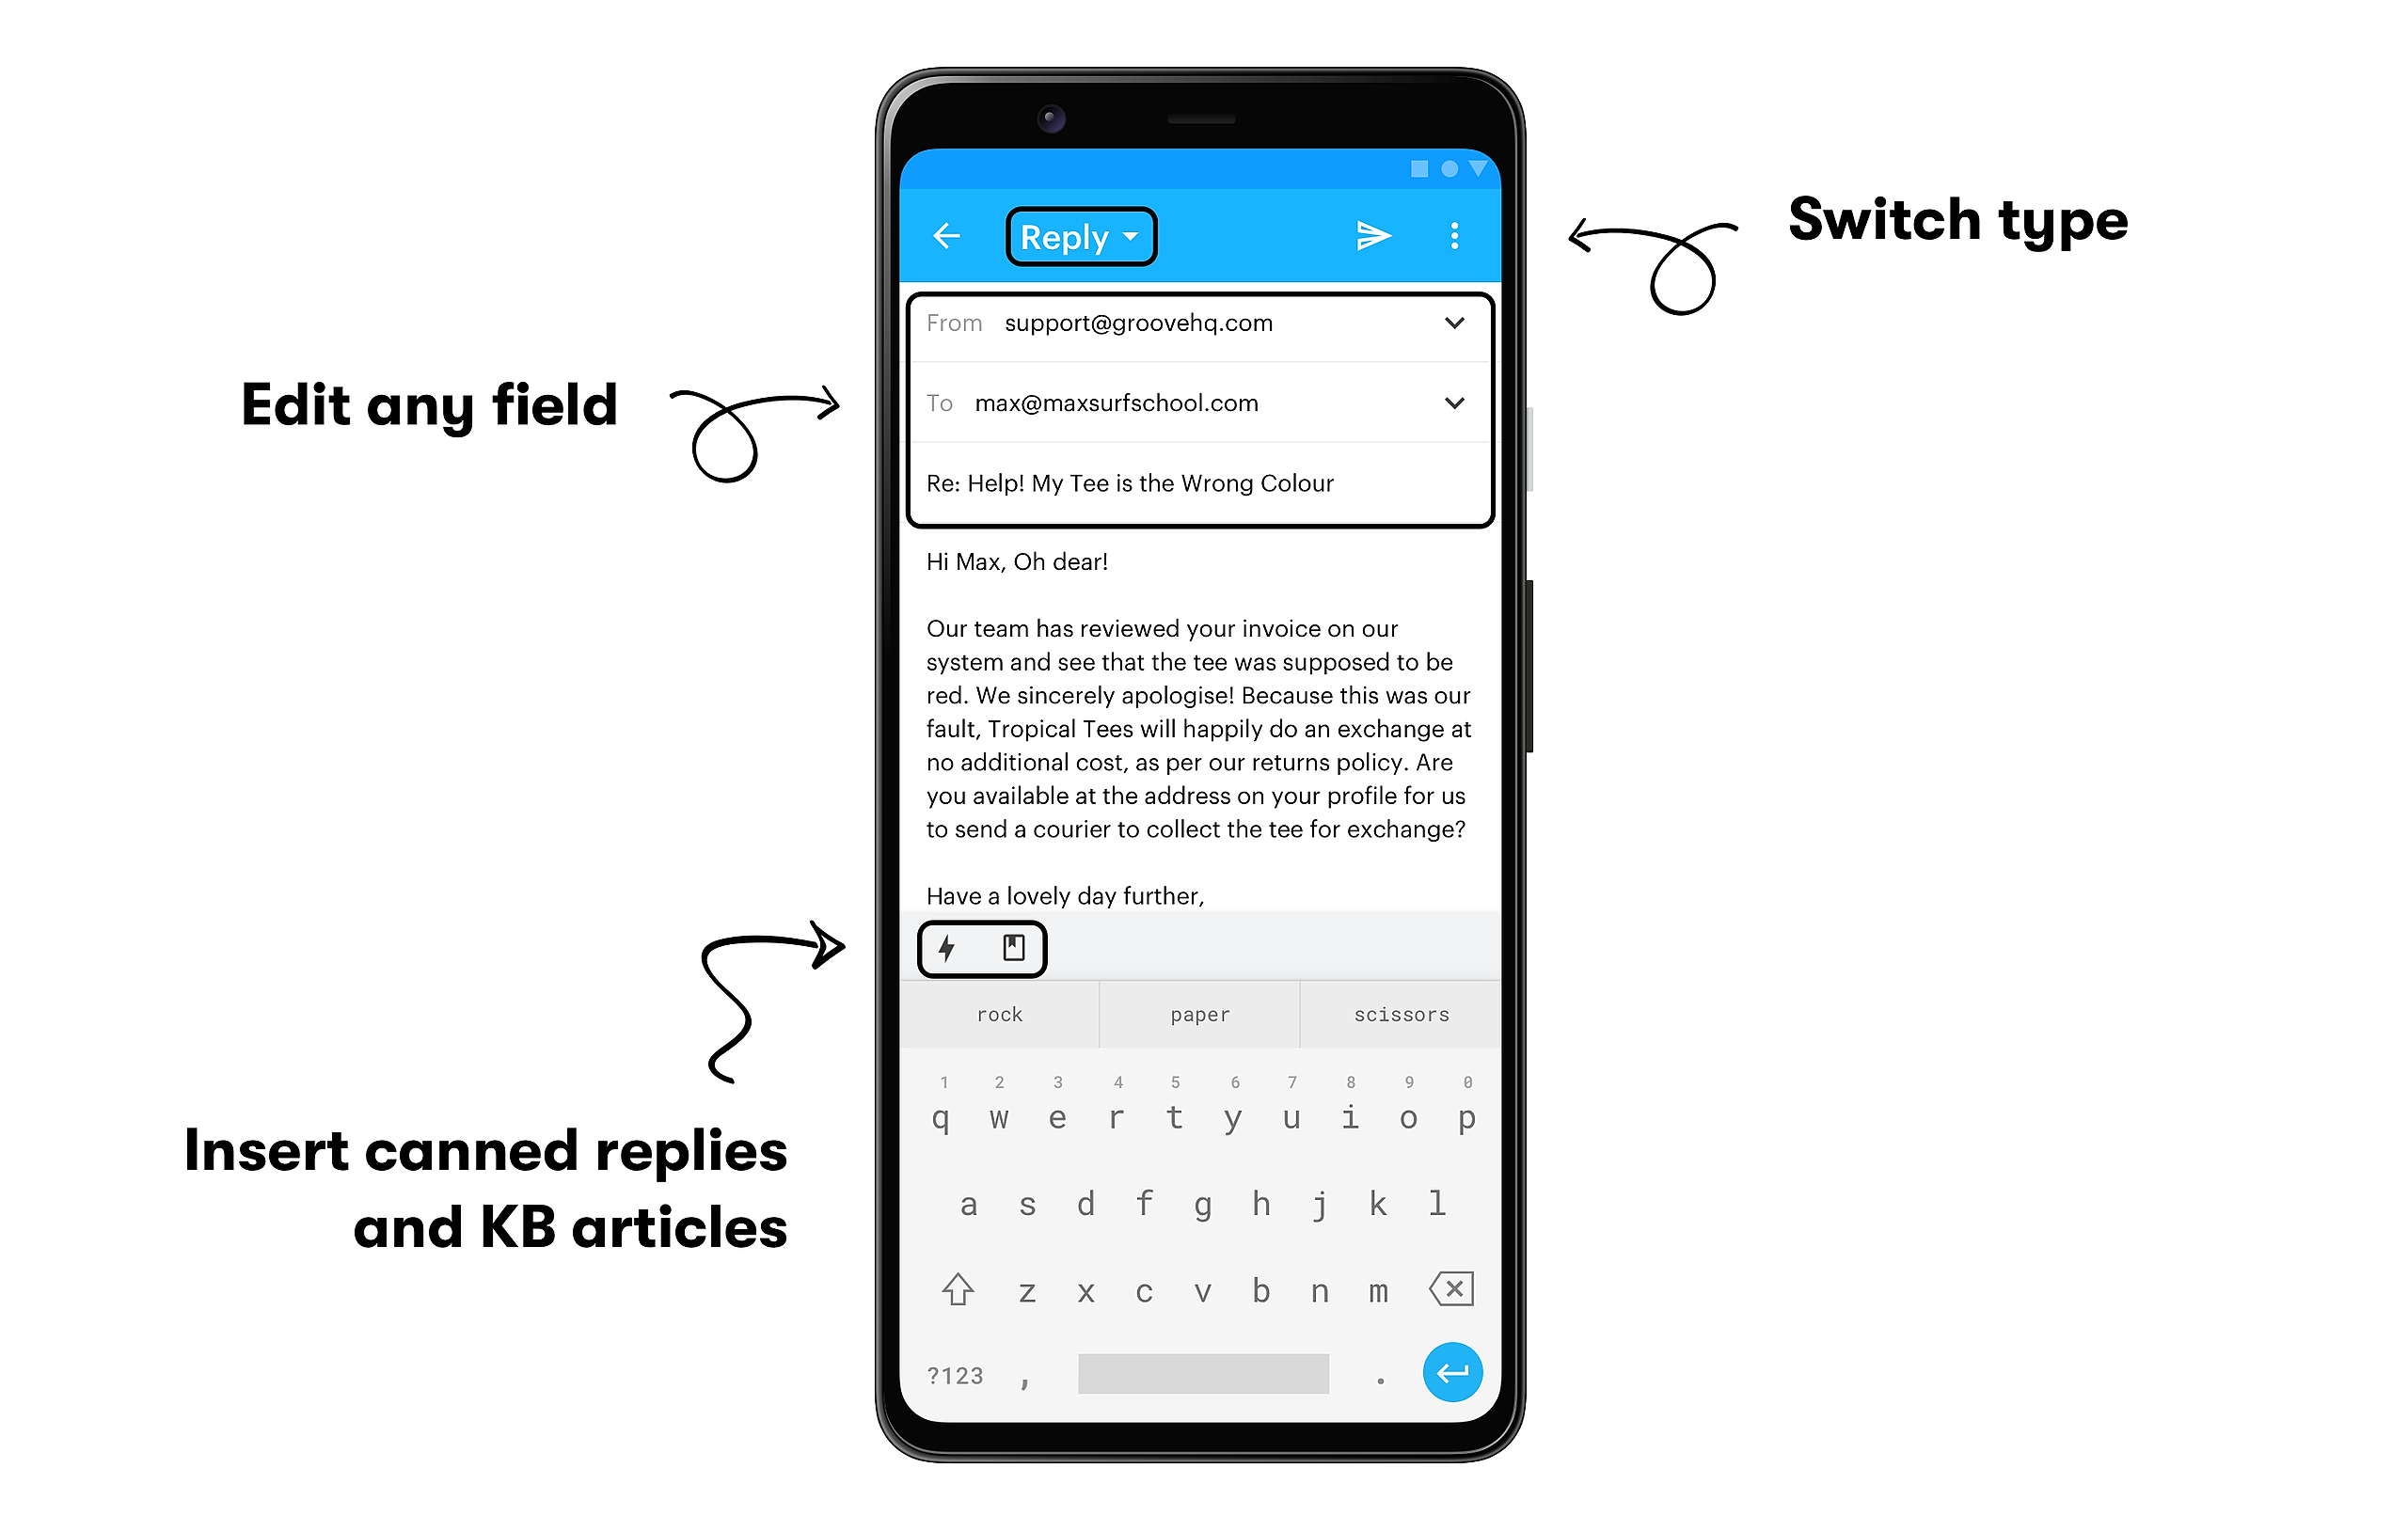
There are two ways of replying in a conversation. The first is to tap on the reply bar in the bottom of the screen, type your message, and then tap the send button. This is great for brief messages. For longer messages you can switch from the inline reply bar to a fullscreen reply by tapping the expand button.
To forward a message or add a note, tap the "⋮" button in the inline reply bar, and select which of the two you want to do. Either will lead you to their respective screen in the fullscreen modal.
Just as on the website, notes allow you to mention other agents by either tapping the "@" button above the keyboard or by simply starting typing a "@" character in your text. Both will show a list of agents, and continuing to type allows you to filter this list. Tap an agent to insert and mention them.
Updating Tags
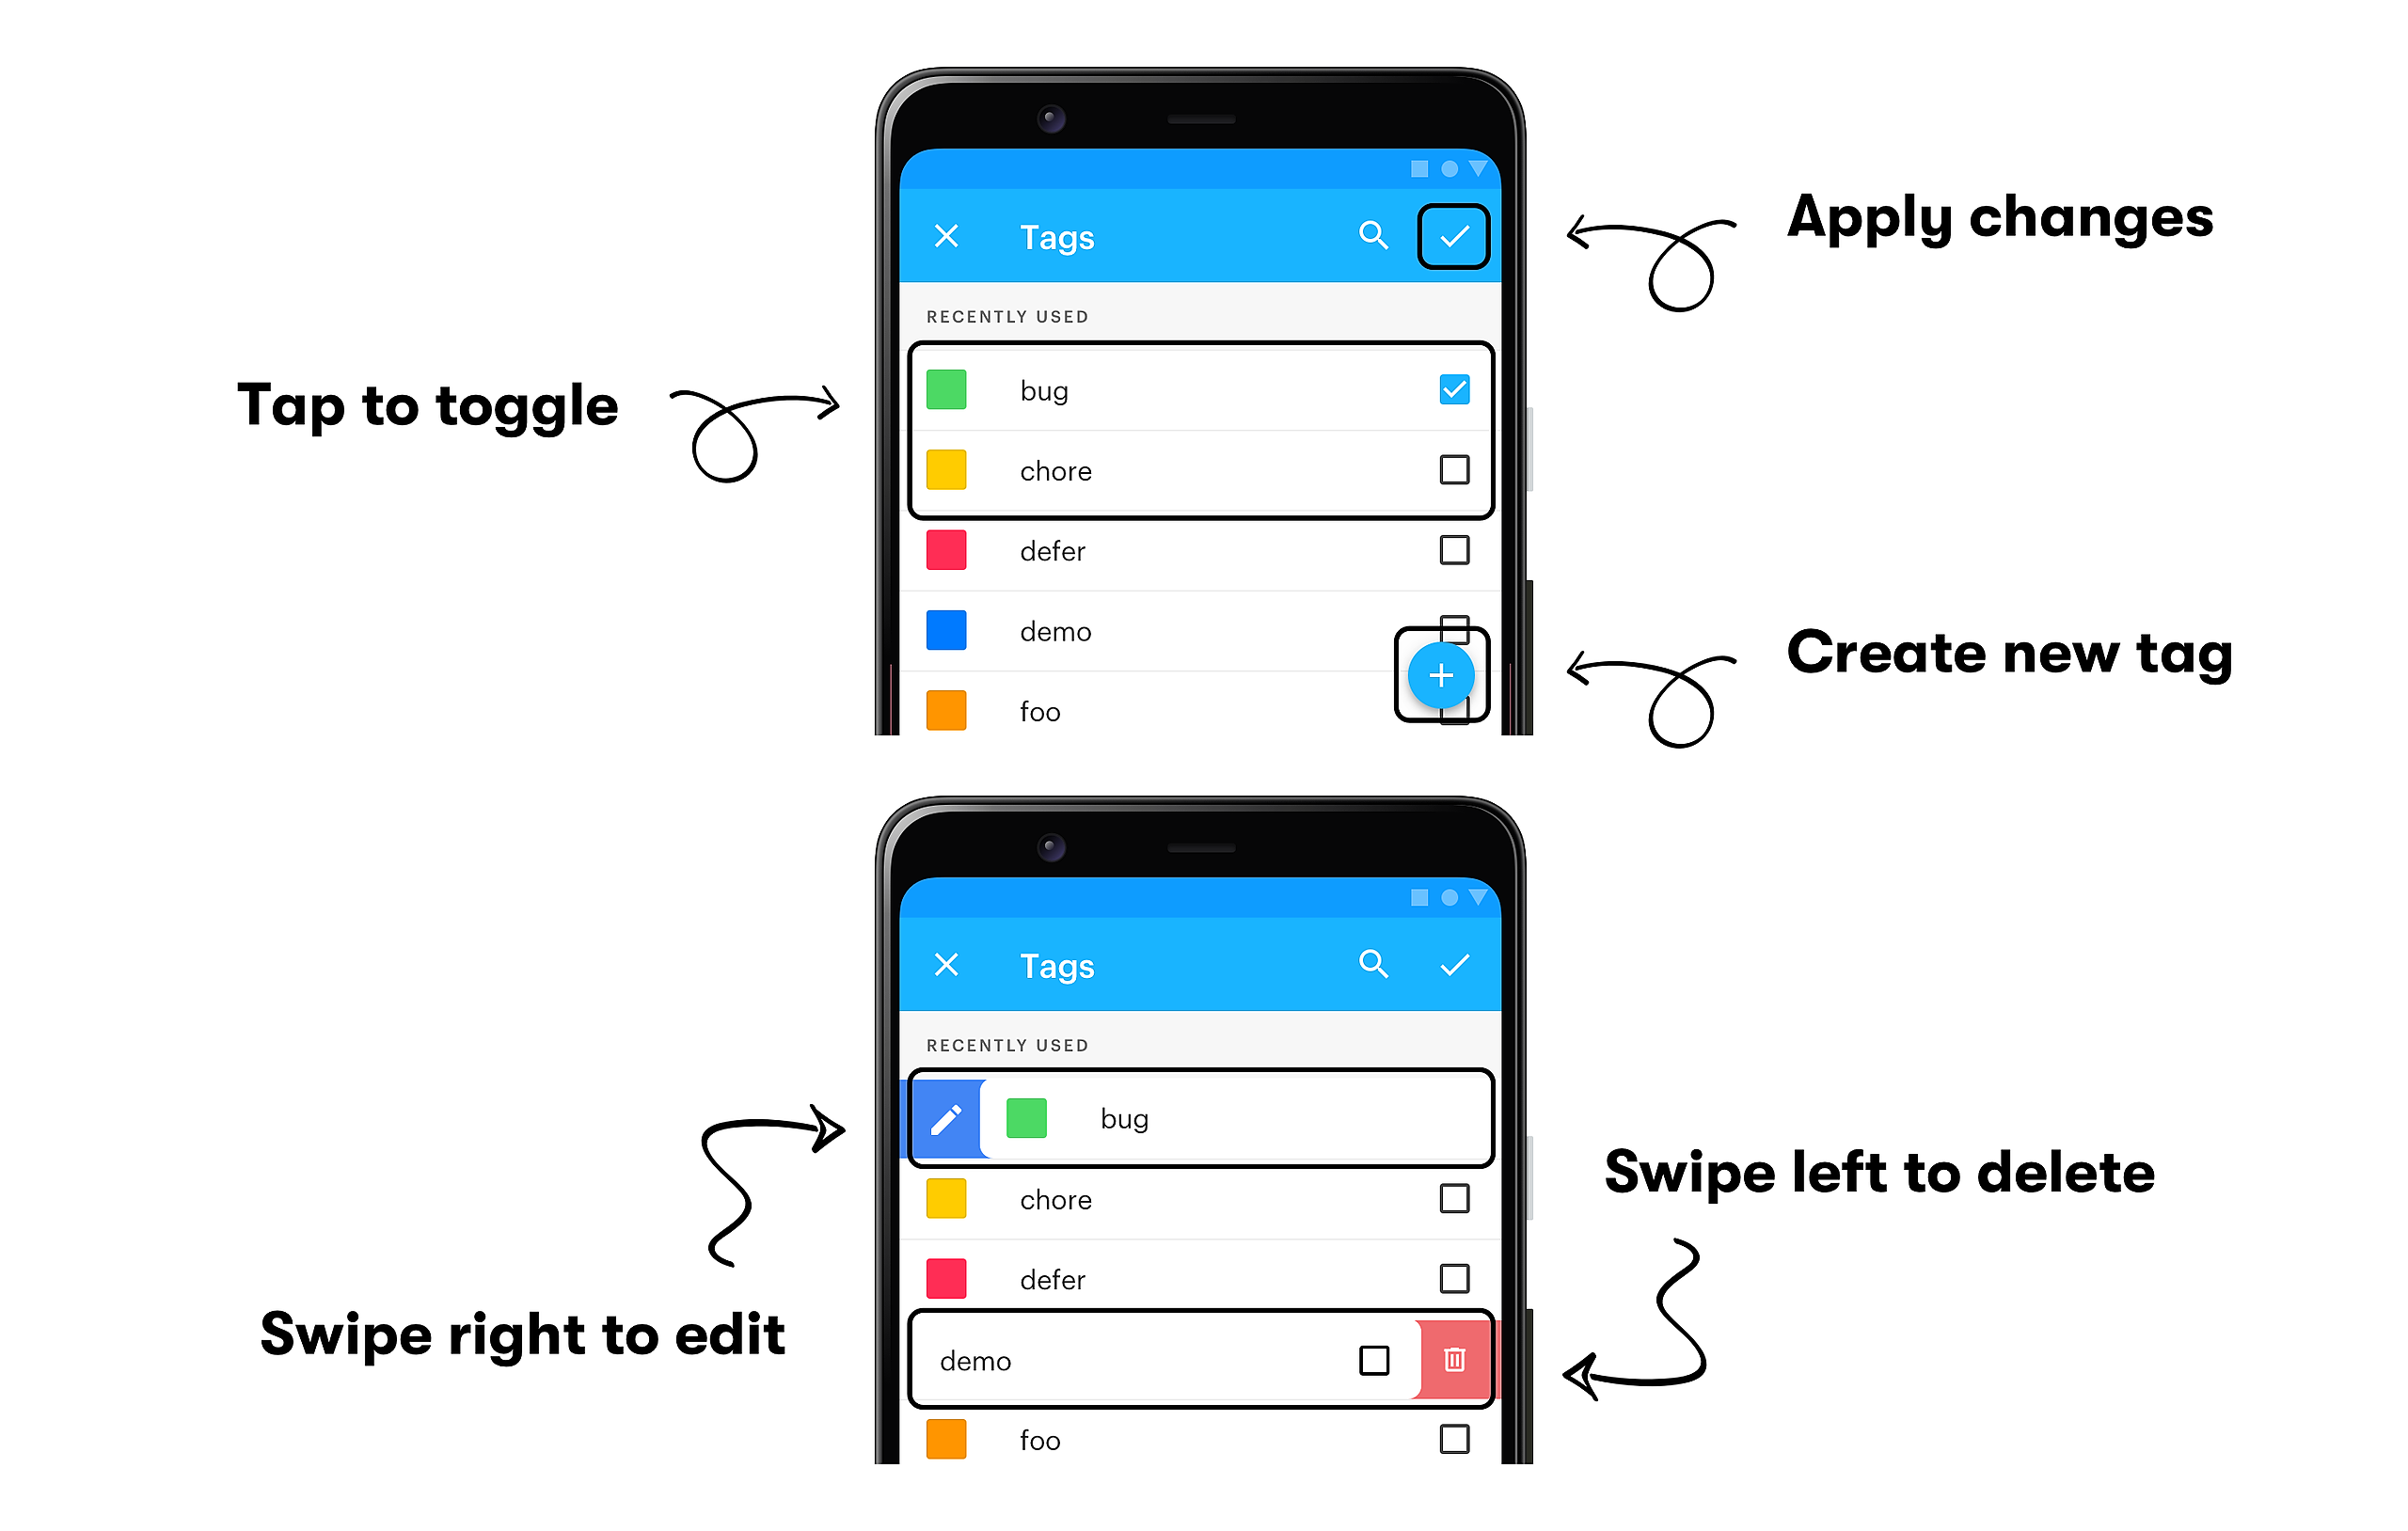
Tapping the left-most button in the toolbar opens up a modal for managing tags. It lists all your current tags, with a checkmark for those that are currently applied to the conversation. Tap tags to toggle their state, and then tap the checkmark in the top right to apply your changes.
You can also create, edit, and delete tags on-the-fly. To create a tag, tap the floating action button in the bottom right of the screen. This will lead to a screen where you can set the tag name and color. To edit existing tags, swipe right on the list item to open up a similar screen which will edit that tag. Lastly, to delete a tag, swipe left on the list item, and confirm by tapping the delete button.
Reassigning
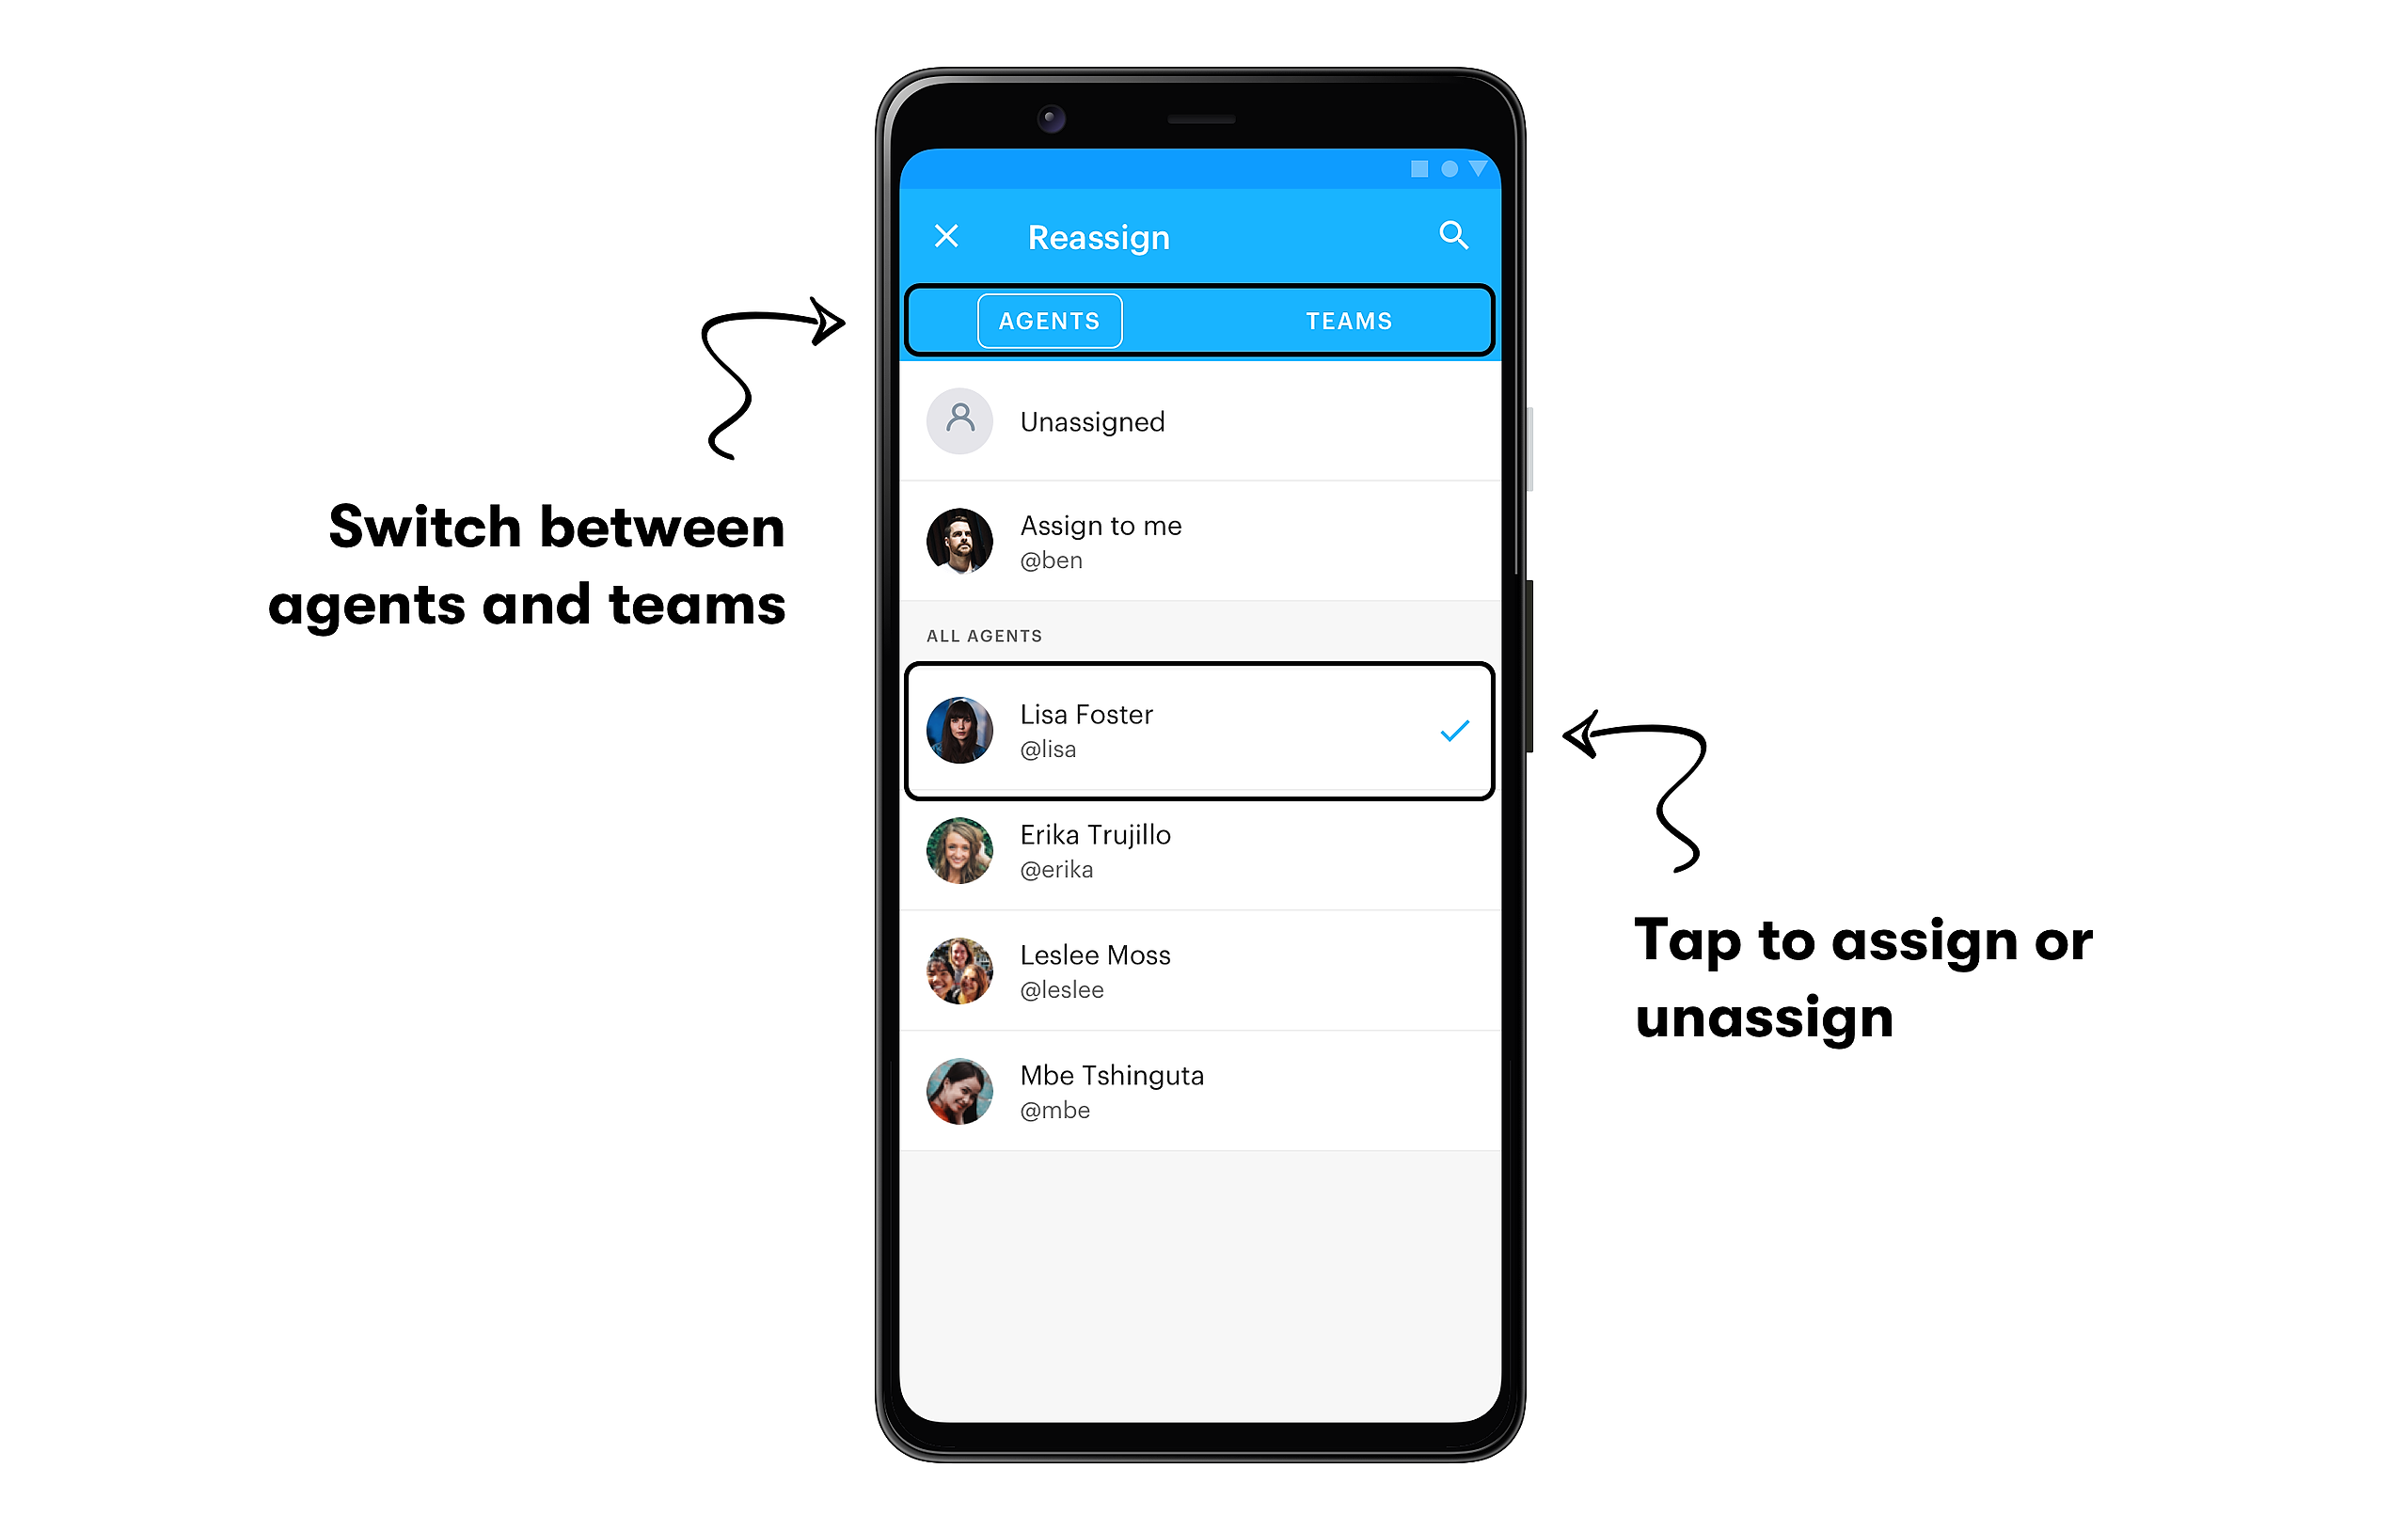
Tapping the button second-to-left in the toolbar opens up a toolbar for managing the assignee. You can reassign to either another agent or a team by switching between the tabs in the navigation bar. Tapping a new assignee will reassign the conversation and close the modal.
Settings
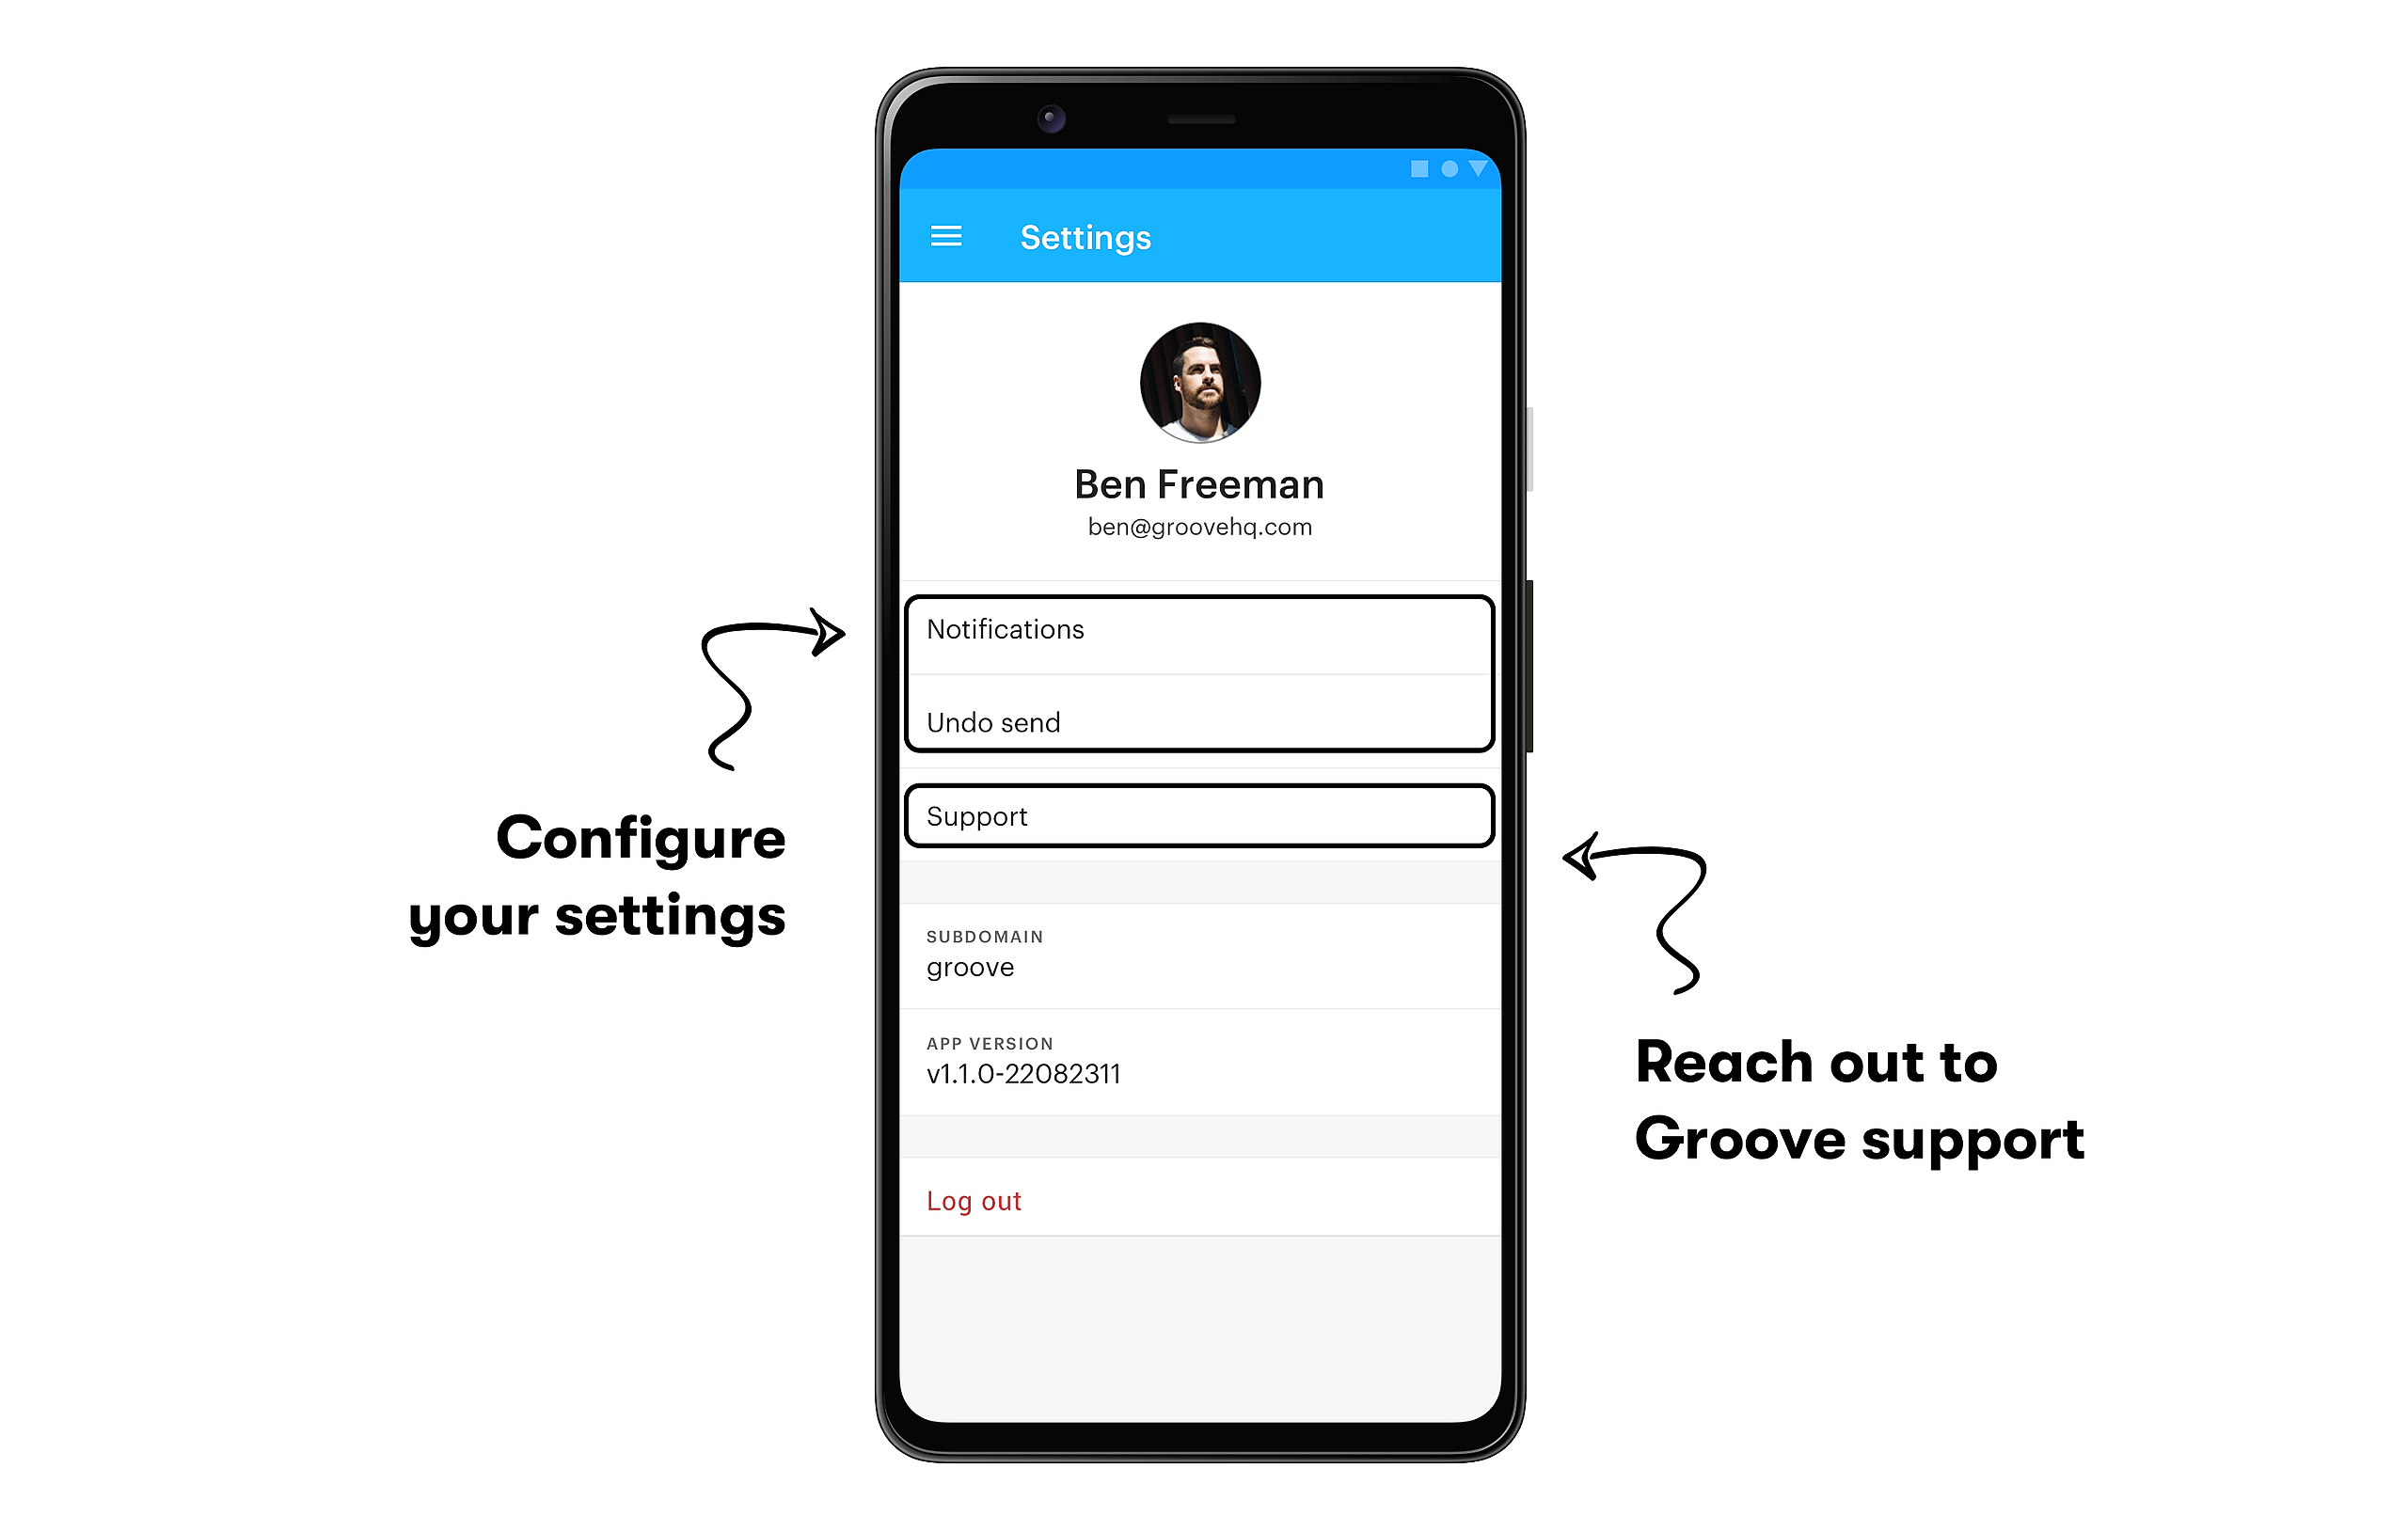
When you're on the "Inboxes" screen, tapping your avatar will open up the settings screen. Here, you'll find various items.
Notifications
You can finely configure your notifications for the app. These settings are for mobile only, so they won't change how you receive your desktop settings.
Undo Send
Enabling "Undo Send" will delay outgoing replies by 5–60 seconds (depending on the setting on web). During this period, a toast message will be shown that allows you to undo sending the message.
Support
Tapping "Support" allows you to reach out to Groove support right from the app. It starts a new conversation, and shares with us the version of the app that you're on for debugging purposes.