Welcome to the world of Rules in Inbox, where you can unleash the power of automation to level up your productivity and provide top-notch customer support! These incredible tools are here to streamline your workflow, banish overhead, and keep your inbox organized like a pro.
Get ready to dive into the realm of Rules and discover how they work their magic in resolving customer queries with lightning-fast speed.
Table of contents:
Rule Introduction: Empowering Your Workflow
Rules are your secret weapons for turbocharging your productivity and wowing your customers.
By automating actions based on triggers and conditions, Rules work behind the scenes to speed up your workflow, eliminate repetitive tasks, and help you resolve customer queries in record time.
Get ready to harness the power of Rules and become a productivity champion!
How to create a Rule
Creating a Rule is as simple as a few clicks:
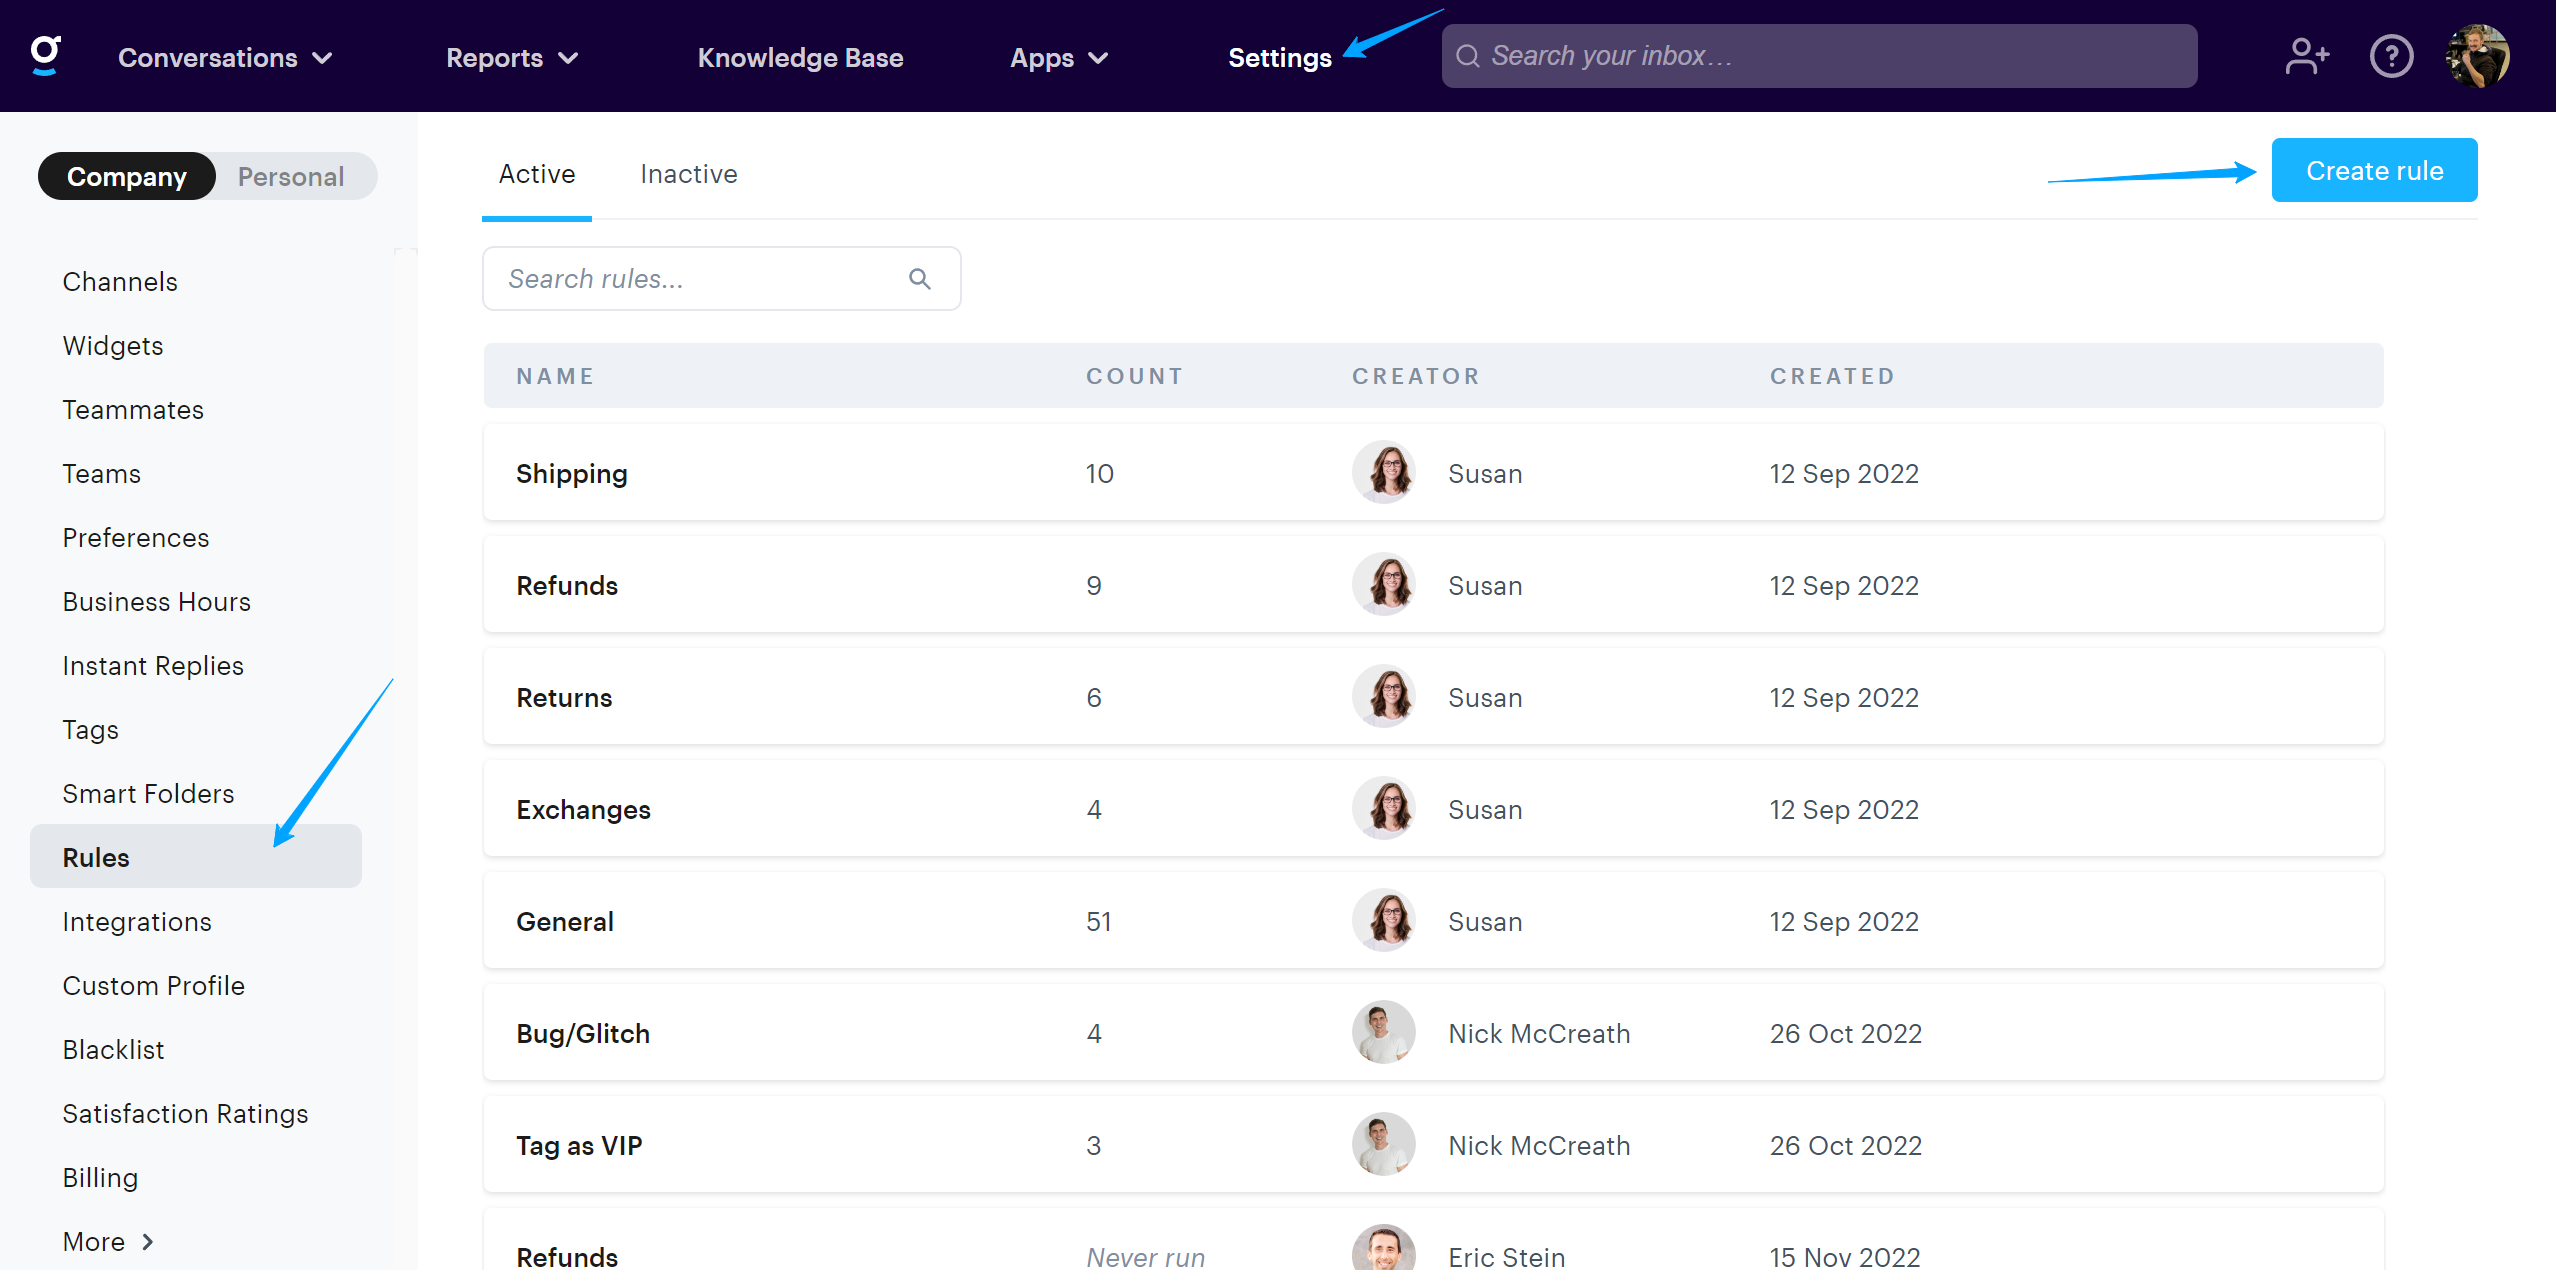
Head to the settings section and navigate to "Rules" settings.
There you’ll find a overview of all your Rules
To create a new Rule, click on the "Create Rule" button in the top right corner.
The Anatomy of Rules: Building Blocks for Success
Every successful Rule is built upon essential components that ensure that they run when they should, execute when they are supposed to, and do what they should.
Let's break them down:
Firing Triggers: These are the triggers that kick-start your Rule, such as new conversations, message updates, or rating changes.
Timing: Once your firing trigger has run you can specify to evaluate conditions immediately or after a specified delay or within business hours.
Conditions: These are the criteria that determine when your Rule should take action. Set conditions based on conversation status, tags, recipients, message details, and more.
Actions: Supercharge your Rule with actions like assigning team members, applying tags, moving conversations, or sending replies. Customize your actions to fit your workflow like a glove!
Later in the article we run through the all the options available for these.
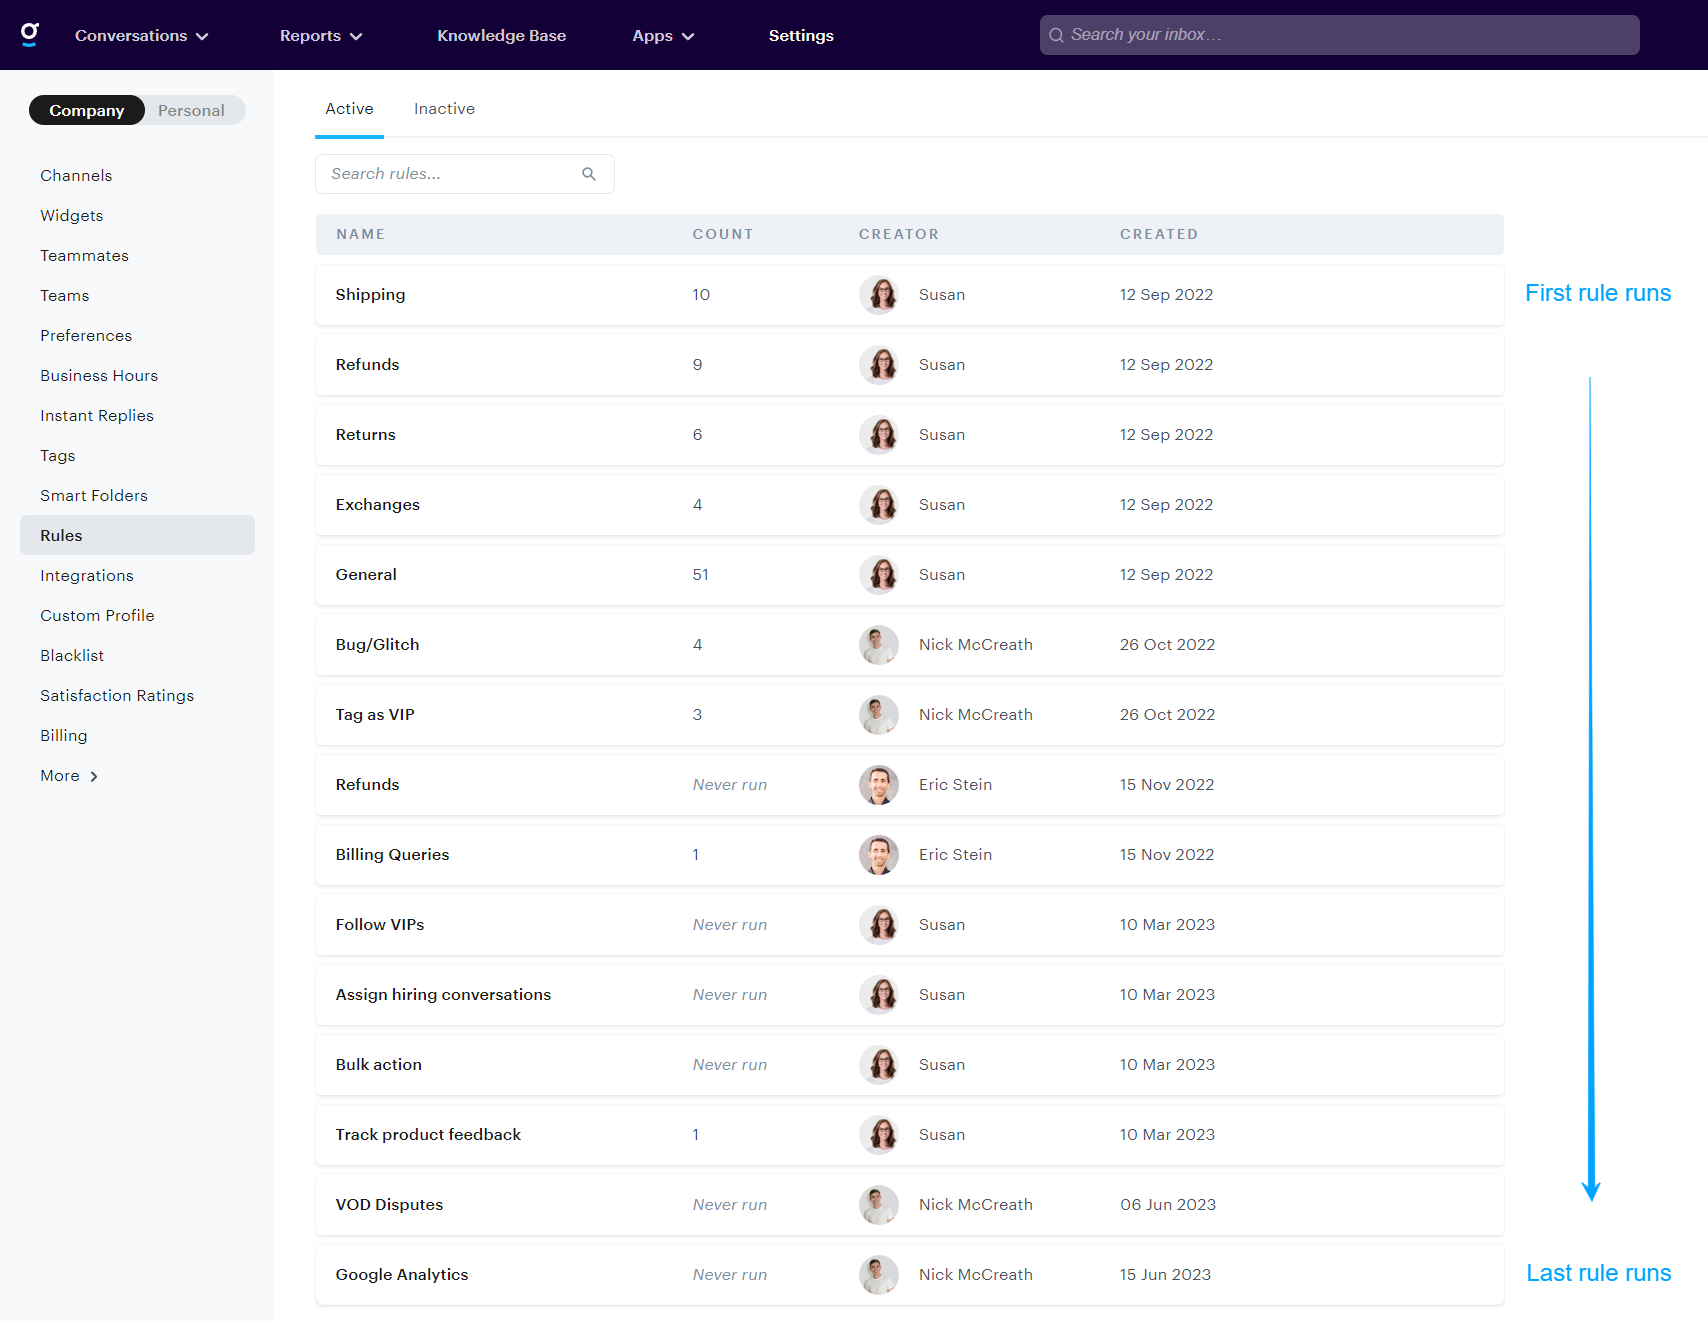
Running and Managing Rules: Organizing Your Inbox Flow
To keep your inbox flow organized and ensure the seamless execution of Rules, it's essential to understand that Rules run sequentially from top to bottom. This means that active Rules are executed in the order they appear in the Rules overview.
Reordering Rules:
The order of your Rules determines their execution sequence. To modify the sequence, follow these steps:
Hover over a Rule on the Rules overview screen.
Use the drag-and-drop icon to easily reorder Rules according to your desired sequence.
By moving a Rule up or down, you can adjust its position in the sequence and control the order in which Rules take action.
Enabling and Disabling Rules:
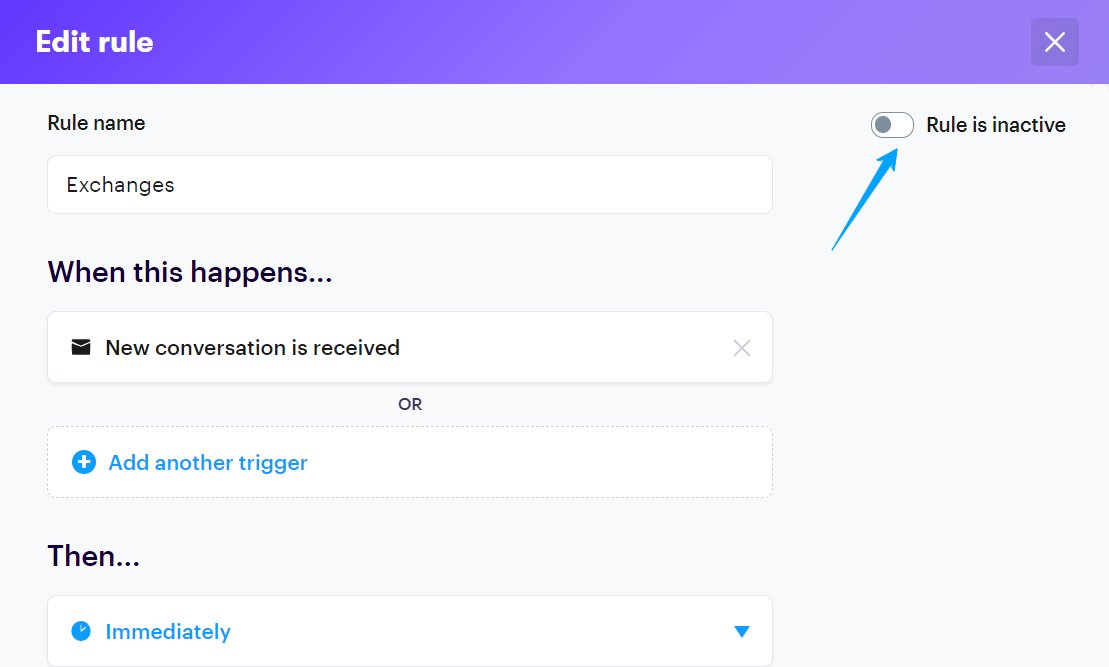
By enabling or disabling Rules, you can control their active status (if a Rule is inactive, it won’t run).
To manage the activation of Rules:
Edit a Rule and locate the enable/disable toggle in the top right corner of the Rule editing screen.
Toggle the switch to enable or disable a Rule, ensuring that it runs or pauses as needed.
Disabled Rules will be listed in the "Inactive" area of the Rules overview which you can access on the tab above the table.
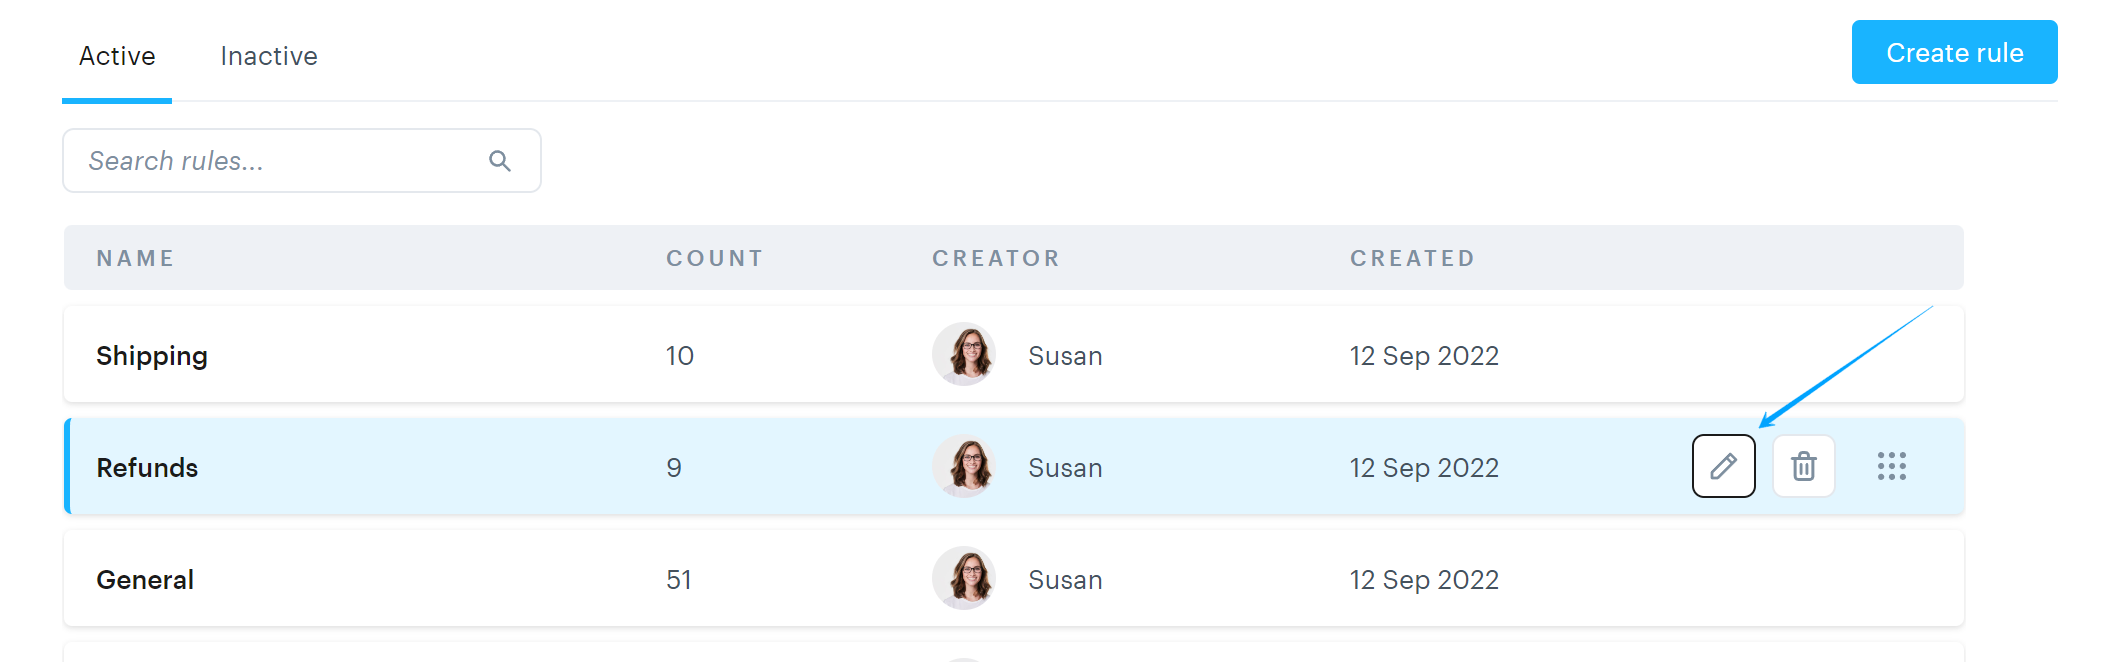
Editing Rules:
Editing a Rule allows you to modify its conditions, actions, or remove it from your Rule set. To make changes or remove a Rule:
Hover over a Rule on the Rules overview screen.
Use the provided editing and button to make the necessary modifications.
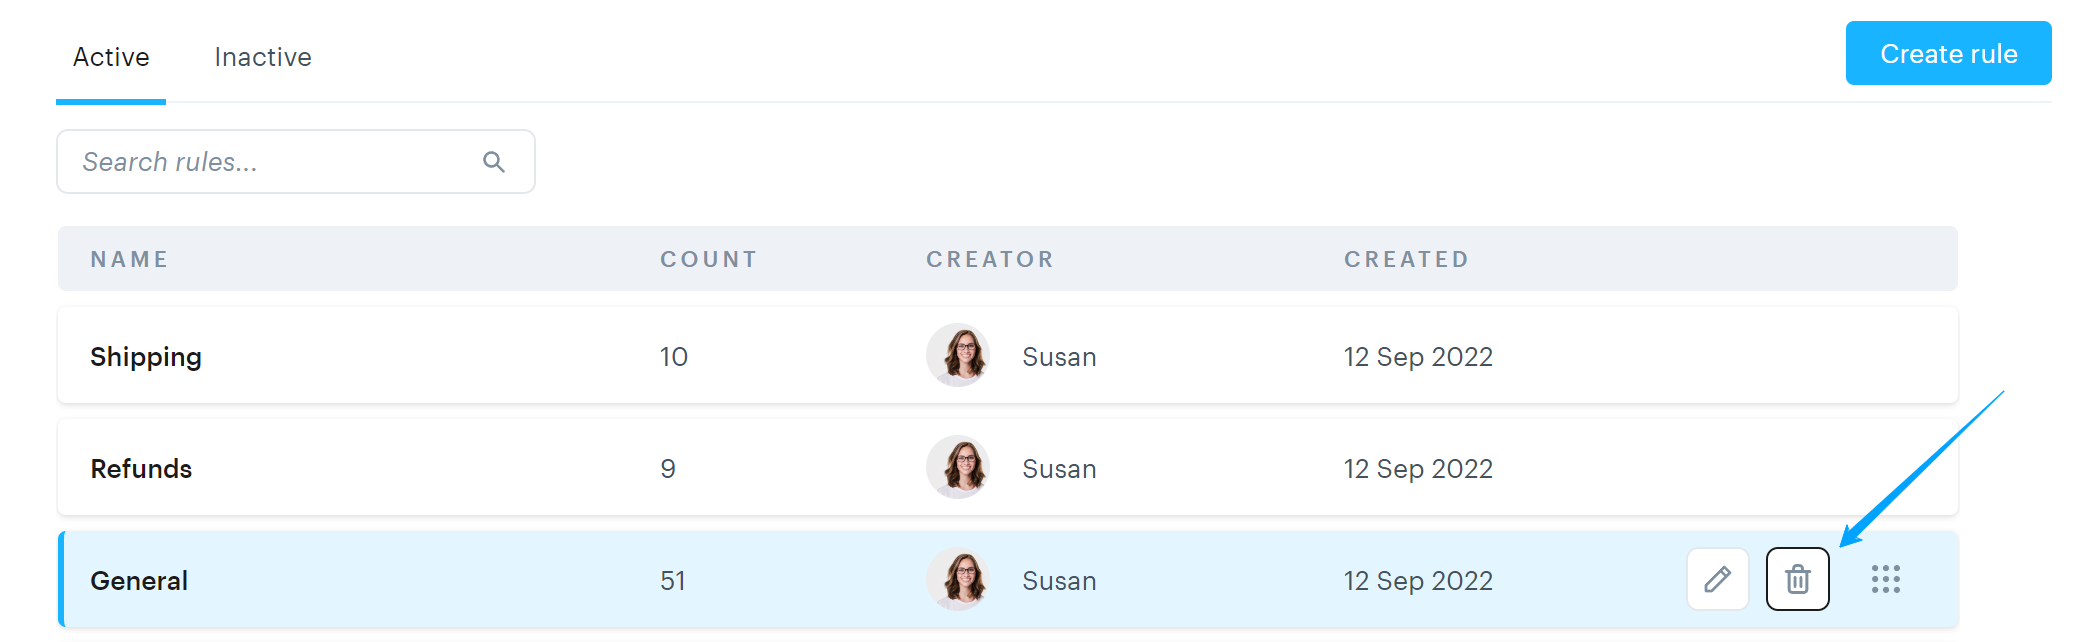
Deleting a Rule
If a Rule is no longer needed:
Locate the Rule you wish to delete on the overview screen.
Hover on the Rule, and click on the delete icon which is displayed.
A confirmation window will show that will allow you to remove the Rule.
Advanced Options
Stopping further Rules if a Rule has run
Take control of Rule execution with the advanced option "Don't process any upcoming Rules if this Rule runs."
When enabled, this option ensures that if a Rule's conditions are met and it runs, no subsequent Rules will override its actions. This way, you can ensure that the intended actions of a particular Rule take precedence.
Note: This option is only available if the Rule’s timing is set to immediate.
Overview of Triggers, Delays, Conditions, and Actions
Firing Triggers Overview
By understanding the available firing triggers and their associated selection options, you can create Rules that effectively automate actions based on various events within your conversations and teammate activities.
Here's an overview of the firing triggers available in Inbox, categorized by trigger type and their associated selection options:
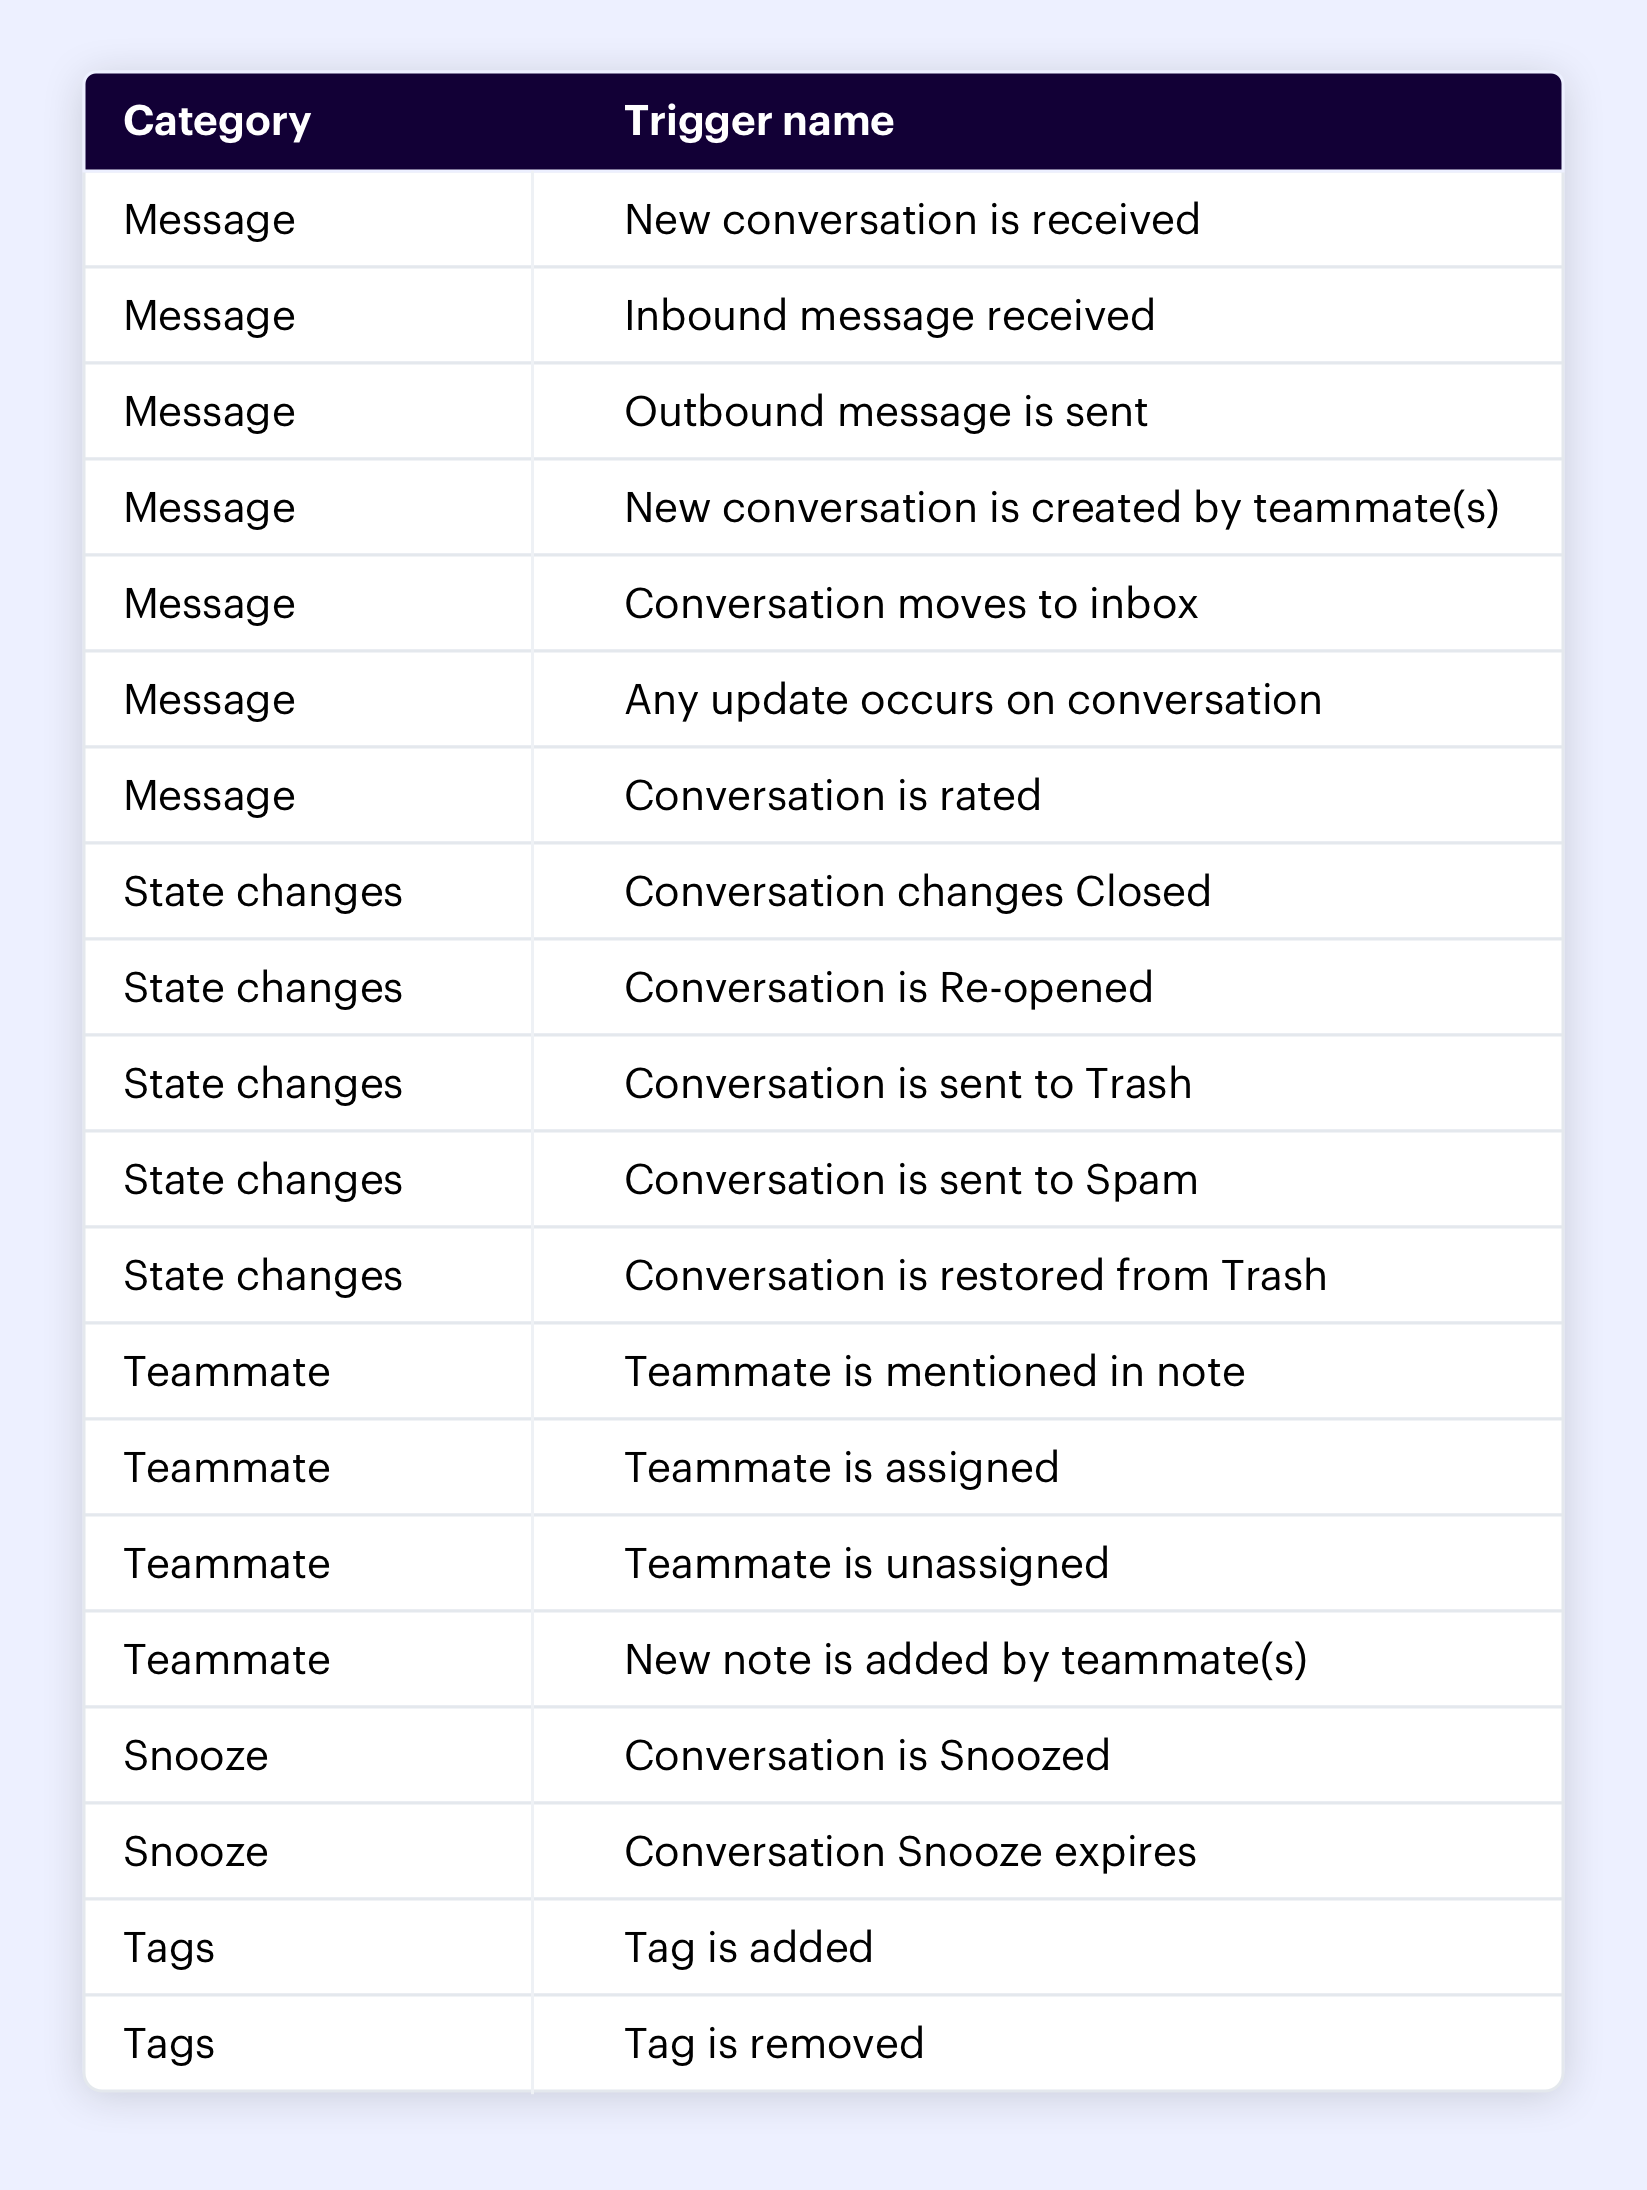
New Conversation Received: This refers to a completely new ticket that has been initiated by a customer.
Inbound Message: This is any message received from a customer, whether it's part of a new conversation or a reply in an existing conversation.
Outbound Message: This is any message sent from an agent to a customer, either as a response or as an initial outreach.
New conversation is created by teammate: This refers to whenever a selected teammate creates a new conversation.
Conversation moves to inbox: If you have multiple inboxes, this will trigger whenever a conversation is moved to the selected inbox.
Conversation is rated: This refers to whenever a conversation is rated via the CSAT Score, you can read more about CSAT Score here).
Any update occurs on a conversation: The rule will run whenever ANY update happens, in other words, any of the triggers described above.
Rule Timing Overview: Mastering Timing
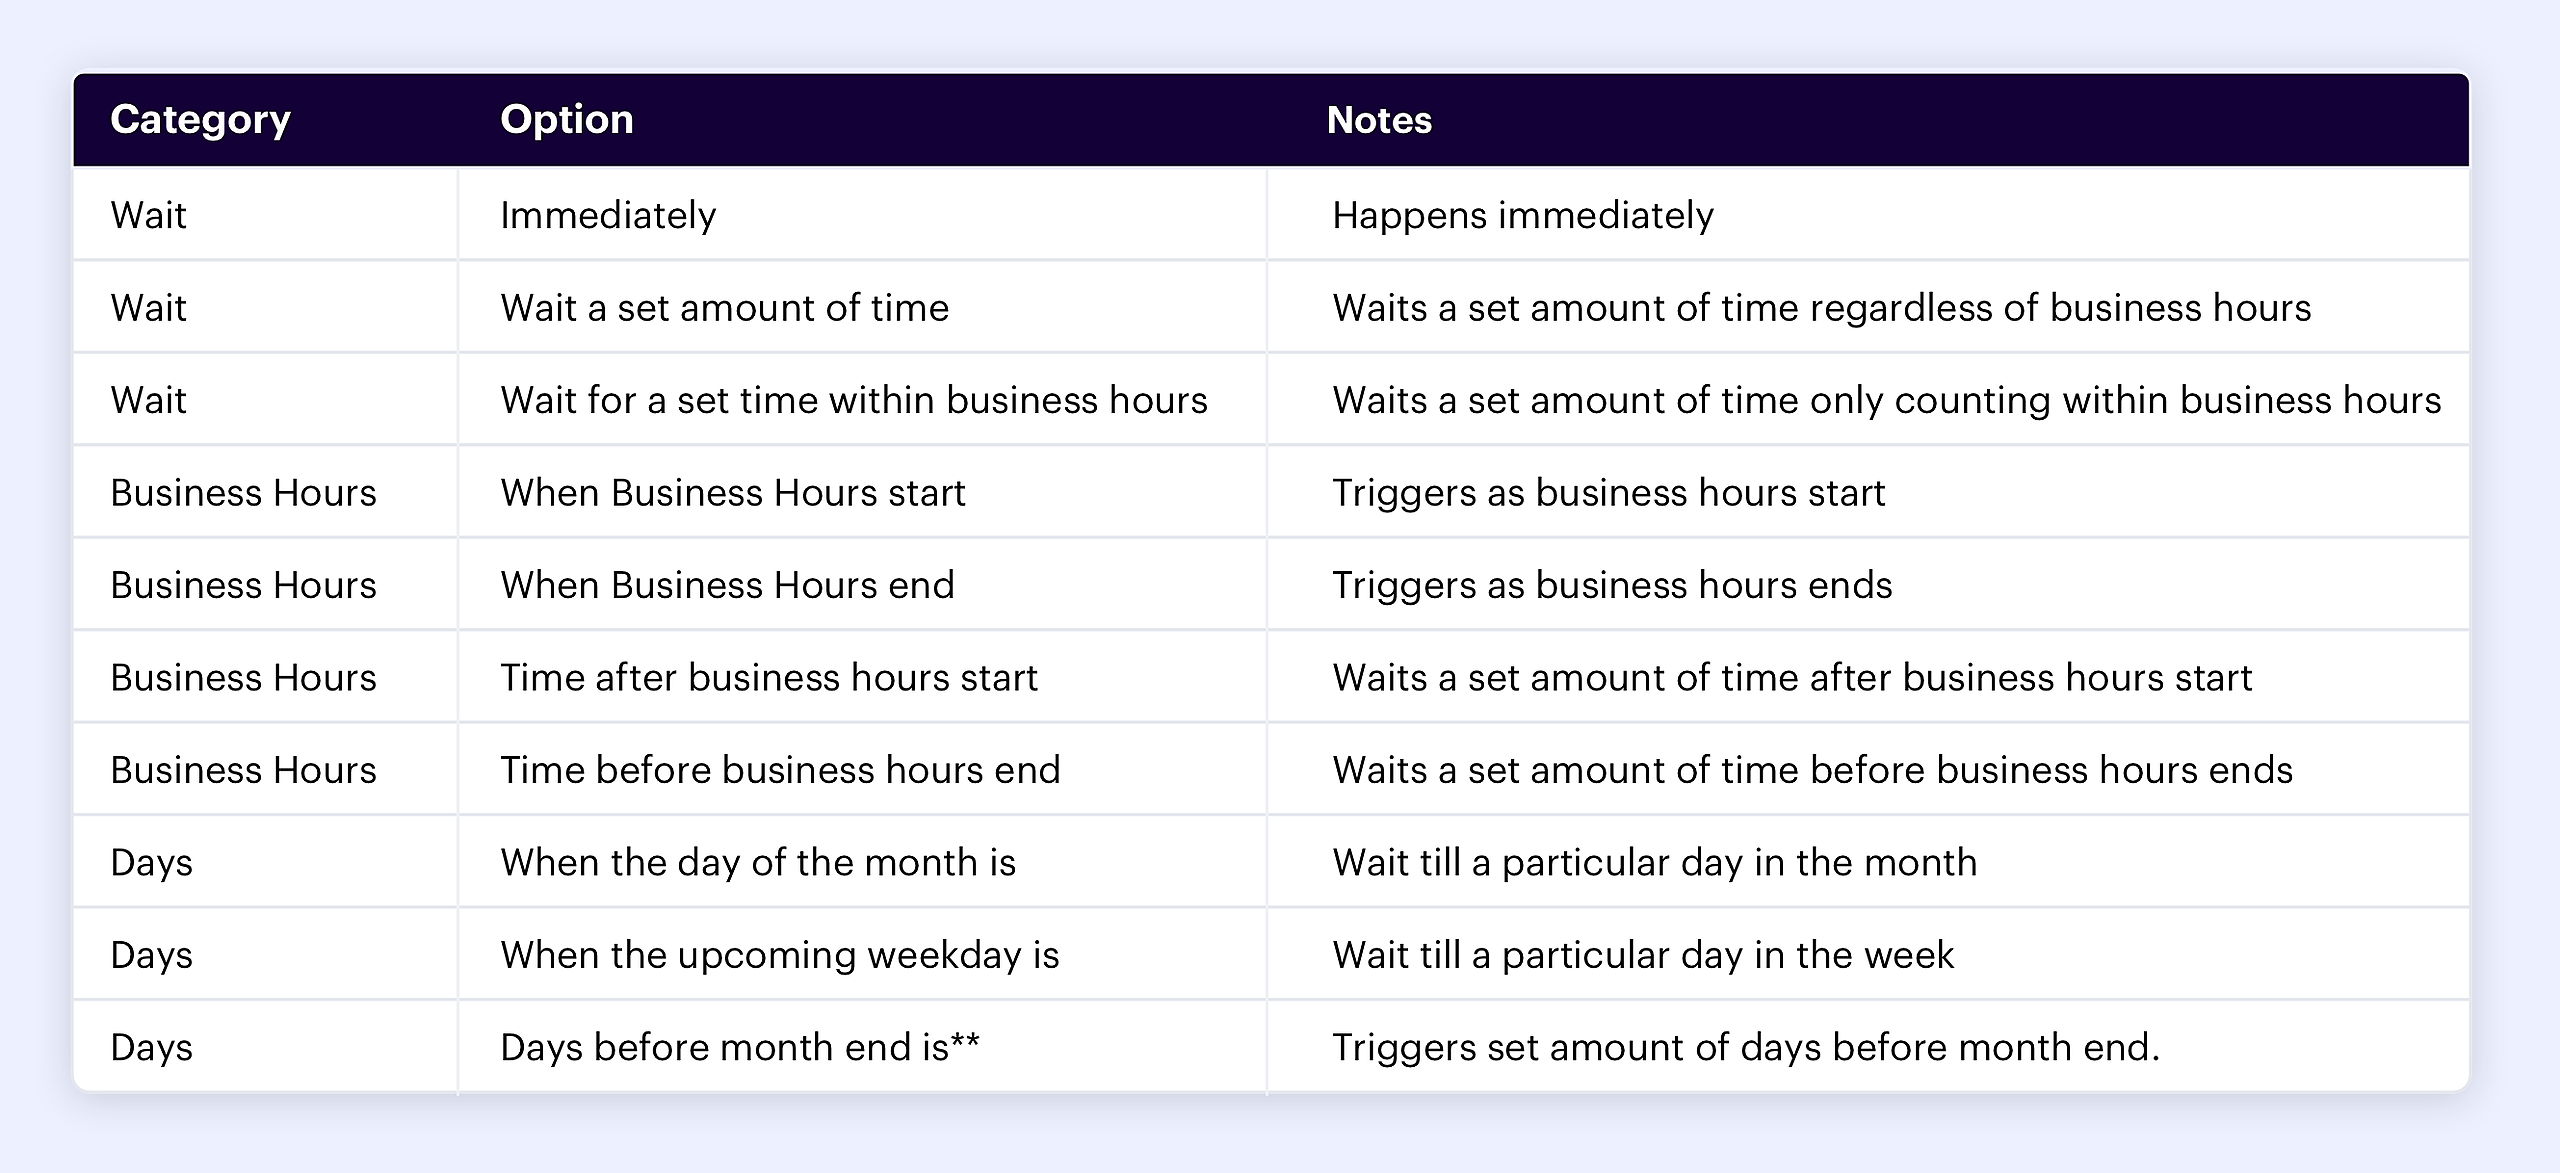
By utilizing these time-based items, you can introduce delays, schedule actions within business hours, trigger Rules on specific dates or weekdays, and customize your Rule execution based on time-related conditions. This flexibility allows you to automate actions at the right time and streamline your workflow effectively in Inbox.
How this functionally works is that once the Rules firing trigger has fired, the Rule will wait based off what you have set for the Rule timing before evaluating the conditions of the rule.
Here's an overview of the time-based items available in Inbox, categorized by item type and their associated selection options:
Understanding "Wait within Business Hours" in Rules
When setting up rules in Groove, it’s important to understand how “wait within business hours” is calculated.
How the system measures time
“1 day” = 24 business hours (86,400 seconds)
This is not the same as 1 business day.When you select “wait within business hours = 1 day”, the system stores this as 86,400 seconds (24 hours).
The calculate_after_business_hours method then counts down these seconds, but only during your defined business hours.
Example with an 8.5-hour workday
Since 1 workday is 8.5 hours, 24 business hours equals roughly 3 calendar days.
Test cases confirm this behavior. For example:
Waiting 133,200 seconds (37 hours) from Friday at noon results in the action occurring the following Thursday afternoon—because the system only counts hours inside business time.
What this means for your setup
If you want to wait 24 business hours (≈3 calendar days with 8.5-hour workdays), set the rule to “1 day.”
If you want to wait just 1 business day (the next workday), set the rule to approximately 8.5 hours (or however long your business hours are).
Key takeaway
The system measures actual business hours elapsed, not calendar business days.
** Note: For the "When the day of the month is" option, the selection is limited up to the 28th due to the varying number of days in different months. If you want to set a specific number of days before the end of the month, it's recommended to use the "Days before month end" option.
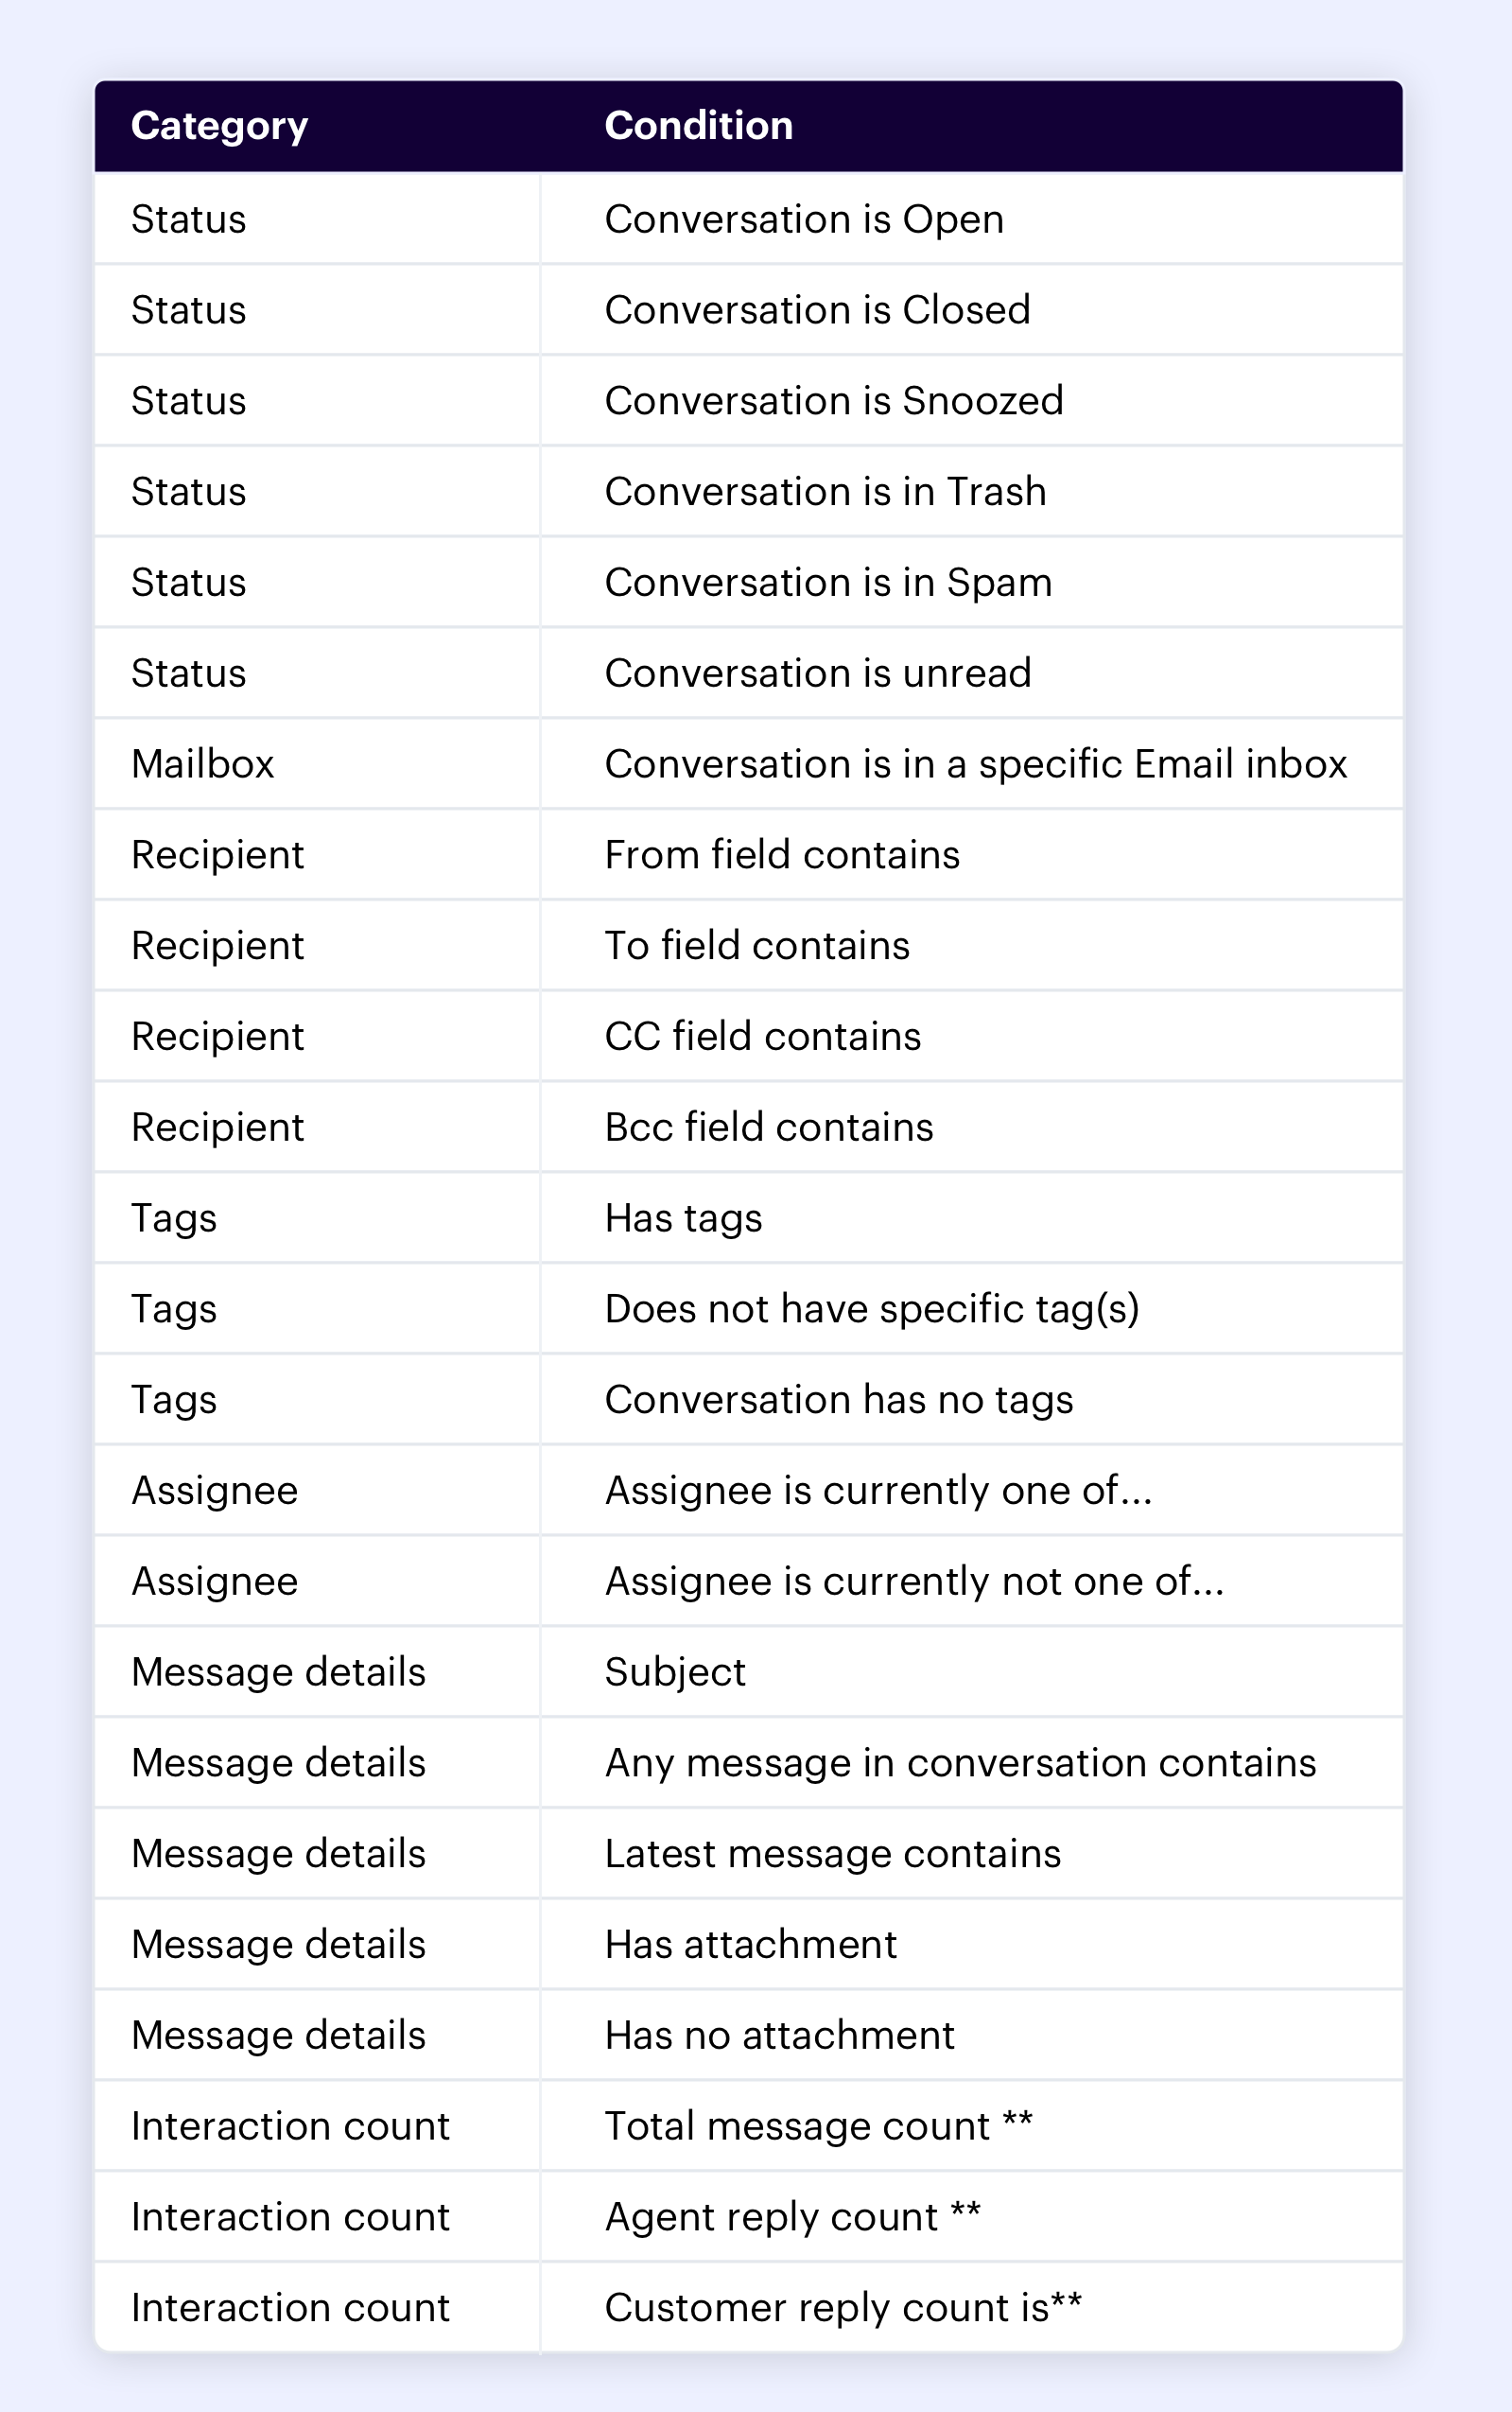
Conditions Overview: Fine-tuning Your Rules
By utilizing conditions, you can create Rules that automatically perform actions based on specific status, mailbox, recipient, tags, assignee, message details, and interaction count criteria.
Here's an overview of the conditions available in Inbox, categorized by condition type and their associated selection options:
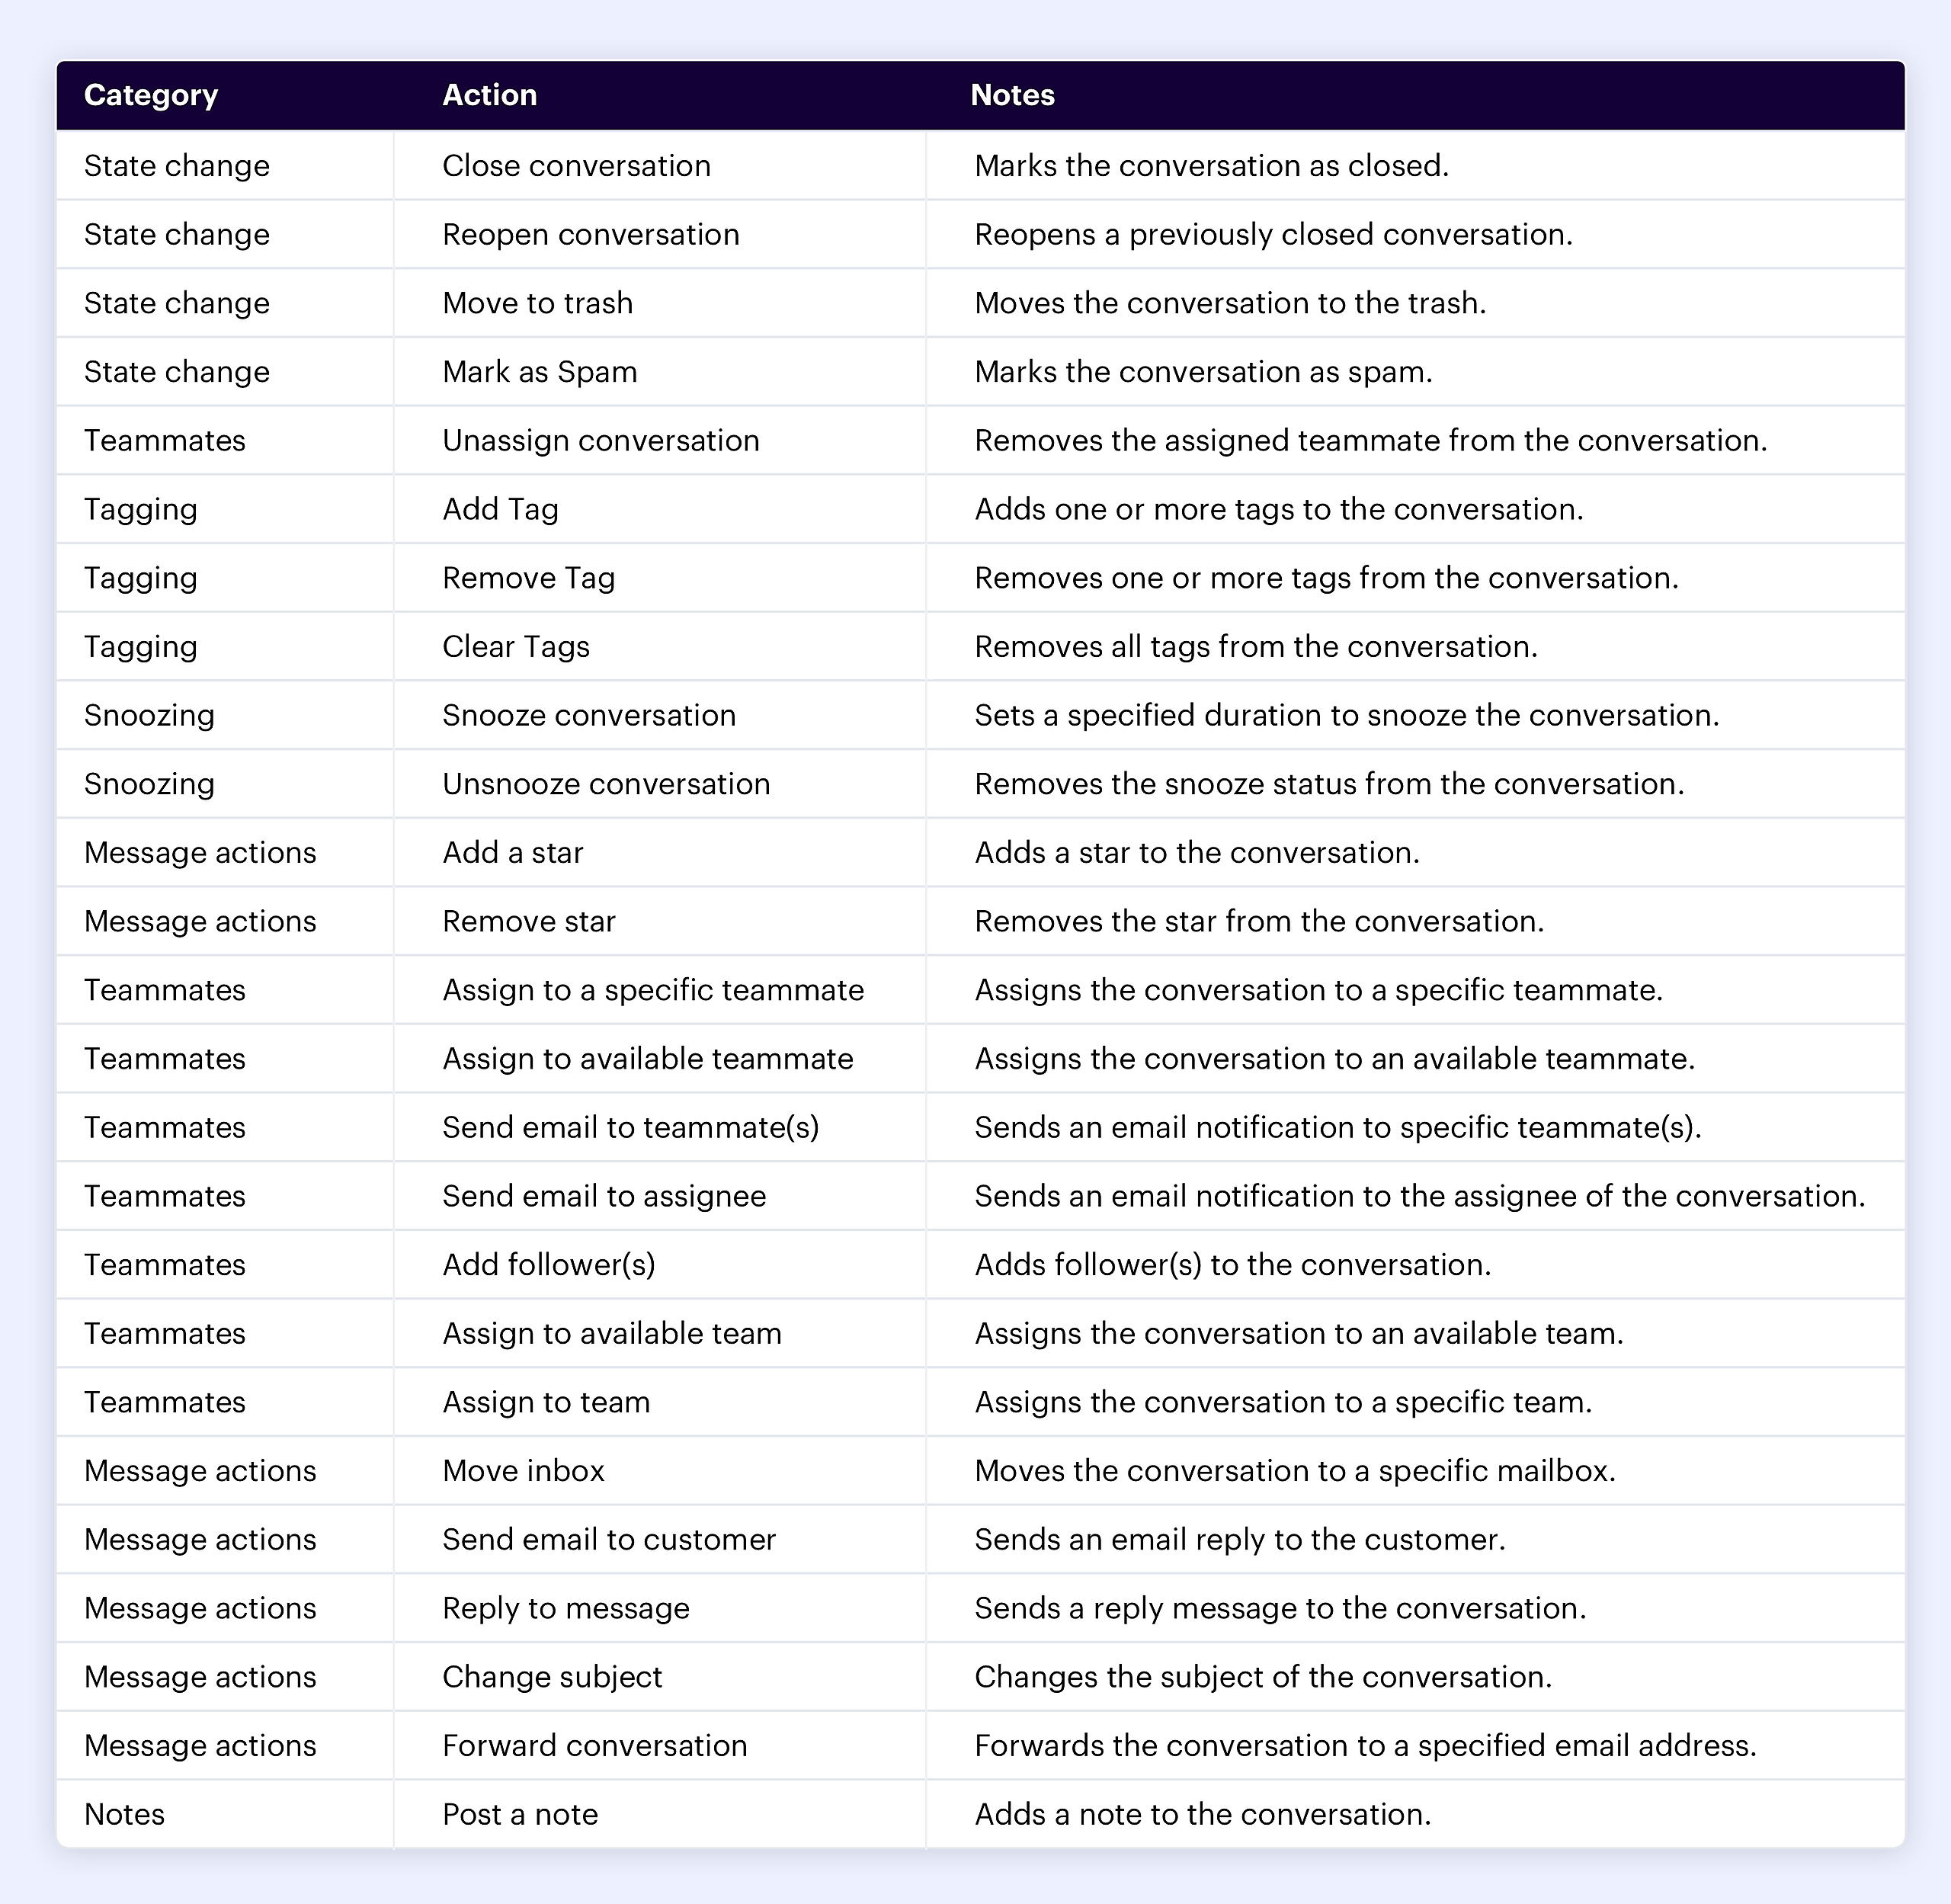
Actions Overview
By understanding the available actions and their associated selection options, you can create Rules that efficiently automate various actions within your conversations, such as assigning team members, adding tags, moving conversations, sending emails, and more.
Utilize these actions to streamline your workflow, improve response times, and deliver exceptional customer support in Inbox.
Here's an overview of the actions available in Inbox, categorized by action type and their associated selection options: